

Wasin Waeosri
Developer Advocate
Developer Advocate
Overview
Last Updated: May 2025
The goal of this article is to guide you through initial steps to set up an Amazon AWS EC2 instance with a ready-use-use Real-Time Optimized (RTO) Real-Time SDK (C/C++, Java, and C#) and WebSocket API (Java, C#, Go, and Python) examples. The instance is based on a LSEG Real-Time Examples - Amazon Linux2 Amazon Machine Image (AMI) which includes all RTO examples with pre-installed required libraries for developers.
Prerequisite
Let’s start with the prerequisite to set up your AWS EC2 instance. The following accounts and software are required to run this quick start guide:
- Amazon AWS account
- Web Browser
- Internet connection
- Amazon AWS key pair
- Real-Time Optimized access credentials (Version 1 or Version 2 Authentication)
Please contact your LSEG's representative to help you to access the RTO account, and services. You can find more detail regarding the RTO access credentials set up from the following resources:
- Getting Started for Machine ID section of the Getting Start with Data Platform article article.
- Account authorization V1 to V2 migration cheat sheet article.
If you are new to Amazon AWS, you can subscribe to AWS Free Tier account which gives you free hands-on access to the AWS platform and services.
I highly recommend you follow the Amazon AWS Setting Up with Amazon EC2 and Getting Started with Amazon EC2 Linux Instances tutorials before proceeding further in this quick start guide to create your key-pair, VPC, and Security Group which are required for your EC2 instance.
How to launch your EC2 Amazon Linux instance based on Real-Time APIs AMI
Now let me turn to step-by-step guide to set up EC2 instance based on LSEG Real-Time APIs examples AMI.
Firstly, log in to AWS Management Console with your IAM user, and then go the EC2 service page.
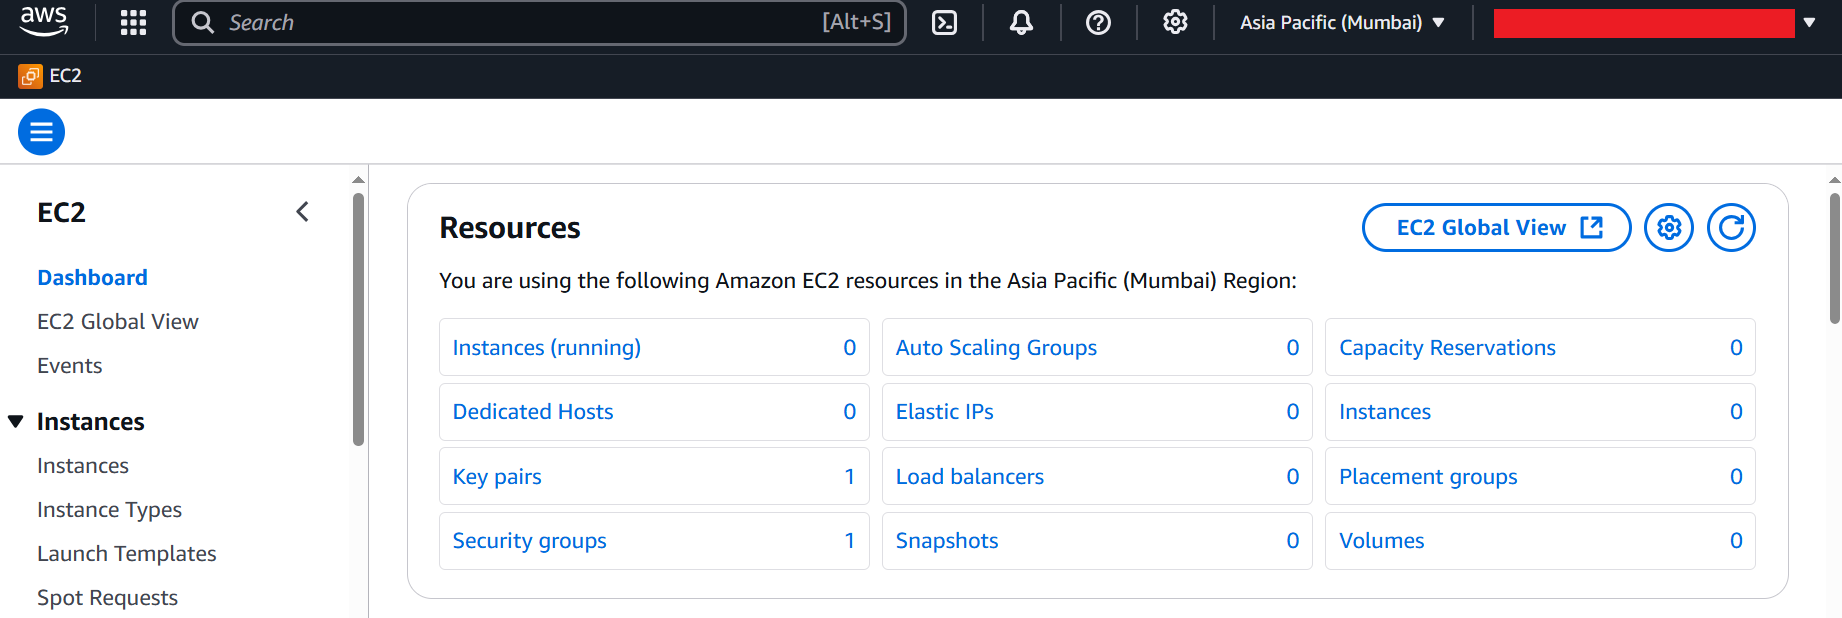
The Real-Time AMI is available in multiple regions. I am using "ap-south-1" Region as a demonstration. Once you are logged in to the AWS Management Console, choose your desired Region In the Region section. There might be unavailability of AMI in some Regions for maintenance, please choose other Regions instead.
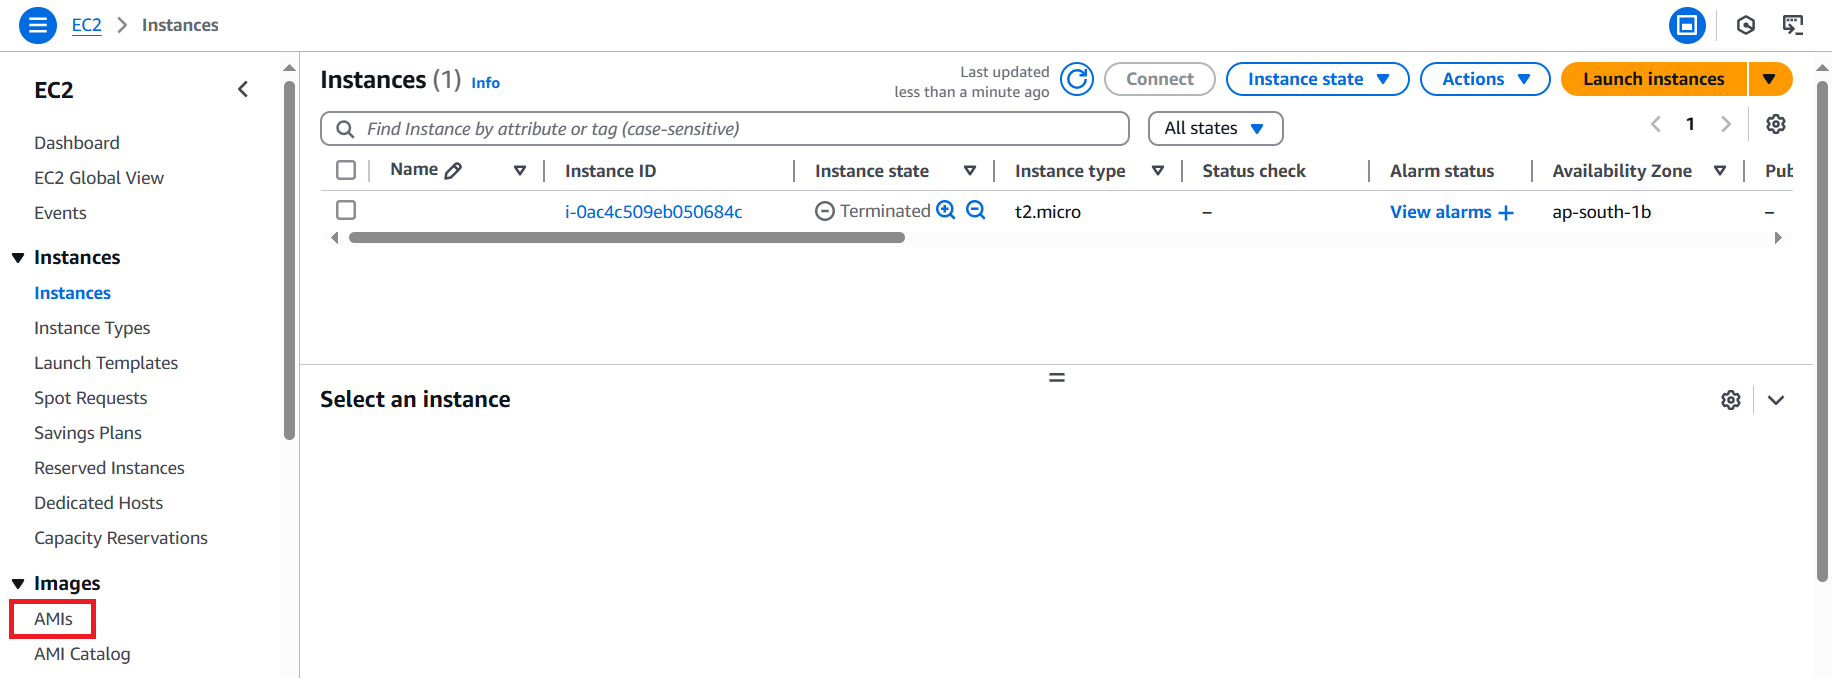
Once you are in the EC2 Dashboard page, choose Images --> AMIs menu.
On the AMIs page, select "Public images" and then search LSEG's AMI name with LSEG name filter.
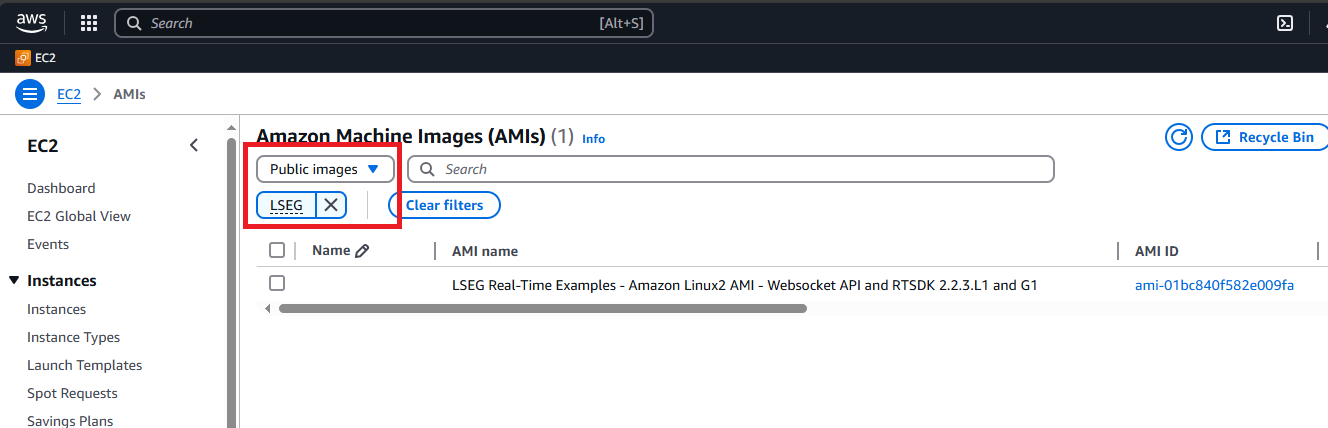
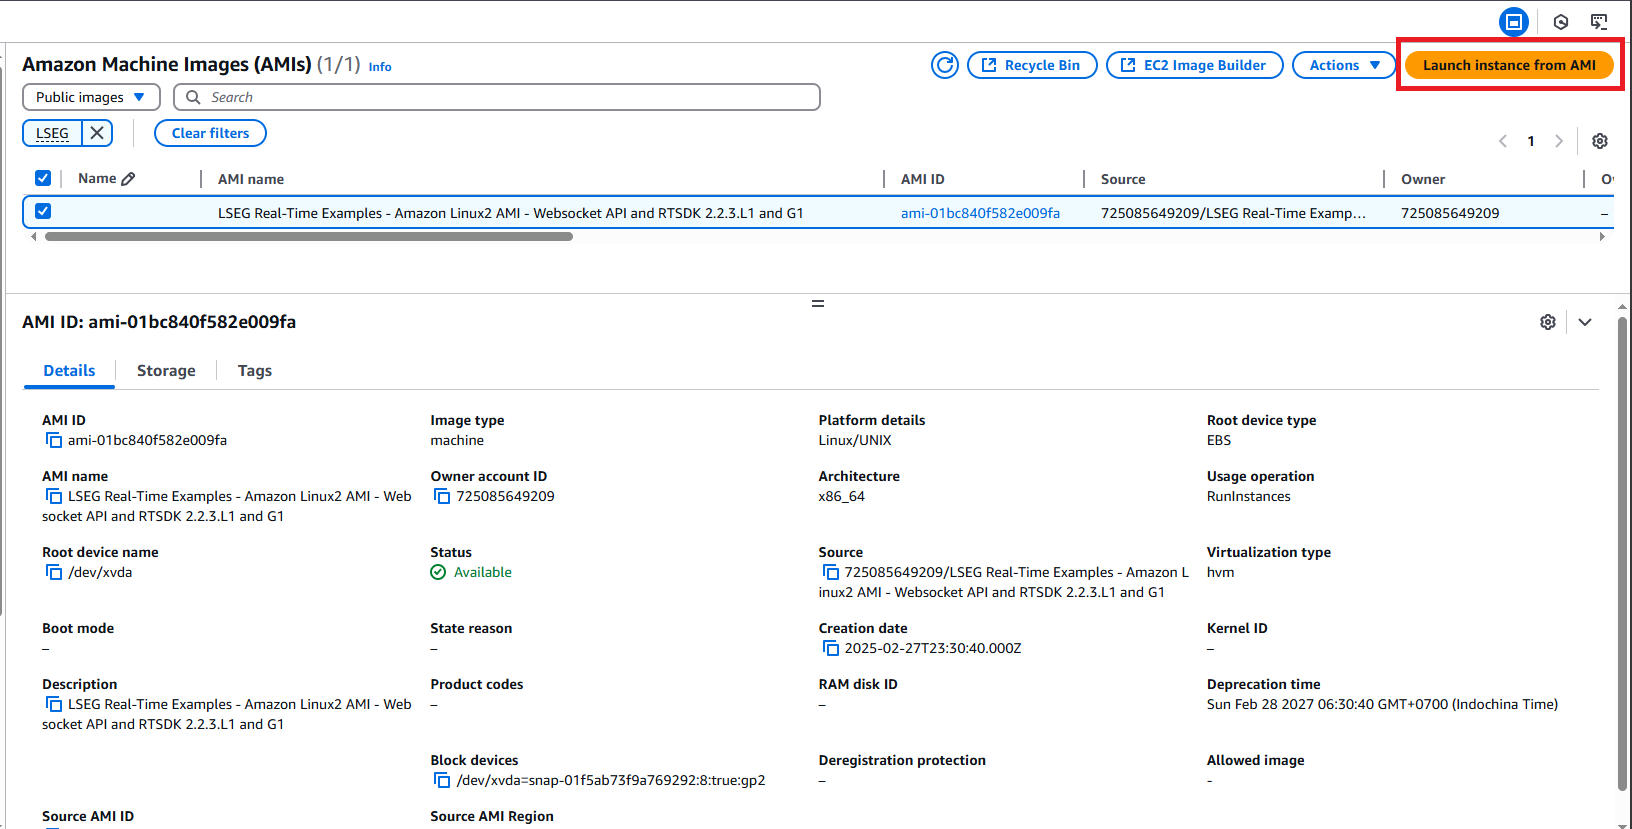
Select the AMI name LSEG Real-Time Examples - Amazon Linux AMI, and choose Launch menu.
Now we are in the Launch an instance menu page. Input your instance name based on your preference. I am using devrel as my instance name.
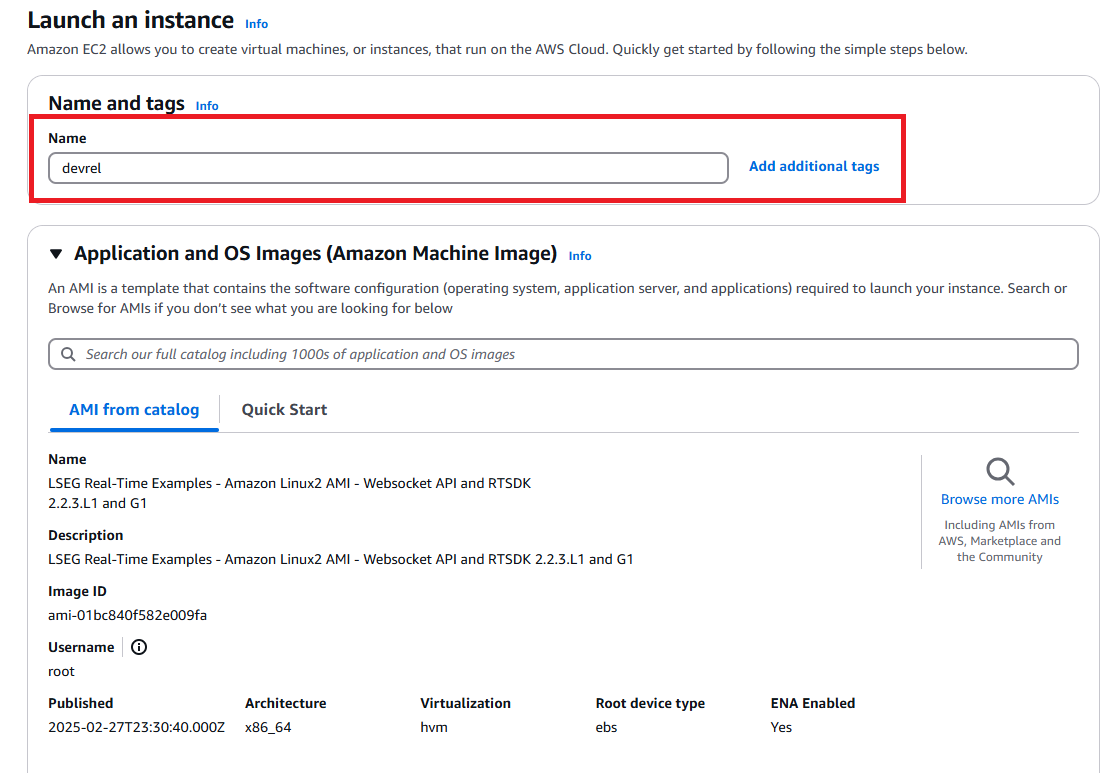
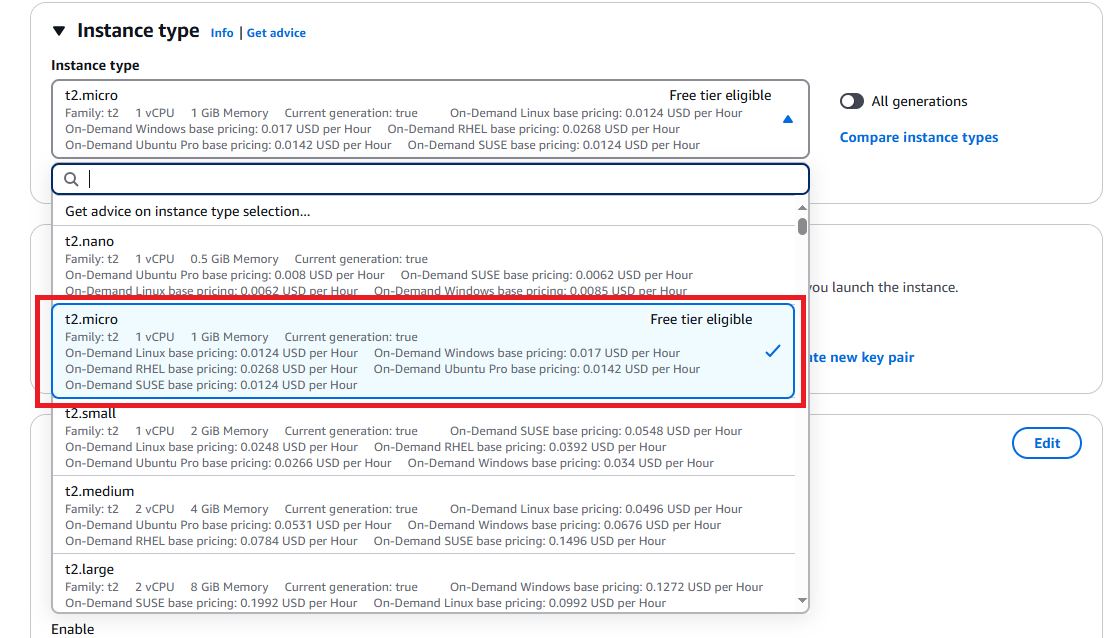
Next, select your instance machine type. Please choose the one that match your requirements (see more detail on Amazon EC2 Instance types page). I am using t2.micro which is eligible for the Free Tier account on this demonstration.
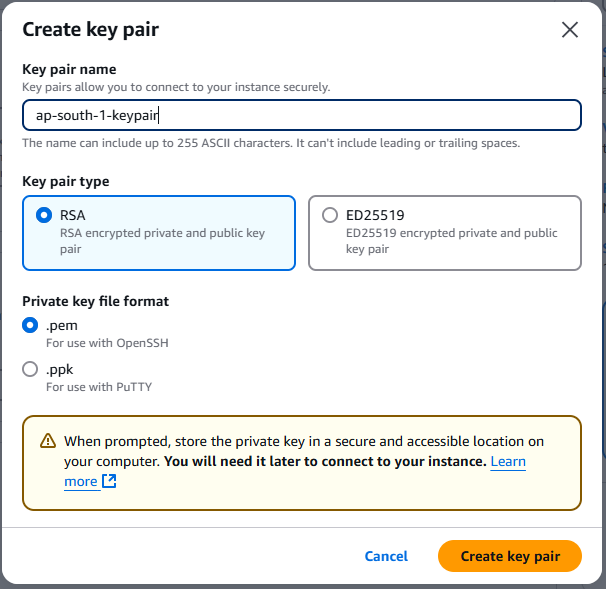
On the Key pair (login) section, click on the Create new key pair text to create a new key pair for a secure connection to your instance. You can choose your key pair type and file format based on how you want to remote connect to an instance. I am choosing the RSA type with .pem file format.

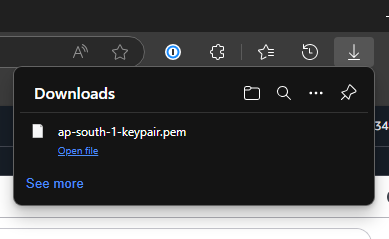
Then the file will be download to your local machine. Please note that you need to keep the key pair file in a secure and accessible location because you need to use this file every time you remote connect to an instance.
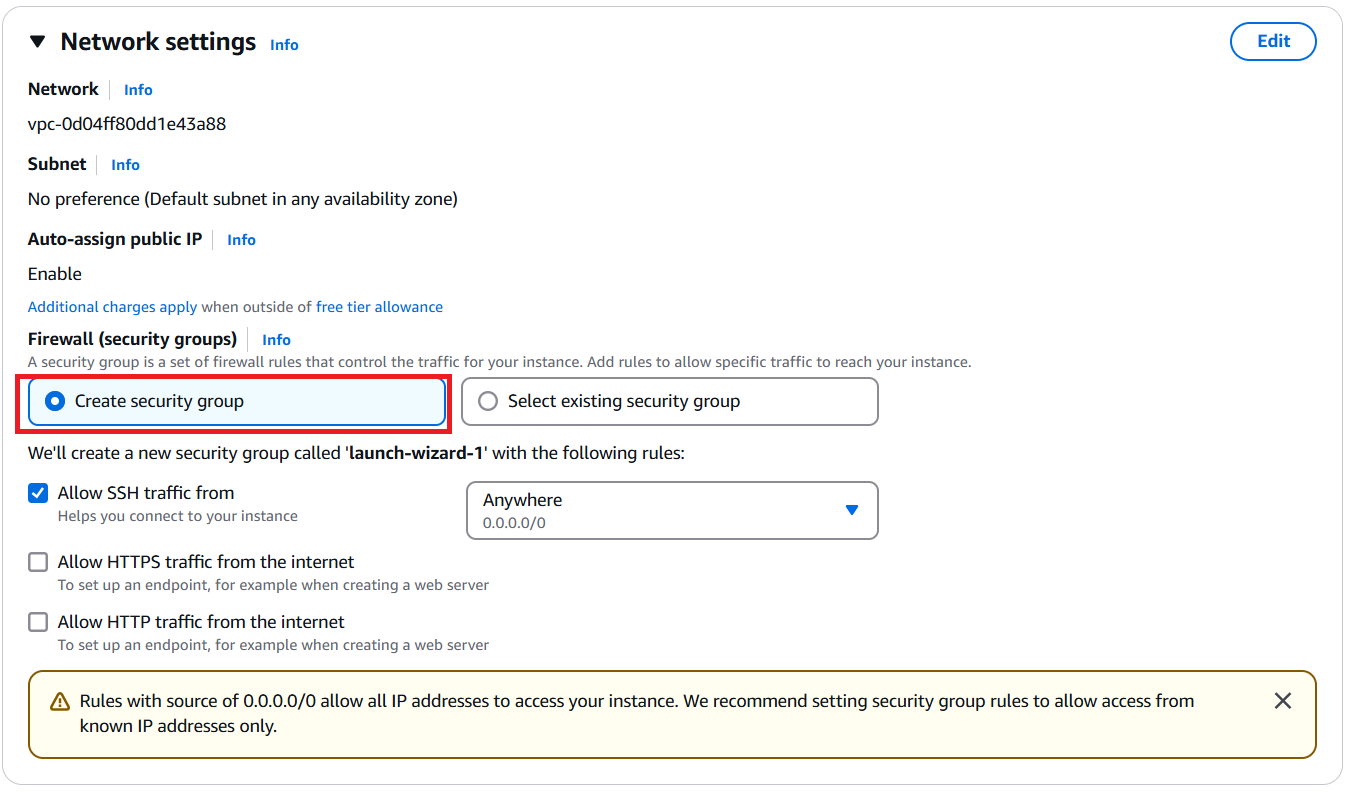
Next, on the Network settings section, select Create security group option (If you already set up a security group that matches your requirements, you can select that one). You can click an Edit button to customize inbound and outbound network (HTTPS, TCP, etc.) based on your preference.
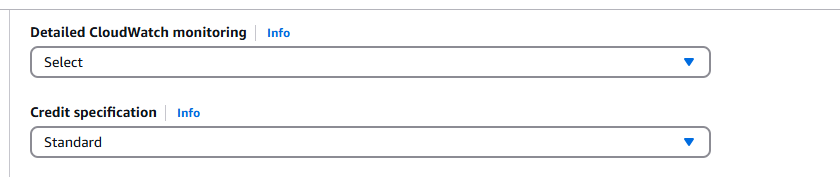
Please note that you may need to set the Credit specification option to Standard on the Advanced section.
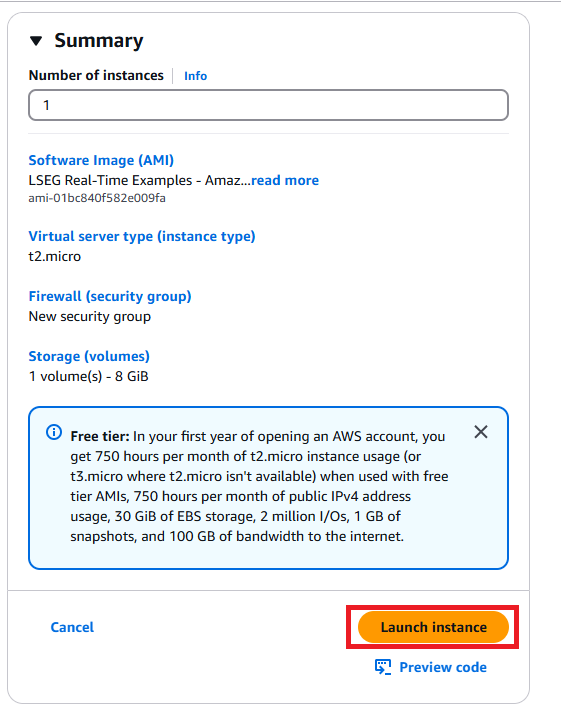
Finally, review your settings on the Summary section and click Launch instance button to create your instance.
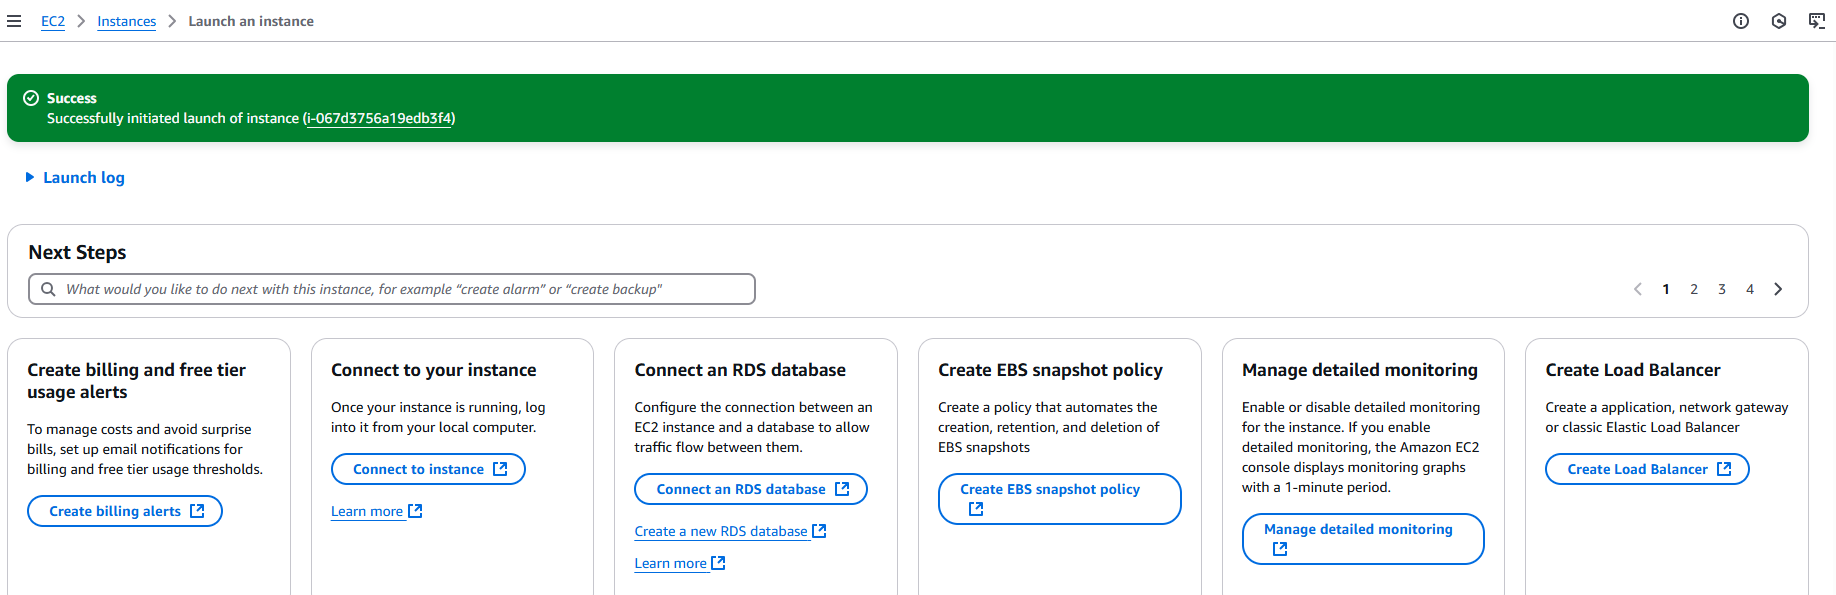
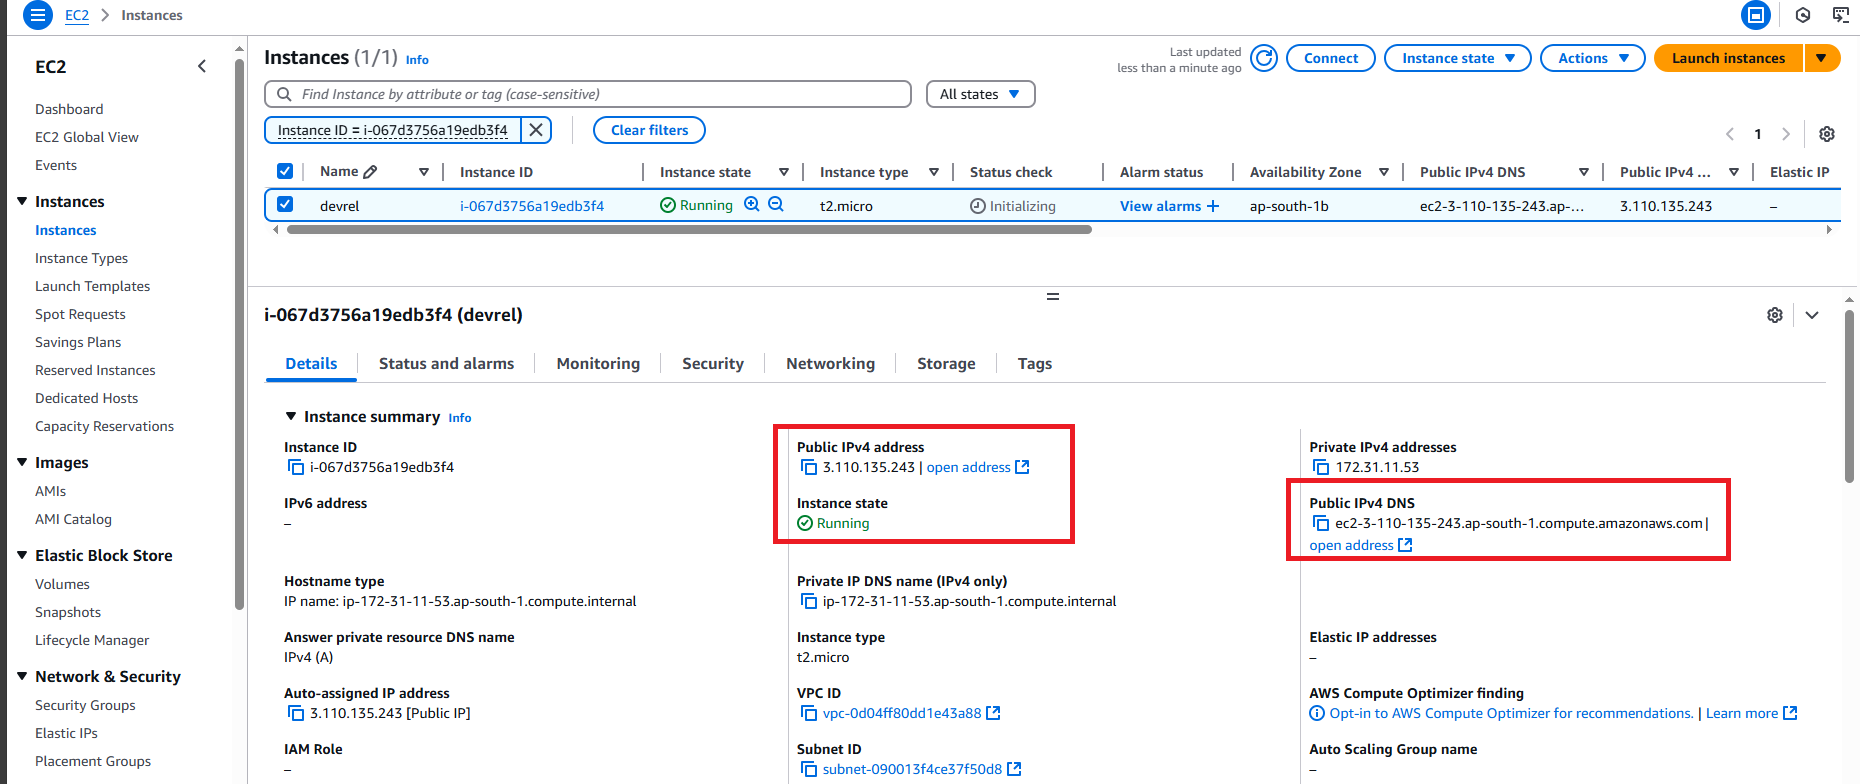
Once an instance creation process is succeed, it shows the following message. You can click on an instance id to see an instance detail.
On an instance page, it displays all instance details such as pubic IP address (IPv4, IPv6 - if any), DNS name, instance type, instance state, and much more. You need the public DNS name for remote connecting to access your instance.
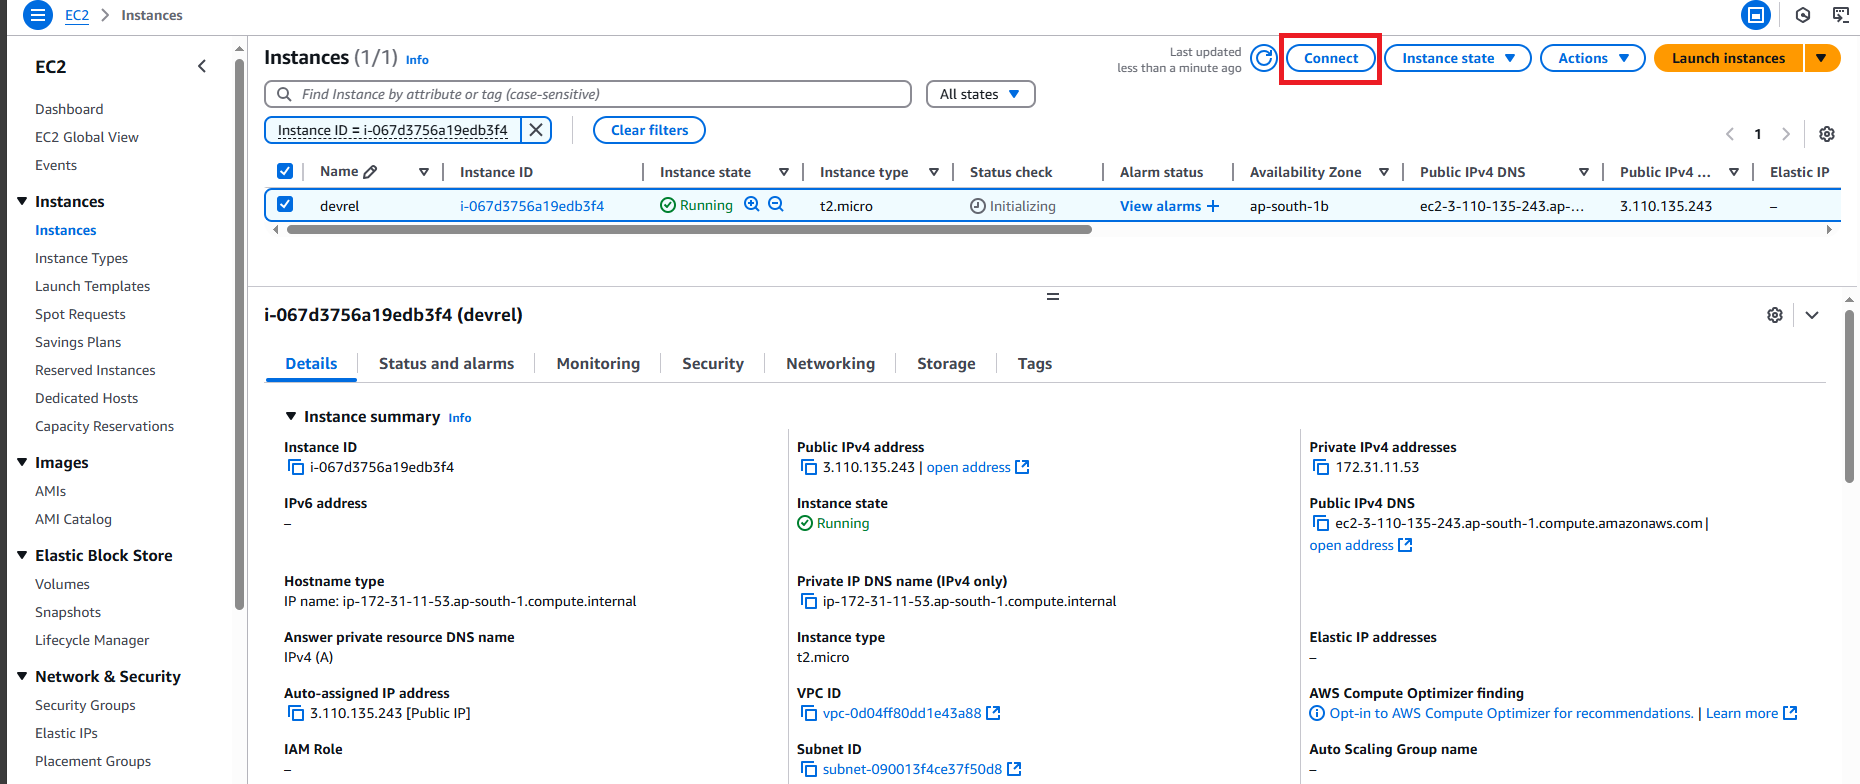
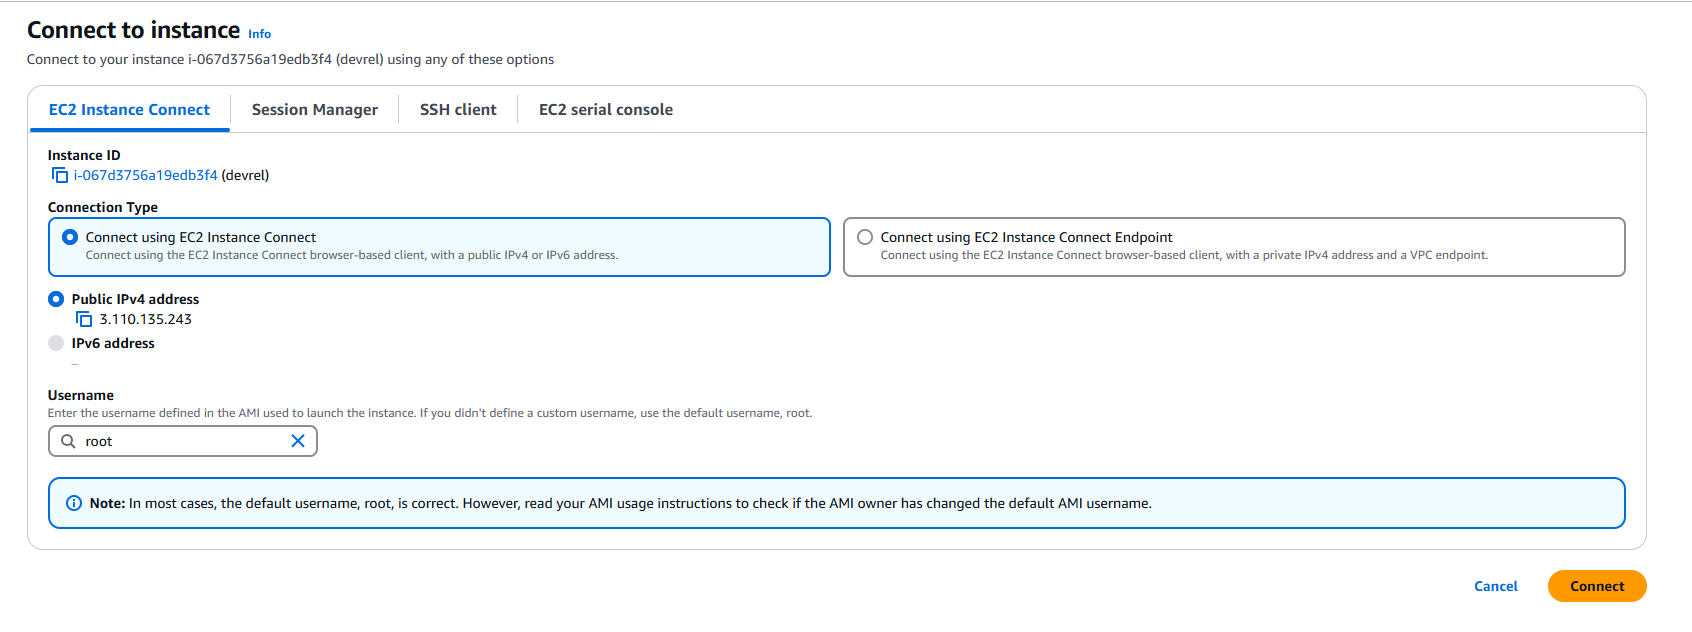
The Connect to instance page shows all available options that you can choose such as SSH client, console, etc.
Please find more detail on the following AWS resource pages:
- Connect to your EC2 instance
- Connect to your Linux instance using an SSH client
- Connect to your Linux instance using PuTTY
- Connect to your Linux instance using EC2 Instance Connect
Since my corporate firewall/proxy does not love PuTTy and SSH client applications (I am looking at you, ZScaler), I am demonstrating with the AWS CloudShell which is a browser-based shell (console) built-in on the AWS website.
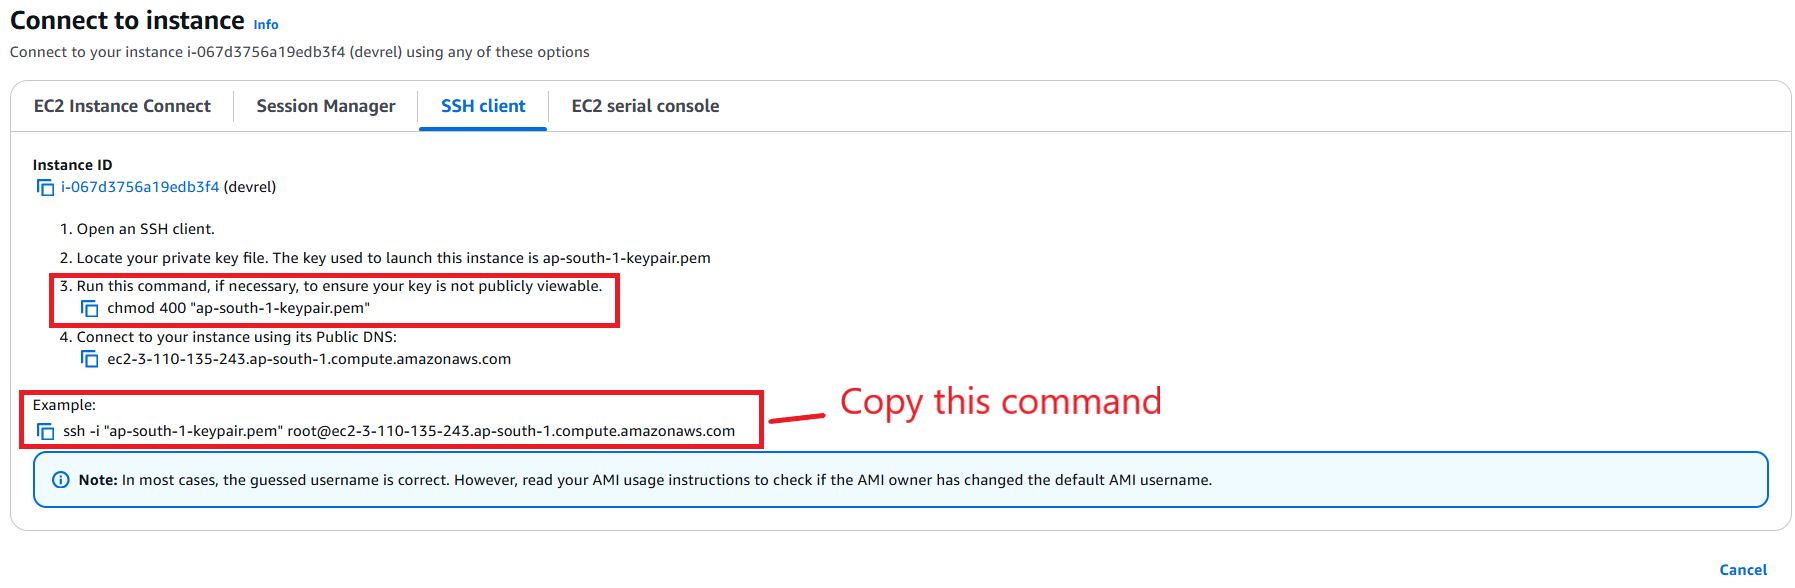
Firstly, click on the SSH client tab. There are steps to connect using the SSH client which will be used with the CloudShell application.
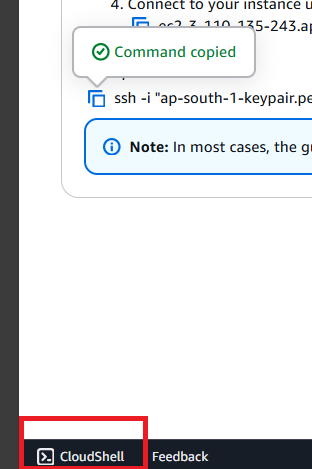
The important step is the step 3, and copy the command on the Example section.
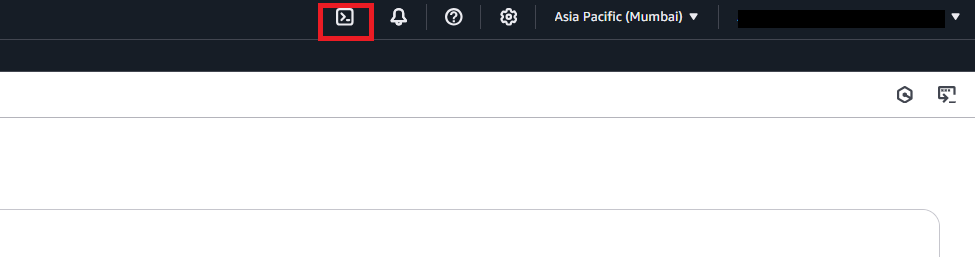
Next, open a built-in CloudShell application on the AWS page. An application is available on the button left corner and top right corner of the page (that ">_" icon).
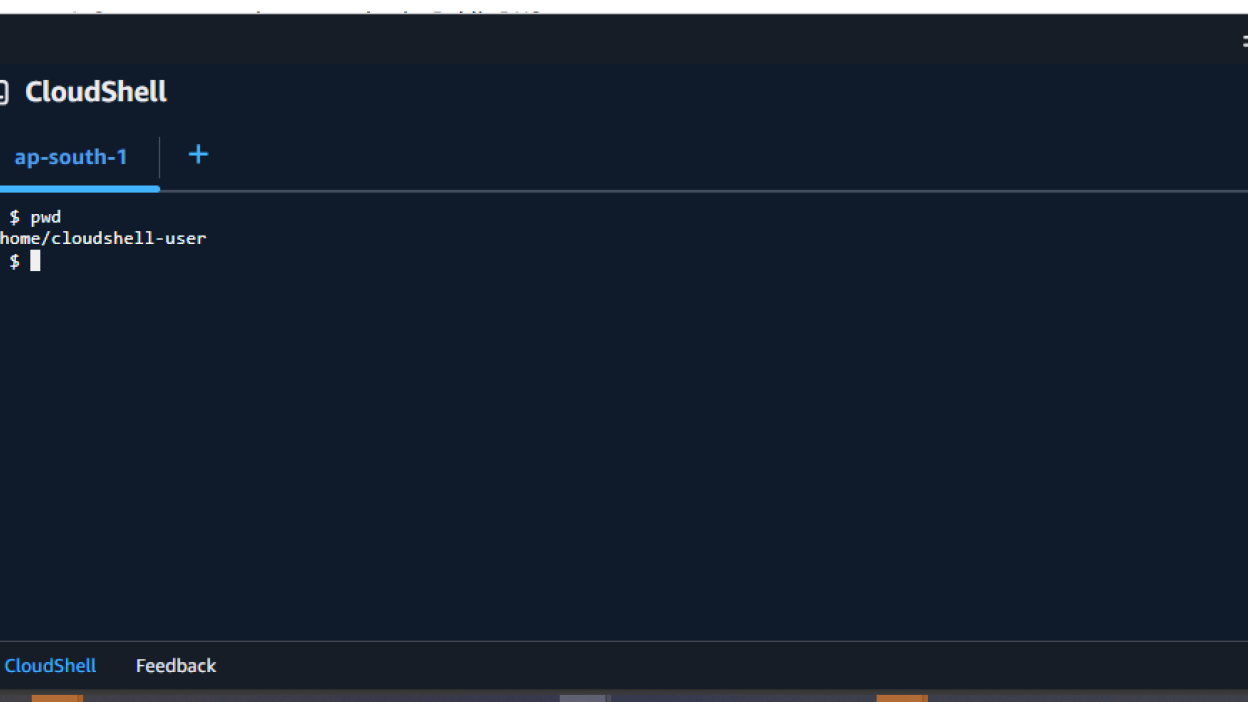
When you open the CloudShell application, it opens a console application on your browser and sign in with your AWS account and location automatically.
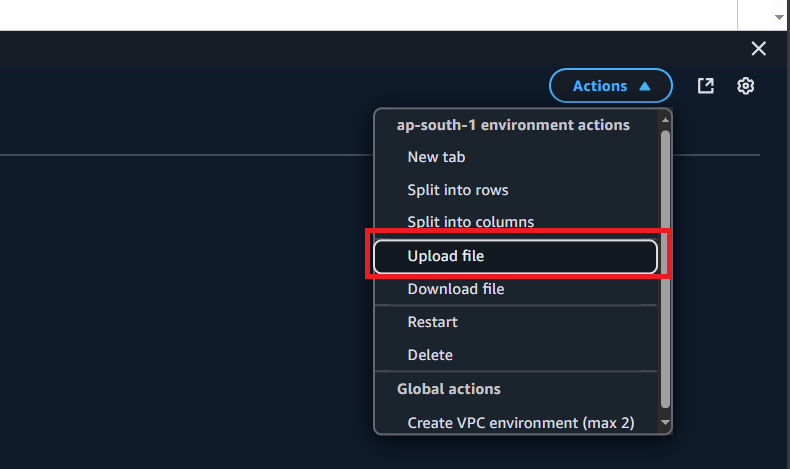
Next, click on the Action menu on a CloudShell console application, then choose Upload file to upload your saved ker pair file to the cloud.
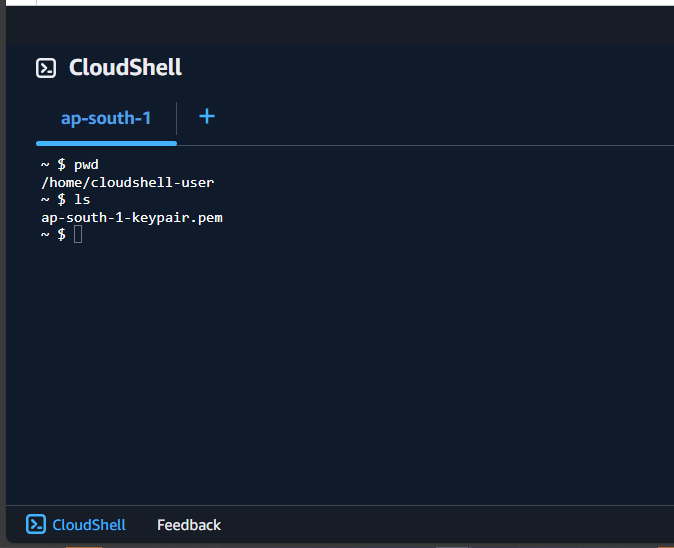
Onces the file is uploaded, run the following command to change a file permission to not be public.
$> chmod 400 <key pair file>
Now you are ready to connect to your instance with the built-in SSH application on the CloudShell. You can connect to an instance with the same command from Example section above but with ec2-user (not a root user).
$> ssh -i "<key pair file>" ec2-user@<public IPv4 DNS name>
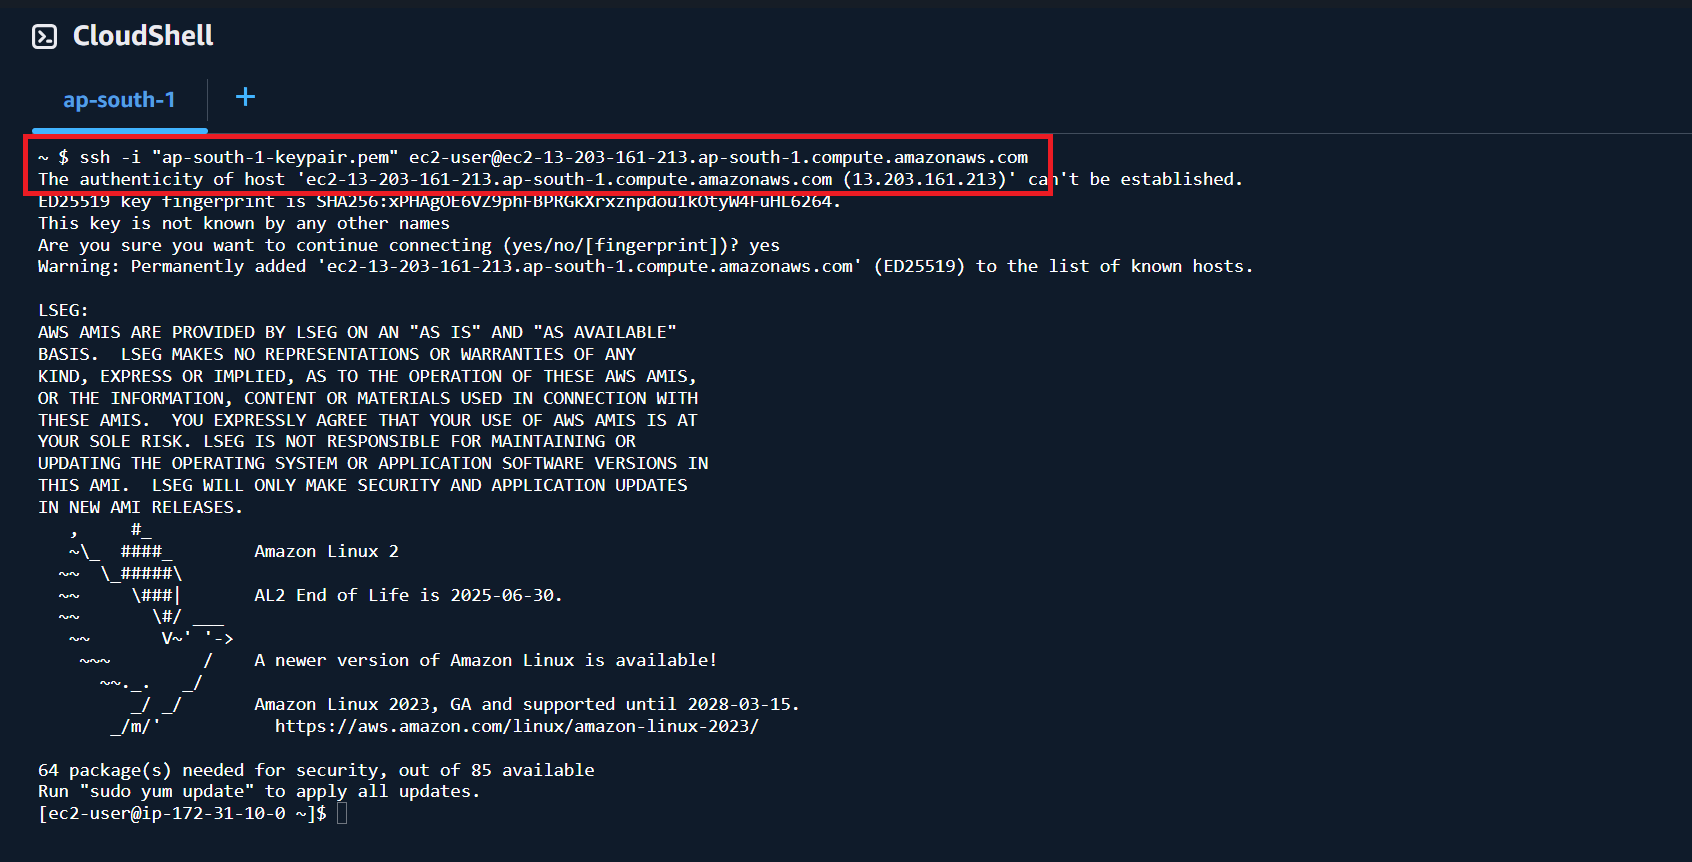
That covers how to connect to your EC2 instance.
How to run Real-Time APIs example
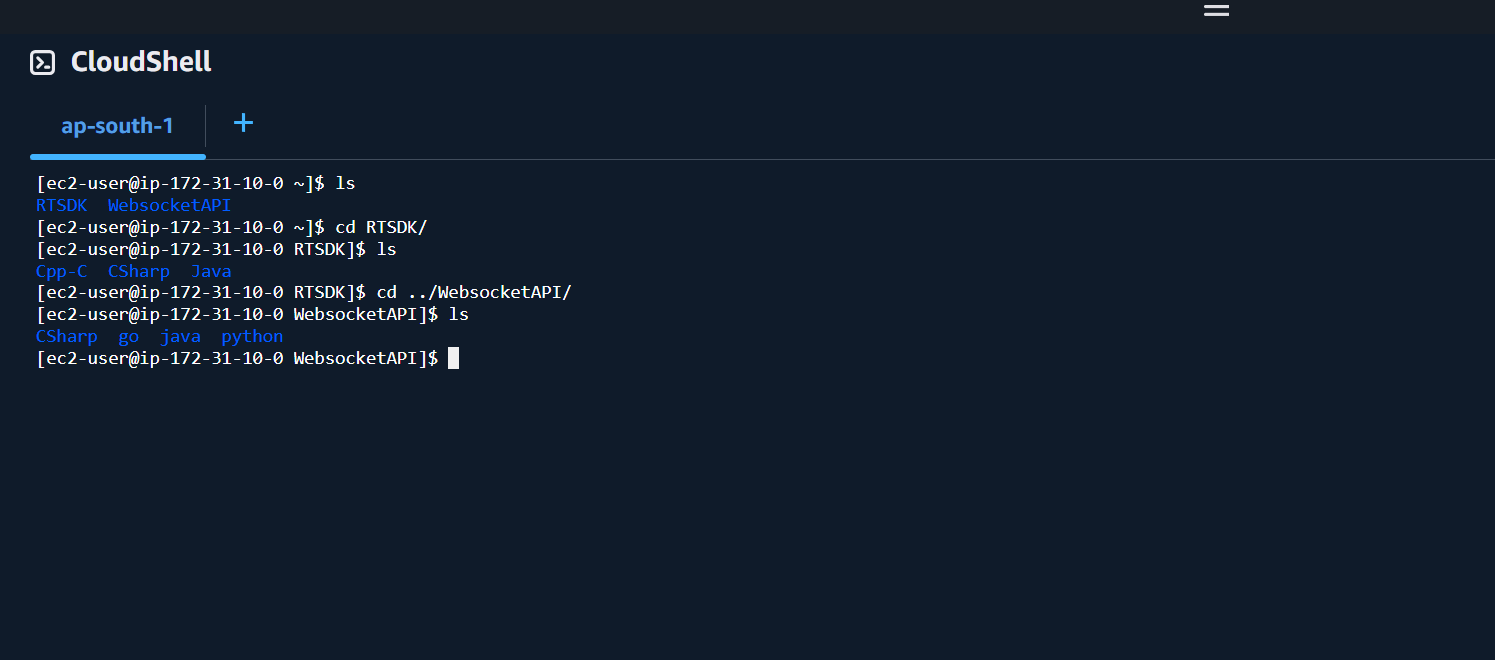
Once you have connected to your instance, you will be on the home folder /home/ec2-user location. Your home folder contains the following example and API folders:
- RTSDK folder: This folder contains the Real-Time SDK C/C++, C# and Java examples for the Real-Time Optimized connection. These examples are the same as on the Real-Time SDK GitHub repository.
- WebSocketAPI folder: This folder contains the WebSocket API examples in Python, Java, Go, and C# for the Real-Time Optimized connection. These examples are the same as on the WebSocket-API RTO GitHub repository.
The instance that build on top of the Real-Time APIs AMI already have all required compilers and libraries installed.
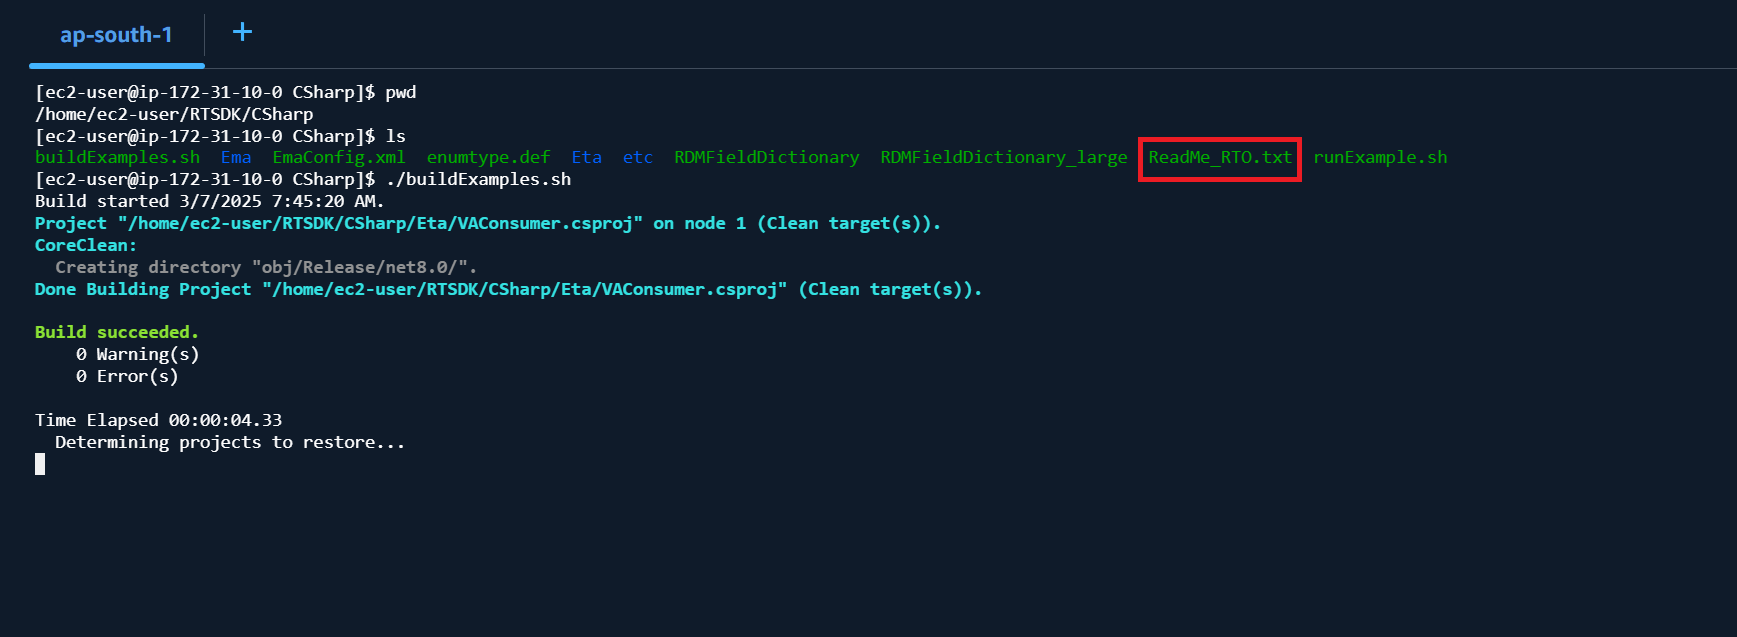
Each subfolder contains the ReadMe_RTO.txt file which gives you a full description regarding the examples detail and how to run examples. I strongly advice you take a look on this file before running an example.
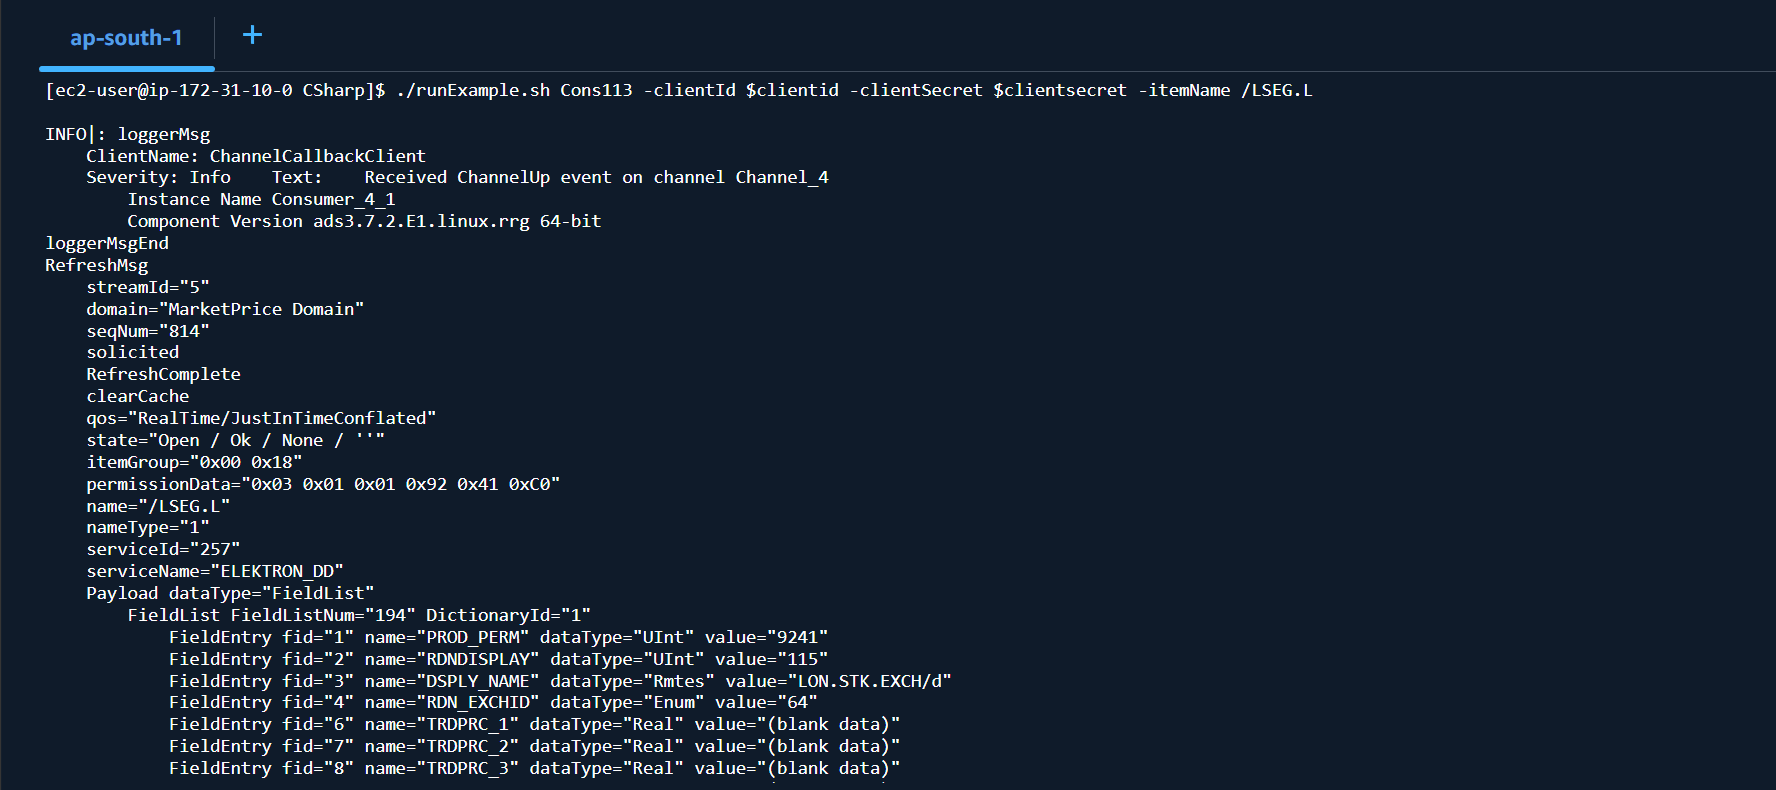
Running RTSDK Example
I am demonstrating with the EMA C# API example inside /home/ec2-user/RTSDK/CSharp folder. The ReadMe_RTO.txt, build and run scripts files are available on the folder.
To build the examples projects, run the following command:
$> ./buildExamples.sh
Then you can run an example with the following command:
$> ./runExample.sh <example name> <parameters>
You can set your RTO credential in the instance environment variable for easy to use.
$> export clientid=<your Authentication V2 client id>
$> export clientsecret=<your Authentication V2 client secret>
Please refer to the readme file and the series of Real-Time Optimized Quick Start (RTO connection section) based on your preferred API:
That is all for the RTSDK example demonstration.
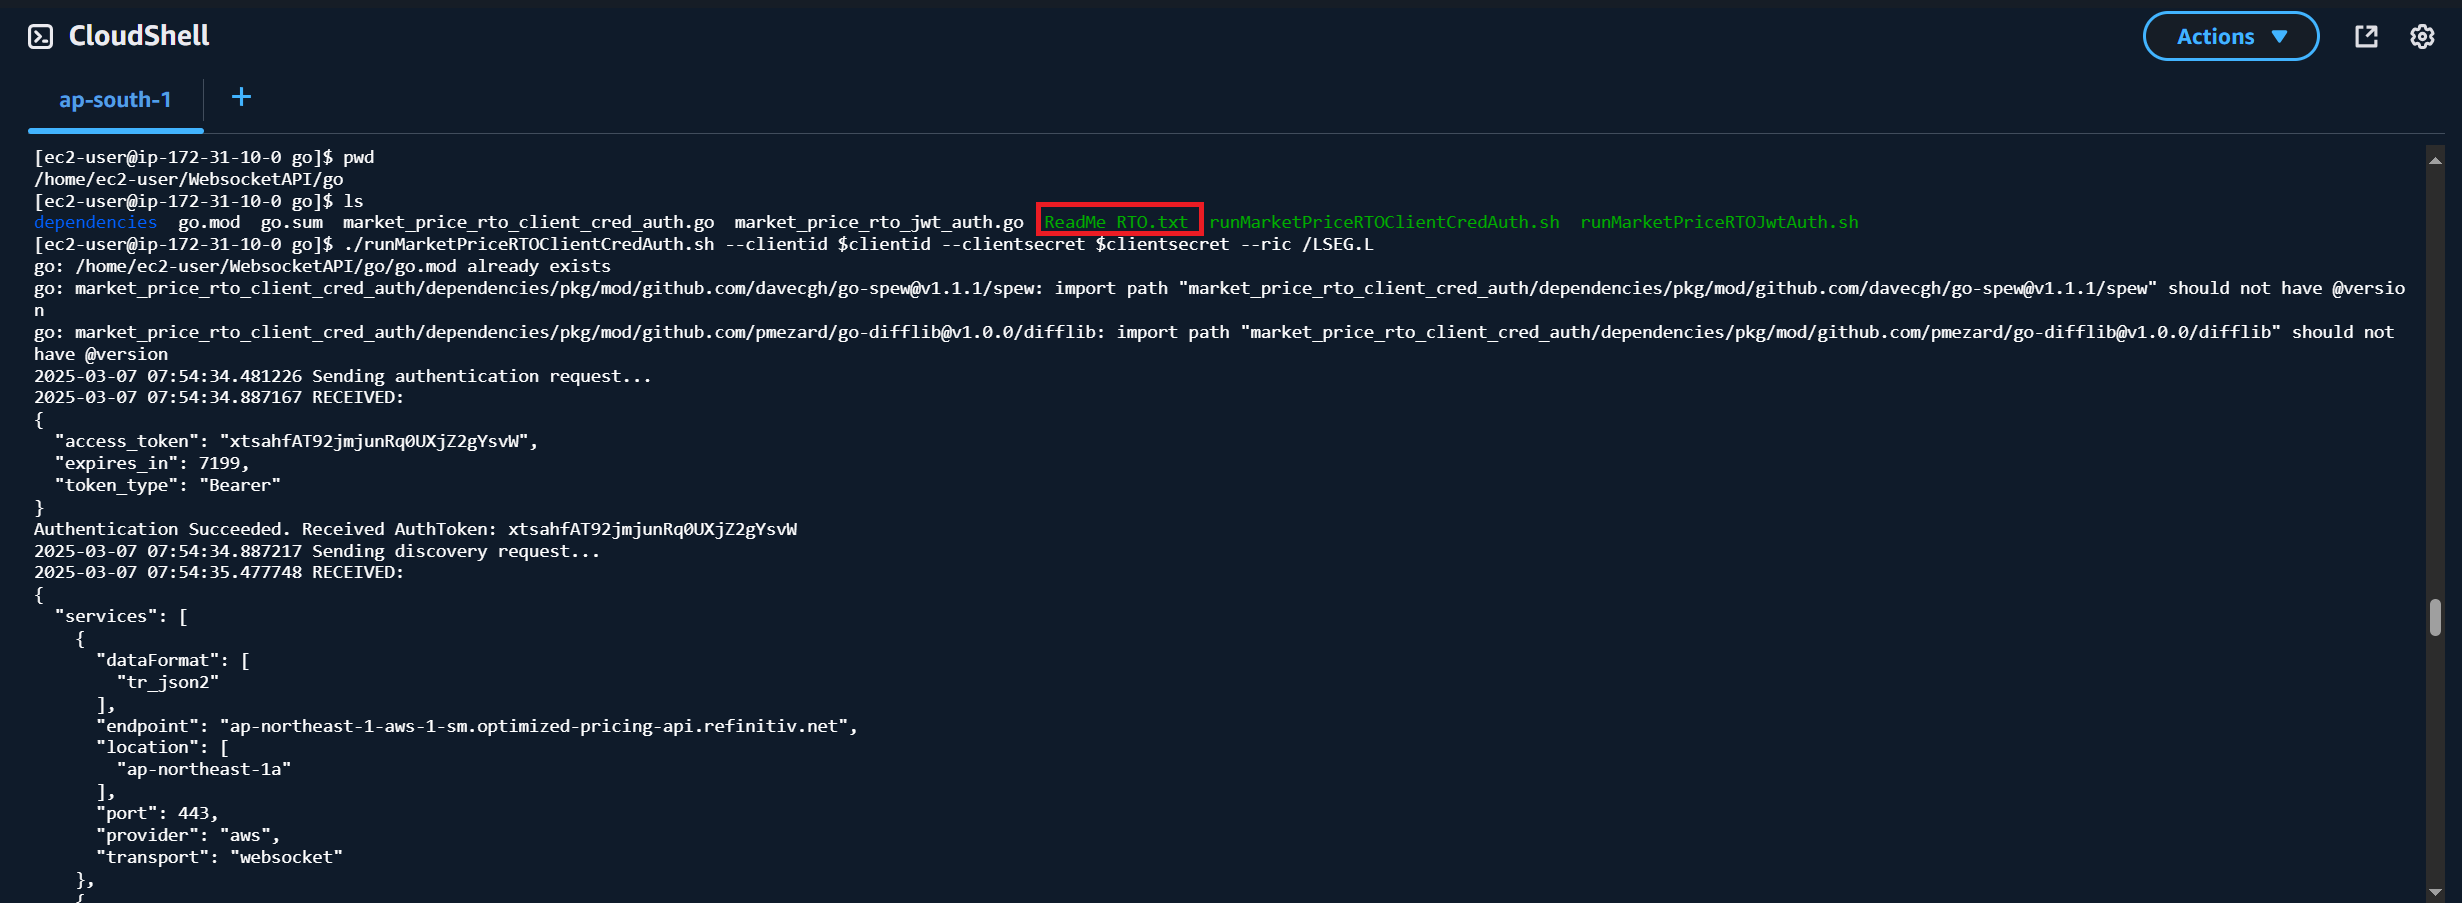
Running WebSocket Example
Moving on to the WebSocket API, I am demonstrating with the Go example. The Go example is available on /home/ec2-user/WebSocketAPI/go folder. The readme file and run scripts are available on this folder as well.
You can run the Go example application for the RTO Authentication Version 2 with the following command (please check ReadMe_RTO.txt file before run an application!):
$> ./runMarketPriceRTOClientCredAuth.sh <parameters>
Please refer to the readme file and the WebSocket API Quick Start (RTO connection sections):
- WebSocket API - Python Example with Authentication Version 2
- WebSocket API - Python Example with Authentication Version 1
That covers a demonstration to run the RTSDK and WebSocket examples
Instance Clean Up
Once you have finished explorer the RTSDK or WebSocket API examples, you can clean up an instance to save your credit cost. To shutdown an instance and release the public DNS and IP Address, please select and instance and choose Stop instance option in the Instance state menu.
Please note that in the stopped state, all attached volumes remain available and will be charged credit.
To complete clean up all resources, you can select Terminate instance option in the Instance state menu. Please refer to AWS Document: Clean Up Your Instance and Amazon EC2 instance state changes pages for more detail.

That covers all I wanted to say today.
Troubleshooting
Q: How can I have the RTO credential?
A: Please contact your LSEG representative to help you with RTO credential and permission.
Q: What is different between the Authentication Version 1 and Version 2
A: Please refer to Getting Started with Version 2 Authentication for The Real-Time Optimized: Overview article.
Q: How do I know which Version 1 or Version 2 of Authentication that I have?
A: Please refer to Account authorization V1 to V2 migration cheat sheet article.
Q: I have tried to use the App Key Generator page to create my client_id but the page keeps asking me Workspace's email username
A: Please contact your LSEG representative to help you with RDP/Real-Time Optimized credential and permission.
Q: I do not have a private key pair file
A: Please follow the steps in AWS Document: Create a Key Pair link to create your private key pair file.
Q: My Amazon EC2 instance does not have a Public DNS IP address
A: The instance Public DNS and IP address need to be configured before launching the instance. Please refer to this AWS Document: Assigning a Public IPv4 Address During Instance Launch link. This public IPv4 address is automatically released in certain cases (stop the instance, etc). If you already launched an instance or need a persistent public IP address, you can associate an AWS Elastic IP Address with the instance.
Note: AWS Elastic IP Address is not included in the AWS Free Tier services.
References
For further details, please check out the following resources:
- Real-Time Market Data APIs page on the LSEG Developer Community website.
- Delivery/Data Platform (RDP APIs)
- Changes to Customer Access and Identity Management: Real-Time - Optimized
- Account authorization V1 to V2 migration cheat sheet article
- Getting Started with Version 2 Authentication for Real-Time - Optimized: Overview article
For any question related to this quick start guide or Real-Time - Optimized, please use the Developer Community Q&A Forum.
Get In Touch
Related Articles
-
10 important things you need to know before you write a Real-Time application
-
Changes to Customer Access and Identity Management: Real-Time - Optimized
-
Getting Started with Version 2 Authentication for the Real-Time: Overview
-
Account authorization V1 to V2 migration cheat sheet
-
How to deploy a web service on AWS
-
How to Deploy EMA Application to Azure Container Instances Service
Related APIs
Source Code
Request Free Trial
Call your local sales team
Americas
All countries (toll free): +1 800 427 7570
Brazil: +55 11 47009629
Argentina: +54 11 53546700
Chile: +56 2 24838932
Mexico: +52 55 80005740
Colombia: +57 1 4419404
Europe, Middle East, Africa
Europe: +442045302020
Africa: +27 11 775 3188
Middle East & North Africa: 800035704182
Asia Pacific (Sub-Regional)
Australia & Pacific Islands: +612 8066 2494
China mainland: +86 10 6627 1095
Hong Kong & Macau: +852 3077 5499
India, Bangladesh, Nepal, Maldives & Sri Lanka:
+91 22 6180 7525
Indonesia: +622150960350
Japan: +813 6743 6515
Korea: +822 3478 4303
Malaysia & Brunei: +603 7 724 0502
New Zealand: +64 9913 6203
Philippines: 180 089 094 050 (Globe) or
180 014 410 639 (PLDT)
Singapore and all non-listed ASEAN Countries:
+65 6415 5484
Taiwan: +886 2 7734 4677
Thailand & Laos: +662 844 9576