

Overview
Last Updated: October 2025
Bun is a new JavaScript runtime that aims to be a drop-in replacement for Node.js with faster startup and run time, more optimized API, and provides a complete toolkit for JavaScript/TypeScript developers.
Bun just released version 1.0 ("production-ready") on September 2023 (the current version is 1.0.21, as of January 2024).
One of Bun features is the Node.js compatibility. Most NPM modules intended to work with Node.js will work with Bun out of the box. This is a good opportunity to test Data Library for TypeScript with Bun runtime to consume data from Data Platform (aka Delivery Platform or RDP, formerly known as Refinitiv Data Platform) as an experimental project.
This example project shows how to implement a console TypeScript application to retrieve financial data using ease-of-use Data Library for TypeScript version 1 on Bun runtime. The project is implemented and run in a controlled environment such as Docker and devcontainer using the Bun Docker Image.
Update October 2025: The Data Library for TypeScript version 2 (aka LSEG Data Library for TypeScript) is now available.
Note:
- Please be informed that this demo project aims for Development and POC purposes only. The Data Library for TypeScript/JavaScript is not tested and qualified with Bun runtime.
- This project uses Bun version 1.0.21.
Prerequisite
Before I am going further, there is some prerequisite, dependencies, and libraries that the project is needed.
Access to the RDP with the your Historical-Pricing, News and CFS file permissions
This project uses RDP access credentials with the CFS file, Pricing History, and News permissions.
Please contact your LSEG representative to help you with the RDP account and services.
Internet Access
This demonstration connects to RDP on AWS via a public internet.
Docker Desktop
This project uses Docker Desktop for containerization.
Visual Studio Code (Optional)
Optionally, you can use the Visual Studio Code with Dev Containers extension to run and debug the example code.
What is Bun?
Bun is an all-in-one JavaScript runtime and toolkit designed for speed, complete with a bundler, test runner, and Node.js-compatible package manager. Bun is built from scratch using the Zig programming language. Unlike Node.js and Deno that use Chromium's V8, Bun uses WebKit's JavaScriptCore as the JavaScript Engine.
The three major design goals of Bun are as follows:
- Speed: Bun starts fast and runs fast. It extends JavaScriptCore, the performance-minded JS engine built for Safari.
- Elegant APIs: Bun provides a minimal set of highly-optimized APIs for performing common tasks, like starting an HTTP server and writing files.
- Cohesive DX: Bun is a complete toolkit for building JavaScript apps, including a package manager, test runner, and bundler.
Bun is designed as a drop-in replacement for Node.js. It natively implements hundreds of Node.js and Web APIs, including fs, path, Buffer and much more to improve performance and developers productivity.
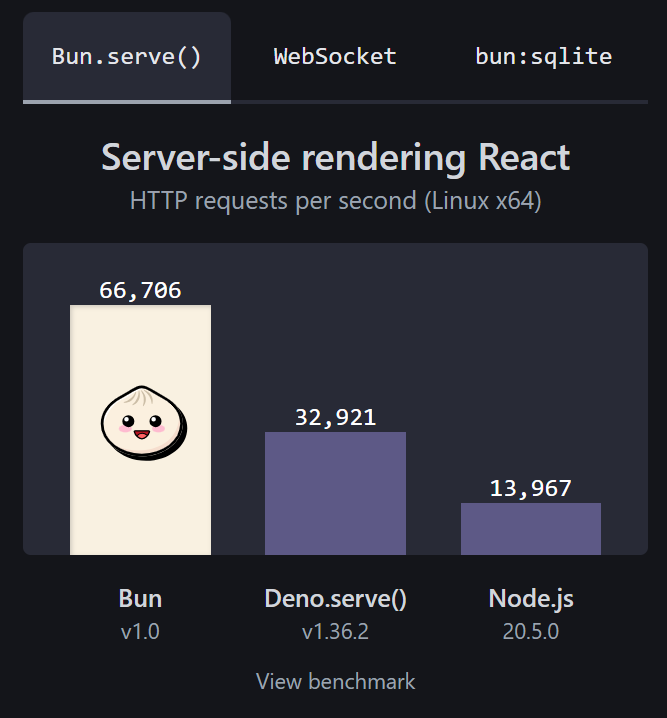
Benchmark result from Bun website.
For more detail about Bun runtime, please check the following resources:
This project was created using bun init command in bun v1.0.21.
Step 1: Setting Up Bun Development environment.
To avoid messing up the office machine (I am looking at you ZScaler), this project is implemented and run in a controlled environment such as Docker and VS Code devcontainer using the Bun Docker Image.
The first step is creating a file name devcontainer.json in the .devcontainer folder in the VS Code project as follows:
{
"name": "BUN RD TypeScript",
"image": "oven/bun:1.0.21",
"customizations": {
"vscode": {
"extensions": ["oven.bun-vscode"],
"settings": {
"bun.debugTerminal.enabled": true,
"bun.runtime": "/usr/local/bin/bun"
}
}
},
"shutdownAction":"stopContainer"
}
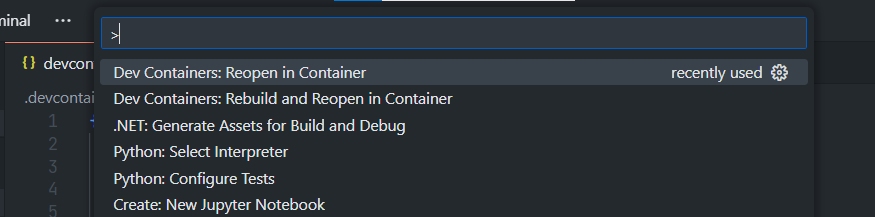
Then open the VS Code Command Palette with the F1 key, and then select the Remote-Containers: Reopen in Container command.
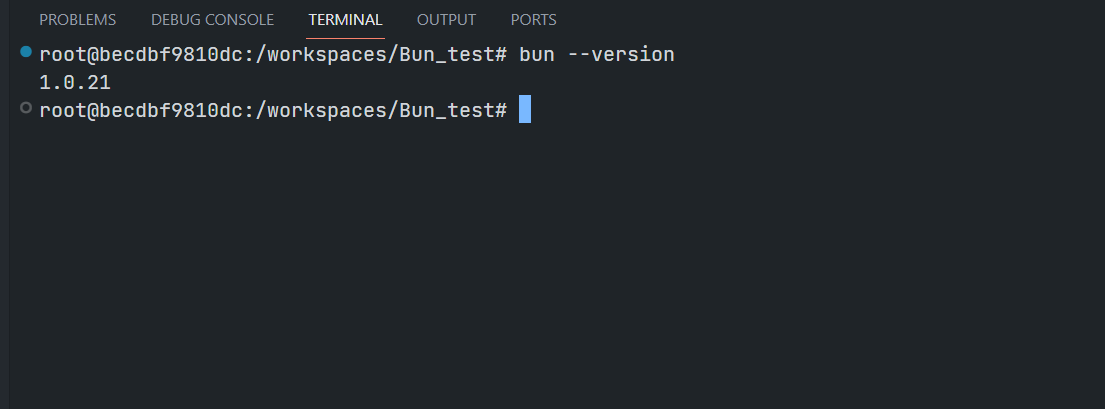
Once this build is completed, VS Code automatically connects to the Bun container and you get a ready-to-use Bun development environment.
The next step is creating an empty Bun project with the interactive bun init command.
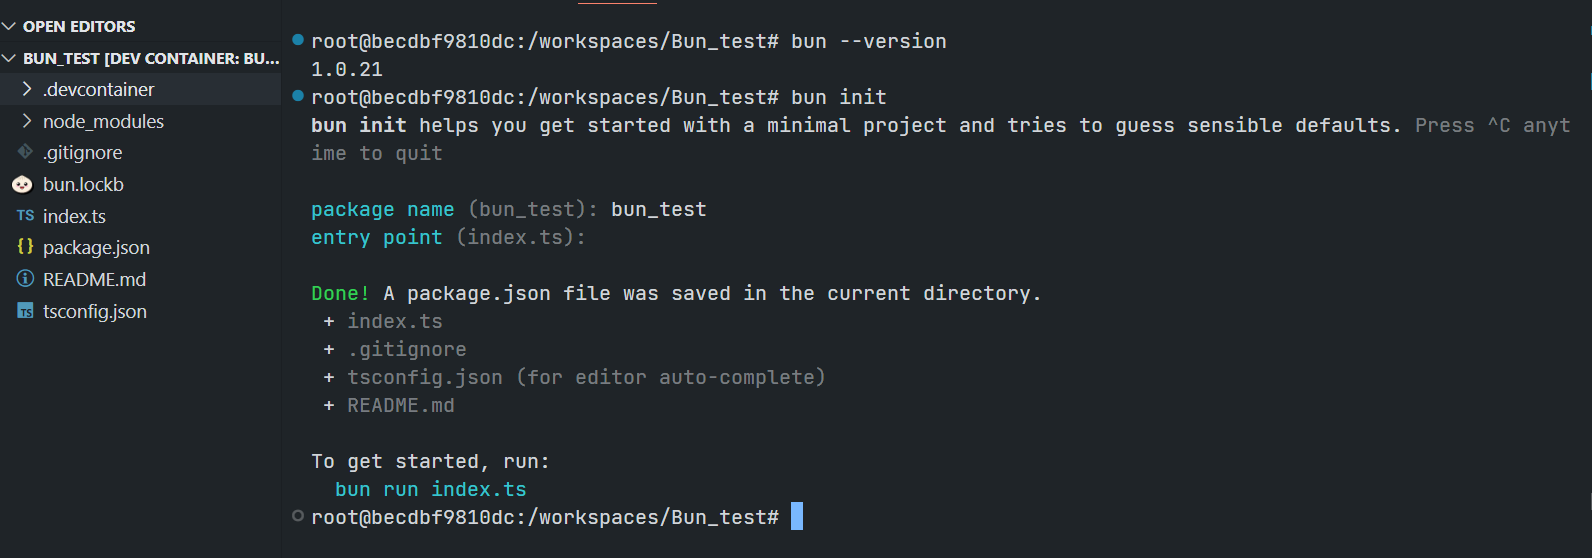
You see that Bun simplify how you can create a development project with minimal interactive questions and generate all necessary project files such as package.json, .gitignore, README.md, tsconfig.json files for you.
Now you can start write the TypeScript source code in the project.
//index.ts
console.log('Hello Bun...');
And run the application with the following command:
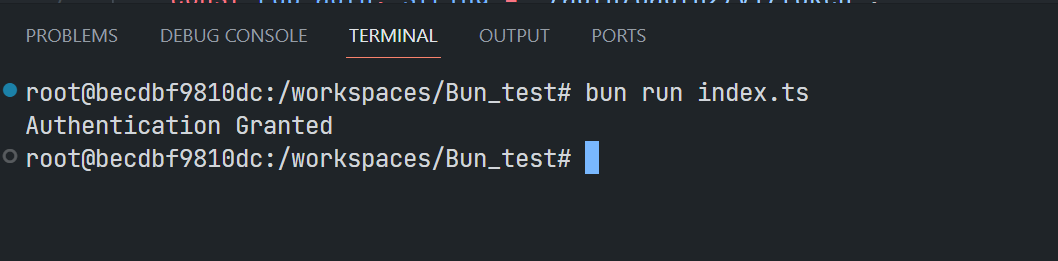
$#bun run index.ts
Hello Bun...
This VS Code Bun development environment is ready for implementing the RDP HTTP application like the following example
//index.ts
(async () => {
let username: string = 'RDP User-ID/Machine-ID';
let password: string = 'RDP Password';
let app_key: string = 'RDP App Key'
const rdp_host: string = 'https://api.refinitiv.com';
const rdp_auth: string = '/auth/oauth2/v1/token';
let authen_url: string = rdp_host + rdp_auth;
let access_token: string = '';
let refresh_token: string = '';
let expires_in: number = 0;
let login_payload: string = `grant_type=password&username=${username}&client_id=${app_key}&password=${password}&takeExclusiveSignOnControl=True&scope=trapi`;
const auth_resp = await fetch(authen_url, {
method: 'POST',
headers: {
'Content-Type': 'application/x-www-form-urlencoded'
},
body: new URLSearchParams(login_payload)
});
if (!auth_resp.ok){
console.log('Authentication Failed');
const status_text = await auth_resp.text();
console.log(`HTTP error!: ${auth_resp.status} ${status_text}`);
} else {
console.log('Authentication Granted');
//Parse response to JSON
const auth_response:any = await auth_resp.json();
access_token= auth_response.access_token;
refresh_token = auth_response.refresh_token;
expires_in = parseInt(auth_response.expires_in);
}
// Continue Request RDP data using access_token
})();
Result:
Let's leave this core RDP HTTP APIs application implementation there. I am going to use the Data Library for TypeScript to connect and consume data from RDP platform.
Introduction to the Data Library for TypeScript
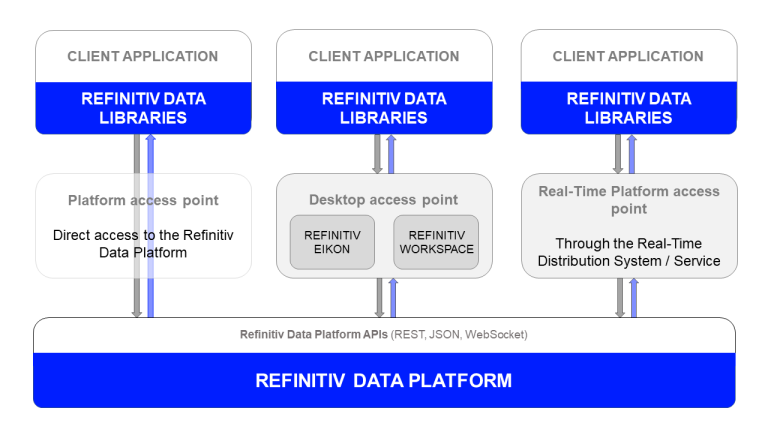
Now let me move on to Data Library. The Data Library for TypeScript is an ease-of-use API defining a set of uniform interfaces providing the developer access to the Data Platform. The APIs are designed to provide consistent access through multiple access channels, spanning multiple programming languages that target both Professional Developers and Financial Coders. Developers can choose to access content from the desktop, within a desktop container, through their deployed streaming services, or directly to the cloud. The interfaces encompass a set of unified Web APIs providing access to both streaming (over WebSockets) and non-streaming (HTTP REST) data available within the platform.
The Libraries are available in the following programming languages:
For more deep detail regarding the Data Library for Python version1, please refer to the following articles and tutorials:
Update October 2025: The Data Library for TypeScript version 2 (aka LSEG Data Library for TypeScript) is now available.
Disclaimer
This project is based on Data Library for TypeScript version 1 (RD Library TypeScript) using the Platform Session only.
Step 2: Installing Data Library for TypeScript.
The Data Library for TypeScript/JavaScript is available on the npm package manager platform. We can install the library to our project with the following command
$bun install @refinitiv-data/data
Then run the following command to install TypeScript declarations for Bun.
$bun add -d @types/bun
Once the installations are succeed, the Data Library dependency will be added to the project's package.json file.
{
"name": "bun_datalibrary_ts",
"module": "src/rdlib_cfsWorkflow.ts",
"type": "module",
"devDependencies": {
"@types/bun": "^1.0.0"
},
"peerDependencies": {
"typescript": "^5.0.0"
},
"dependencies": {
"@refinitiv-data/data": "^3.13.1-beta"
}
}
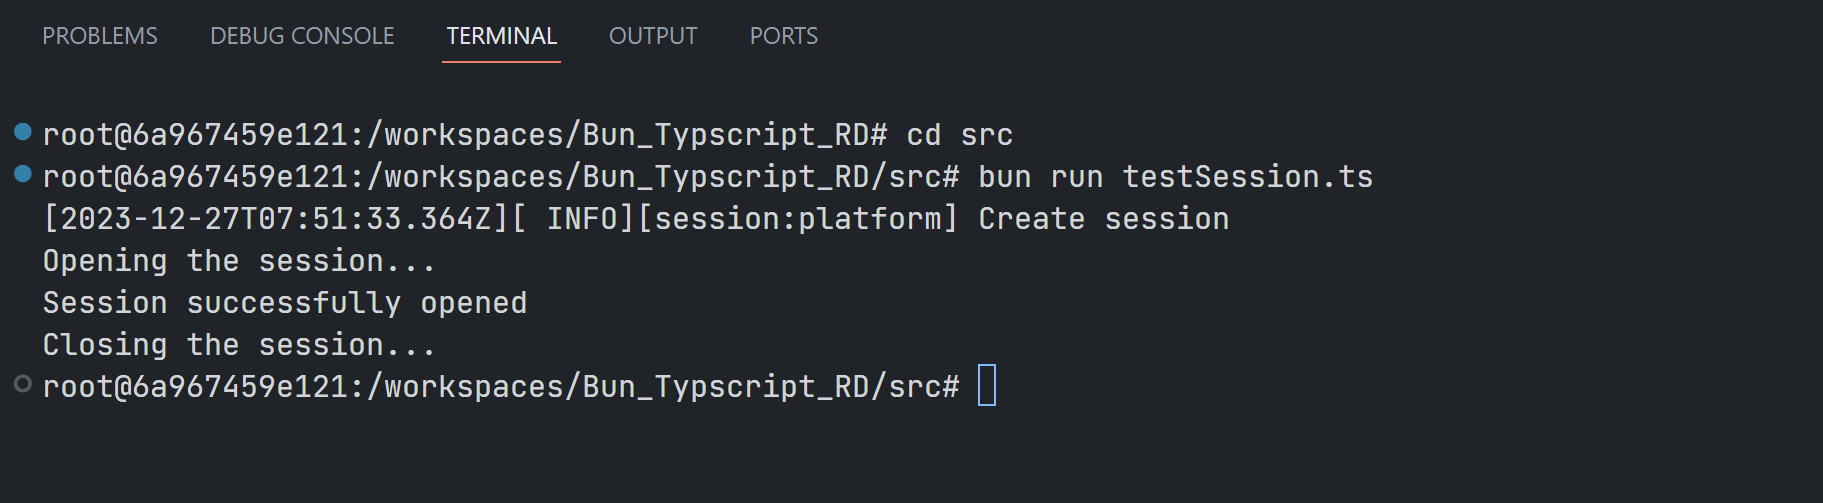
Then we create a test code as testSession.ts file in a src folder to test our Data Library installation.
//src/testSession.ts
import { Session } from '@refinitiv-data/data';
const session = Session.Platform.Definition({
appKey: 'Your App-Key'!,
userName: 'Your User-Id/Machine-ID'!,
password: 'Your RDP Password'!,
takeSignOnControl: true,
}).getSession();
(async () => {
try {
console.log('Opening the session...');
// open the session
await session.open();
console.log('Session successfully opened');
}
catch (err) {
console.log('Session failed to open !');
console.log(err);
}
finally {
console.log('Closing the session...');
await session.close();
}
})();
Result:
That covers the Data Library installation in our Bun project.
Step 3: The Content Layer
Now we come to the Data Library Content Layer feature. The Content layer refers to logical market data objects, representing financial items like level 1 market data prices and quotes, Order Books, News, Historical Pricing, Company Research data and so on.
Let's start with the HistoricalPricing.Summaries object that provides access to the historical pricing intraday (or other time periods) summary data, and the ability to filter them by types, such as start time, end time, and market session durations. We can start by creating a file name rdlib_historical-pricing.ts file in a src folder as follows.
//src/rdlib_historical-pricing.ts
import { HistoricalPricing, Session } from '@refinitiv-data/data';
const session = Session.Platform.Definition({
appKey: 'Your App-Key'!,
userName: 'Your User-Id/Machine-ID'!,
password: 'Your RDP Password'!,
takeSignOnControl: true,
}).getSession();
(async () => {
try {
console.log('Opening the session...');
// open the session
await session.open();
console.log('Session successfully opened');
const pricing1: any = HistoricalPricing.Summaries.Definition({
universe: 'IBM.N',
interval: HistoricalPricing.Summaries.IntradayInterval.ONE_MINUTE,
fields: ['TRDPRC_1', 'HIGH_1', 'LOW_1', 'OPEN_PRC', 'NUM_MOVES'],
count: 10
});
const response: any = await pricing1.getData(session);
if (response.data.table){
console.log('Historical pricing intraday summaries');
console.table(response.data.table);
} else {
console.log('No data received');
}
console.log('End program');
}
catch (err) {
console.log('Session failed to open !');
console.log(err);
}
finally {
console.log('Closing the session...');
await session.close();
}
})();
Then run the application with bun run rdlib_historical-pricing.ts command.
Result:
root:/workspaces/Bun_Typscript_RD/src# bun run rdlib_historical-pricing.ts
[2023-12-27T09:27:07.426Z][ INFO][session:platform] Create session
Opening the session...
Session successfully opened
[2023-12-27T09:27:09.167Z][ INFO][session:platform] Begin request sending...
Historical pricing intraday summaries
{
"0": {
DATE_TIME: "2023-12-26T23:30:00.000000000Z",
HIGH_1: 163.21,
LOW_1: 163.21,
OPEN_PRC: 163.21,
TRDPRC_1: 163.21,
NUM_MOVES: 1,
},
"1": {
DATE_TIME: "2023-12-26T21:10:00.000000000Z",
HIGH_1: 163.21,
LOW_1: 163.21,
OPEN_PRC: 163.21,
TRDPRC_1: 163.21,
NUM_MOVES: 1,
},
...
"9": {
DATE_TIME: "2023-12-26T20:53:00.000000000Z",
HIGH_1: 163.08,
LOW_1: 163.02,
OPEN_PRC: 163.08,
TRDPRC_1: 163.02,
NUM_MOVES: 22,
},
}
End program
Closing the session...
For more detail about the HistoricalPricing.Summaries object, please check the Data Library HistoricalPricing.Summaries.Definition document.
So, now let’s look at the News object that allows you to retrieve Headlines and Story data stored on the Data Platform. The code is rdlib_news.ts in a src folder.
Source Code:
import { News, Session } from '@refinitiv-data/data';
const session = Session.Platform.Definition({
appKey: 'Your App-Key'!,
userName: 'Your User-Id/Machine-ID'!,
password: 'Your RDP Password'!,
takeSignOnControl: true,
}).getSession();
(async () => {
try {
console.log('Opening the session...');
// open the session
await session.open();
console.log('Session successfully opened');
const news1: any = News.Headlines.Definition({
query: 'Thailand Prime Minister',
sort: News.Headlines.SortDirection.NewToOld,
count: 10
});
const headlines: any = await news1.getData(session);
if (headlines.data.table){
const storyID = headlines.data.table['0'].storyId;
console.log(`Most recent news headline: ${storyID}`);
if(typeof(storyID) === 'string'){
const stDef = News.Story.Definition(storyID);
const story: any = await stDef.getData(session);
console.log(`News Story: ${JSON.stringify(story.data)}`);
}
} else {
console.log('No data received');
}
console.log('End program');
}
catch (err) {
console.log('Session failed to open !');
console.log(err);
}
finally {
console.log('Closing the session...');
await session.close();
}
})();
Result:
root:/workspaces/Bun_Typscript_RD/src# bun run rdlib_news.ts
[2023-12-27T09:38:56.602Z][ INFO][session:platform] Create session
Opening the session...
Session successfully opened
[2023-12-27T09:38:58.903Z][ INFO][session:platform] Begin request sending...
Most recent news headline: urn:newsml:reuters.com:20231226:nNDL76P6Jq:1
[2023-12-27T09:38:59.387Z][ INFO][session:platform] Begin request sending...
News Story: {"raw":{"newsItem":{"_conformance":"power","_guid":"tag:reuters.com,2023-12-26:newsml_NDL76P6Jq","_standard":"NewsML-G2","_standardversion":"2.18","_version":1,"catalogRef":[{"_href":"http://xml.media.reuters.com/g2-standards/catalogs/ReutersMedia_G2-Standards-Catalog_v1.xml"}],"rightsInfo":[{"copyrightHolder":{"_literal":""},"copyrightNotice":[{"$":"(C) Copyright 2023 - Ministry of Foreign Affairs of the Kingdom of Thailand"}]}],"itemMeta":{"itemClass":{"_qcode":"ninat:text","_rtr:msgType":"S"},"provider":{"_literal":"reuters.com"},"versionCreated":{"$":"2023-12-26T12:02:04.000Z"},"firstCreated":{"$":"2023-12-26T12:02:04.000Z"},"pubStatus":{"_qcode":"stat:usable"},"role":{"_qcode":"itemRole:N"},"title":[{"$":"Ministry of Foreign Affairs of the Kingdom of Thailand - Prime Minister of Thailand attended the 4th Mekong-Lancang Cooperation Leaders’ Meeting"}],
...
End program
Closing the session...
For more detail about the News.Headlines and News.Story objects, please check the Data Library News document.
That is all for the Data Library Content Layer.
Step 4: The Delivery Layer
My next point is the Data Library Delivery Layer. The Delivery layer refers to lowest abstraction layer of the library such as Level 1 & 2 Streaming Data and Request/Reply data endpoints interfaces, etc. This article is focusing on the Delivery interface to retrieve LSEG content directly from an Endpoint.
Endpoint Interface
The Endpoint interface allows the application to request LSEG data/content from the RDP data endpoint URL directly. Unlike sending the HTTP requests to the RDP RESTFul API directly, the application with Endpoint interface does not need to manual sends authentication request and access token to the endpoint because the Library always manages that process for the application.
The summary steps are as follows:
- Open the session
- Defining an Endpoint. Defining an Endpoint At the heart of the Endpoint Request interfaces, is the data endpoint URL.
- Defining Endpoint Request Properties such as Query Parameters, Path Parameters, Headers, or Body Parameters (for the HTTP POST).
The examples of the data endpoint URLs are as follows:
- Historical Pricing: https://api.refinitiv.com/data/historical-pricing/v1/views/events
- News Headlines: https://api.refinitiv.com/data/news/v1/headlines
- Symbology Lookup: https://api.refinitiv.com/discovery/symbology/v1/lookup
- Basic ESG scores: https://api.refinitiv.com/data/environmental-social-governance/v2/views/basic
Please find more detail about the endpoint URLs and parameters of each API from the API Playground page.
I am demonstrating with the https://api.refinitiv.com/file-store/v1/ endpoints for downloading the Client File Store (CFS) file distribution.
Firstly, let's create a TypeScript class file named genericCFS.ts file with the following content:
//genericCFS.ts
import { Session,Delivery } from '@refinitiv-data/data';
export class GenericCFSFile {
session: Session.Session;
cfs_api_version: string;
constructor(session:any, version = 'v1'){
this.session = session;
this.cfs_api_version = version;
}
/*
* Step 2: Listing the packageId using the Bucket Name
*
* To request the CFS Bulk data, the first step is to send an HTTP ```GET``` request to the RDP
* ```/file-store/v1/packages?bucketName={bucket-name}``` endpoint to list all package Ids under the input ```bucket-name```.
*
*/
listPackageIds = async (bucket_name = '') => {
if(bucket_name.length === 0){
throw new Error('Received invalid (None or Empty) argument');
}
let response:any = {};
try{
const param: Delivery.EndpointRequestDefinitionParams = {
url: `/file-store/${this.cfs_api_version}/packages`,
method: Delivery.EndpointRequest.Method.GET,
queryParameters: {
'bucketName' : bucket_name}
};
const def = Delivery.EndpointRequest.Definition(param);
response = await def.getData(this.session);
}
catch (err) {
console.log(`Failed to request RDP /file-store/${this.cfs_api_version}/packages`);
console.log(err);
throw new Error(`Failed to request RDP /file-store/${this.cfs_api_version}/packages`);
}
return response;
}
}
The listPackageIds() method above receives a bucket name from a caller, and then sends the HTTP GET request to the RDP https://api.refinitiv.com/file-store/v1/packages?bucketName={bucket-name} endpoint to list all Package Ids under the input bucket-name.
Next, create a main file name rdlib_cfsWorkflow.ts to call this GenericCFSFile class. The file uses the `Green Revenue bucket (bulk-greenrevenue) as an example Bucket data set.
//rdlib_cfsWorkflow.ts
import { Session } from '@refinitiv-data/data';
import {GenericCFSFile} from './genericCFS.ts';
const session = Session.Platform.Definition({
appKey: 'Your App-Key'!,
userName: 'Your User-Id/Machine-ID'!,
password: 'Your RDP Password'!,
takeSignOnControl: true,
}).getSession();
(async () => {
try {
console.log('Opening the session...');
/*
* Step 1: Authentication with RDP APIs.
*
*/
// open the session
await session.open();
console.log('Session successfully opened');
const cfsFile = new GenericCFSFile(session);
let response:any = null;
/*
* Step 2: Listing the packageId using the Bucket Name
*
* To request the CFS Bulk data, the first step is to send an HTTP ```GET``` request to the RDP
* ```/file-store/v1/packages?bucketName={bucket-name}``` endpoint to list all package Ids under the input ```bucket-name```.
*
*/
const bucket_name: string = 'bulk-greenrevenue';
response = await cfsFile.listPackageIds(bucket_name);
if(response.data['value'].length === 0){
console.log('No data received');
process.exit(1);
}
console.log(`Received data: ${JSON.stringify(response.data['value'][0], null, ' ')}`);
...
}
catch (err) {
console.log('Session failed to open !');
console.log(err);
}
finally {
console.log('Closing the session...');
await session.close();
}
})();
You see that the rdlib_cfsWorkflow.ts CFS consumer application does not need to send an authentication request to the RDP https://api.refinitiv.com/auth/oauth2/v1/token endpoint and sends the access token to the CFS endpoint manually, the Library manages all that processes for the application.
The rest of the workflow rdlib_cfsWorkflow.ts and genericCFS.ts files are implemented based on the A Step-By-Step Workflow Guide for RDP Client File Store (CFS) API article. The completed files are available on the GitHub repository.
Example Result of the completed workflow application:
root:/workspaces/Bun_Typscript_RD/src# bun run rdlib_cfsWorkflow.ts
[2024-01-03T07:25:13.785Z][ INFO][session:platform] Create session
Opening the session...
Session successfully opened
[2024-01-03T07:25:15.289Z][ INFO][session:platform] Begin request sending...
Received data: {
"packageId": "4316-d43b-81c40763-8e6a-0dbec8162ab1",
"packageName": "Bulk-GR-Global-Standard-Full-v1",
"created": "2022-09-30T13:45:54Z",
"modified": "2023-02-10T09:41:50Z",
"packageType": "bulk",
"bucketNames": [
"bulk-GreenRevenue"
]
}
[2024-01-03T07:25:16.007Z][ INFO][session:platform] Begin request sending...
Received data: {
"id": "4183-52de-f8a62bcc-a89d-d0321783ae95",
"name": "Bulk-GR-Global-Summary-Full-v1-Jsonl-Delta-2023-12-03T21:00:23.469Z",
"bucketName": "bulk-GreenRevenue",
"packageId": "4e94-6d63-fea034dc-90e2-de33895bd4e9",
"attributes": [
{
"name": "ContentType",
"value": "GR Global Summary Full"
}
],
"files": [
"4b3c-df5e-74cf7606-821f-5aff2f998987"
],
"numFiles": 1,
"contentFrom": "2023-11-26T20:55:00Z",
"contentTo": "2023-12-03T20:55:00Z",
"availableFrom": "2023-12-03T21:00:27Z",
"availableTo": "2024-01-03T21:00:26Z",
"status": "READY",
"created": "2023-12-03T21:00:27Z",
"modified": "2023-12-03T21:00:28Z"
}
4b3c-df5e-74cf7606-821f-5aff2f998987
[2024-01-03T07:25:16.702Z][ INFO][session:platform] Begin request sending...
Received data: "https://a206464-bulk-greenrevenue.s3.amazonaws.com/Bulk-GR-Global-Summary-Full-v1/2023/12/03/Bulk-GR-Global-Summary-Full-v1-Delta-2023-12-03T21%3A00%3A23.469Z.jsonl.gz?...7ac55233ebcc53da50e8b8a"
Downloading Bulk-GR-Global-Summary-Full-v1-Delta-2023-12-03T21_00_23.469Z.jsonl.gz
Requesting File Success
Downloading Bulk-GR-Global-Summary-Full-v1-Delta-2023-12-03T21_00_23.469Z.jsonl.gz success
Closing the session...
That covers the Data Library Delivery feature demonstration.
Step 5: Bundler the application
Now we come to how to delivery the application using a bundler tool. A bundler is development tool for combinding multilple JavaScript/TypeScript files into a single file that optimized to be run in the client environment (web browsers, node runtime, etc). This single static file helps the client machine does not need to fetch many files including multiple dependencies.
While the Node.js applications need external tools like Webpack, Parcel, Rollup, etc for the module bulder, Bun has a native bundler tool out of the box. Developer can use a bun build command to produce a single distribution file.
Note: Bun's fast native bundler is now in beta phase.
How to Bundler the Project
Developers can use a bun build CLI command or the Bun.build() API. This article is focusing on the CLI command as follows:
$bun build --entrypoints {entrypoint} --outdir ./build --target {target} --minify
- entrypoints: (Required) An array of paths corresponding to the entrypoints of our application. One bundle will be generated for each entrypoint.
- outdir: (Required) The directory where output files will be written.
- target: The intended execution environment for the bundle. Now supports browser (default), bun (for generating bundles that are intended to be run by the Bun runtime), and node (for generating bundles that are intended to be run by Node.js)
- minify: To enable minification, False by default.
I am showing how to bundler the rdlib_cfsWorkflow application as follows:
root:/workspaces/Bun_Typscript_RD# bun build ./src/rdlib_cfsWorkflow.ts --outdir ./dist --target node --minify
./rdlib_cfsWorkflow.js 896.68 KB
[1.87s] bundle 567 modules
root:/workspaces/Bun_Typscript_RD#
Result:
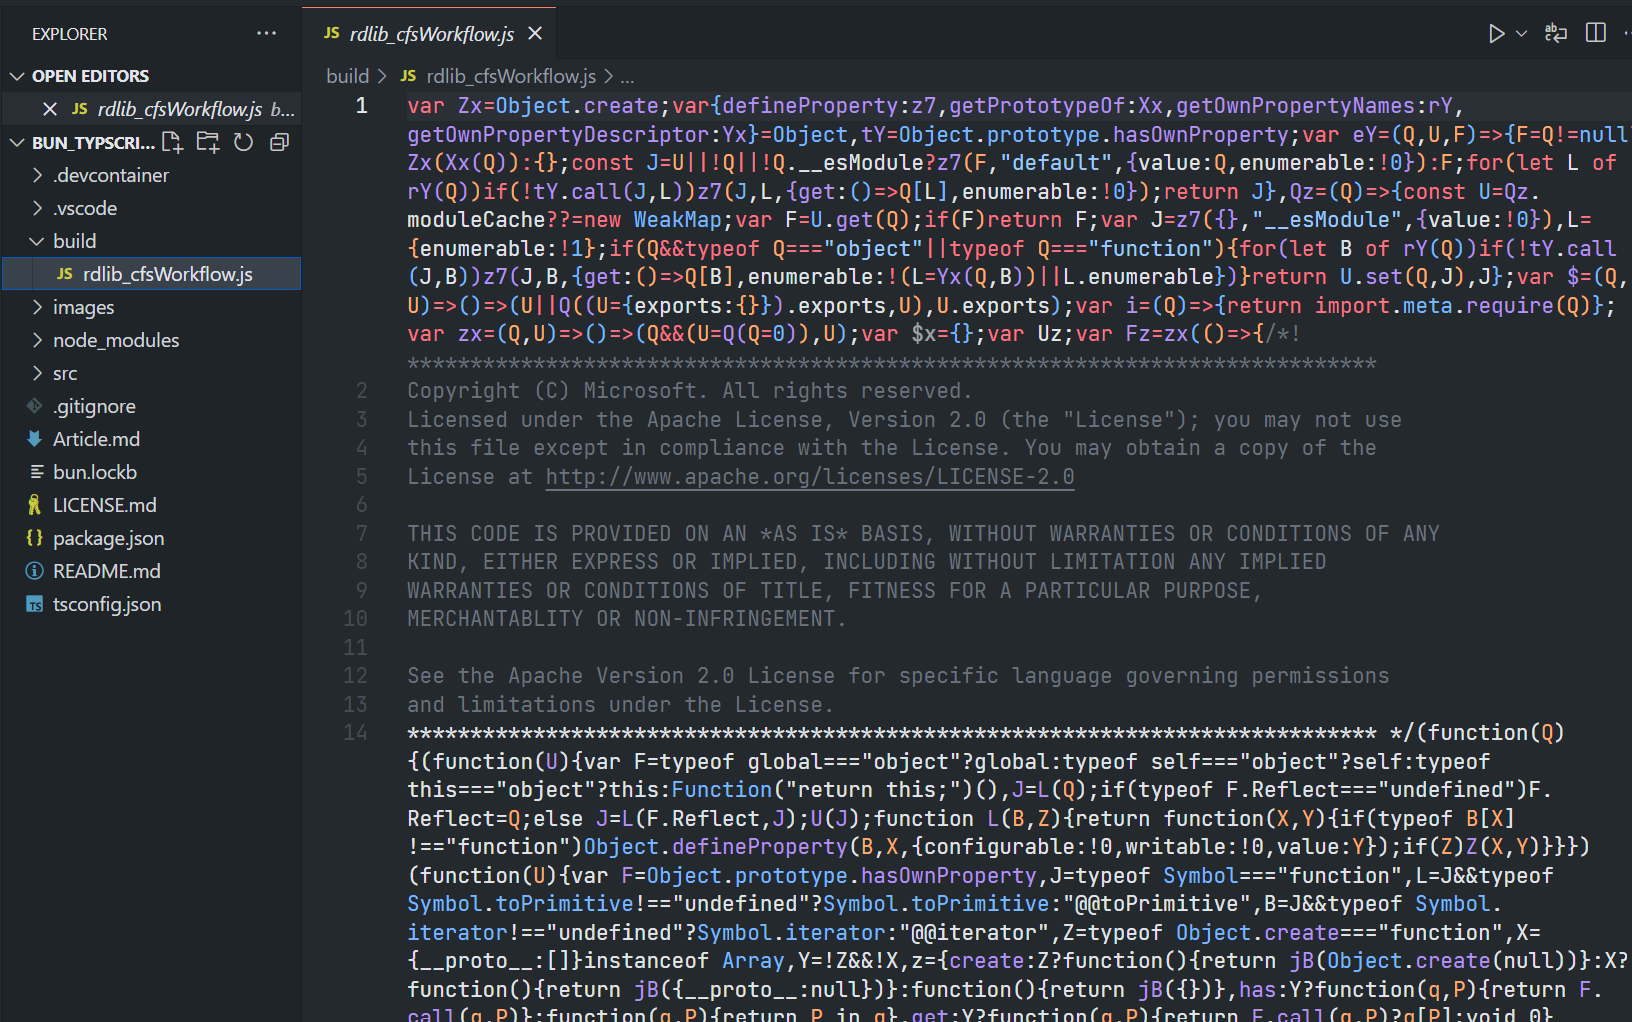
Then all dependencies have been bundled to a single ./dist/rdlib_cfsWorkflow.js application file. We can run this file to get the CFS data from RDP as follows:
root@:/workspaces/Bun_Typscript_RD# bun run ./dist/rdlib_cfsWorkflow.js
[2024-01-03T10:07:20.585Z][ INFO][session:platform] Create session
Opening the session...
Session successfully opened
[2024-01-03T10:07:21.308Z][ INFO][session:platform] Begin request sending...
Received data: {
"packageId": "4316-d43b-81c40763-8e6a-0dbec8162ab1",
"packageName": "Bulk-GR-Global-Standard-Full-v1",
"created": "2022-09-30T13:45:54Z",
"modified": "2023-02-10T09:41:50Z",
"packageType": "bulk",
"bucketNames": [
"bulk-GreenRevenue"
]
}
...
If you want to compile tha application into a standalone binary, Bun support this feature with --compile flag with a bun build command. Please check Bun.Build document for more detail about Bun bundler tool and parameters.
That completes my Bun JavaScript runtime experiment with Data Library - TypeScript.
How to run the demo application
Please check a step-by-step guide to run the demo application with VS Code Devcontainer or Docker on the GitHub repository page.
Conclusion
Before I finish, let me just say while the Node.js is still a de factor platform for the JavaScript/TypeScript application development, Bun is a good alternative platform for JavaScript/TypeScript developers. It provides a fast runtime, simplify APIs, well written document, and all-in-one toolkit (development, runtime, test, and bundler) for developers. The Node.js-compatible package manager is also a killer feature that makes Node.js developers feel right-at-home when using Bun.
This leads to how easy to use Bun with the easy-to-use Data Library for TypeScript. When combining the library development experience with Bun runtime and toolset, developers can create applications that connect and consume data from the Data Platform (aka Delivery Platform or RDP, formerly known as Refinitiv Data Platform) easier and faster when comparing to using Node.js.
However, please be noticed that the Data Library for TypeScript is not qualified with Bun runtime yet. But this Prove of Concept (POC) project shows that once the Bun becomes a mainstream platform, developers can start using it with the Data Library with confident.
References
That brings me to the end of my Bun - Data Library TypeScript project. For further details, please check out the following resources:
- Data Library for TypeScript page on the LSEG Developer Community website.
- Data Libraries Family page.
- Getting started with Data Library for TypeScript.
- Data Library for TypeScript Tutorials.
- Data Library for TypeScript Examples.
- Bun Official website.
- Bun Official Documents.
- Bun Official Guides.
- Bun Official Guides: Install TypeScript declarations for Bun.
- Bun Official Guides: Containerize a Bun application with Docker.
- How To Dockerize A Bun App blog post.
- Bun on DockerHub.
For any questions related to Data Library for TypeScript, please use the Developers Community Q&A page page.
Related Articles
-
Limitations and Guidelines for the RDP Authentication Service
-
Getting Started with Refinitiv Data Platform
-
A Step-By-Step Workflow Guide for RDP Client File Store (CFS) API
-
Building a proprietary web application with LSEG Workspace SDK: An Options RIC Search use case
-
Building proprietary back-ends: Using Node.js, Express Framework, and Mongoose for web application development
-
Building web application using React JS and UI Elements
-
Enhancing web app functionality: Leveraging the SDK to integrate with workspace web