World-Check Verify
Key terminology
Groups
The Groups feature allows clients to organise and manage screening configurations based on business needs or organisational structure. A group enables tailored screening policies that can be applied dynamically during screening requests.
- Risk-Based Segmentation: Apply stricter screening rules for high-risk segments and lighter configurations for low-risk segments.
- Organisational Alignment: Assign different business units or regions their own group with custom screening policies.
- Policy Control: Each group can have its own screening configuration, including match thresholds, data sources, and auto-resolution settings.
You may refer this quick start guide to create/manage your tailored policies in our Policy manager app, configure auto-resolution settings and promote to relevant groups.
Screen
Screening is the process of matching a name against official or proprietary watchlists to identify potential risks. World-Check Verify allows you to perform real-time screening of individuals, organisations, vessels, etc. against selected risk data sources such as Sanctions, Law & Regulatory enforcement lists, PEPs, adverse media, and private watchlists. The screening API accepts one or more names and optional secondary identifiers (e.g., date of birth, nationality, identity document number, etc.) and returns potential matches based on the selected screening configuration.
Getting Started with Postman
There may be several different tools, code examples, and libraries that you can use to make a request to World-Check Verify. We are going to use the Postman tool in this developer portal for all the examples. Postman is a desktop and web application that allows you to make HTTP requests to a REST API from a graphical user interface. We recommend using Postman to explore the API’s functionality, and when you are troubleshooting issues.
Note: This is by no means an endorsement of Postman, it is just an example to get you started. Feel free to use any other tool or REST client that you may prefer.
Prerequisite: Before you get started with Postman, you will need to make sure you have appropriate product access and credentials.
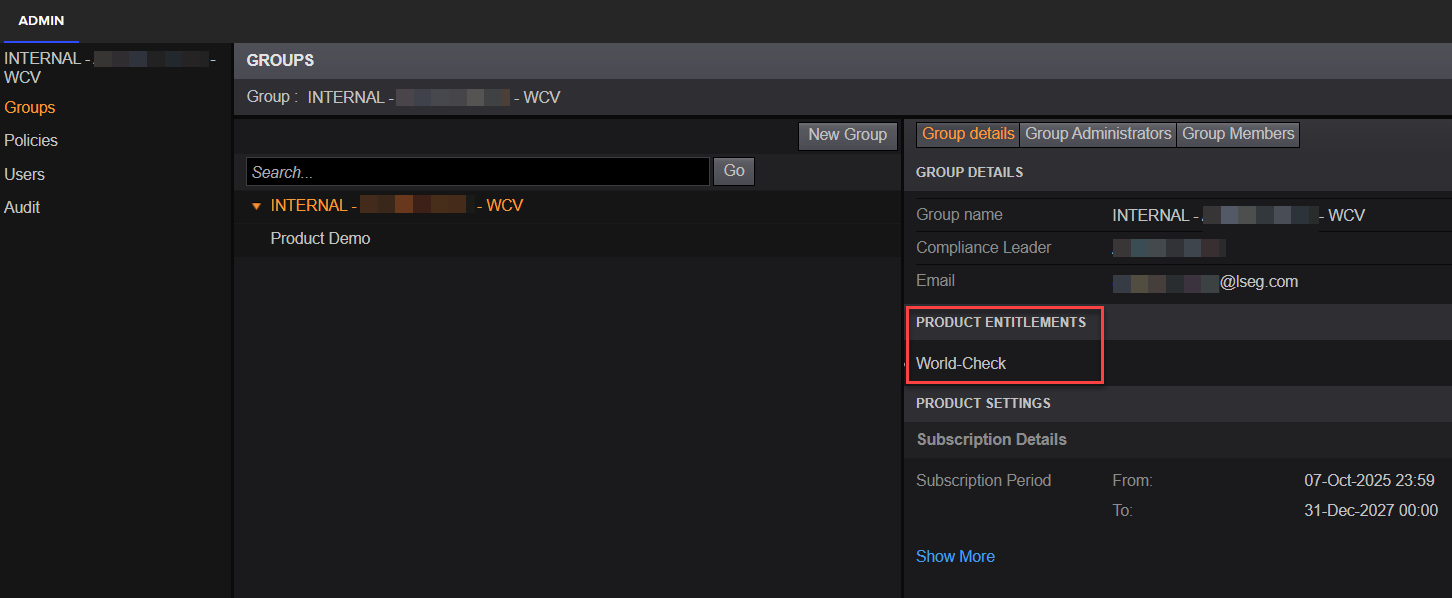
If you have the necessary access, you will find the following service account credentials which are required to generate a token to access World-Check Verify.
| service-account-uuid | The unique identifier of the service account (client id in oauth terminology) |
| service-account-password | The password of the service account (client secret in oauth terminology) |
If you have access to World-Check Verify but do not have a service account yet, refer Authentication to create one and obtain the service account credentials.
Note: You will usually be given one Pilot account and one Production account, unless you are using one of our World-Check Verify partner solutions – in which case you will be given direct access to Production account considering our Partner already has a valid integration with our API. The service account credentials will be different for both the accounts. You may use your Pilot account for your development and basic testing purposes before you go-live with your Production account.
If you do not have necessary access or credentials, contact your LSEG Account team.
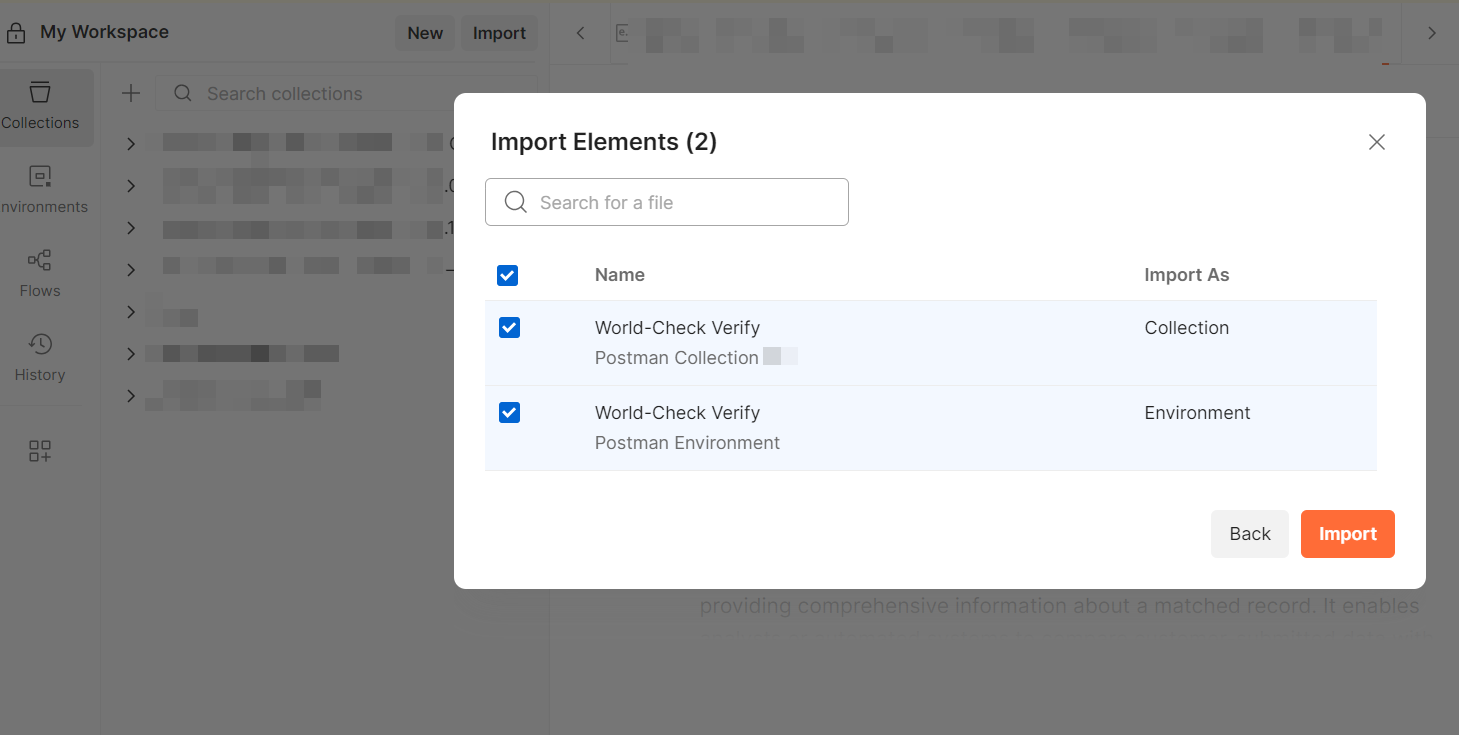
Step 1: Import World-Check Verify Postman collection and Postman environment files into your Postman application
While you could build out the specific endpoints that you’d like to use within Postman, we did all the heavy lifting for you and built out a ready to use Postman collection with sample requests and Postman environment for all the necessary variables. Download and import both collection and environment (.json) files into your Postman app to add all the World-Check Verify endpoints.
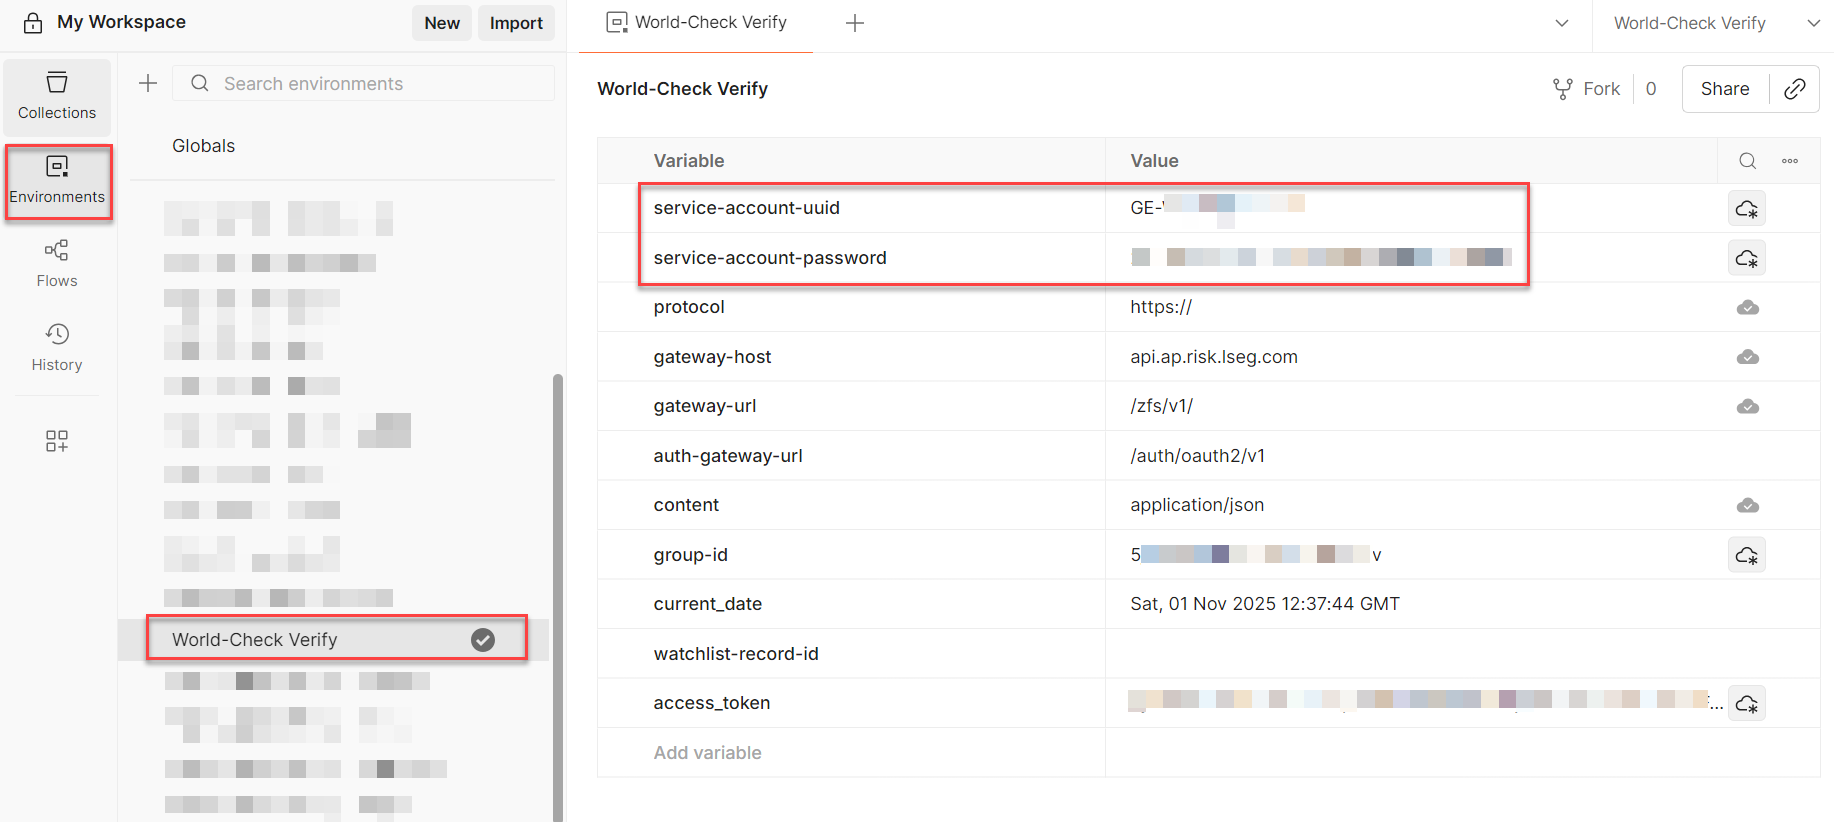
Step 2: Add your Service Account credentials to your Postman environment
Once you have imported your Postman environment, you can add your credentials to the environment file to start exploring the API functionality.
Click on “Environments” and select the World-Check Verify environment that you just imported. Add your service-account-uuid and service-account-password to the respective variables under “Value”.
Note: You may have to click on "Save" if you are using older Postman version.
Make your first API request
Now that you have setup your Postman with valid credentials, you can follow below steps to make your first API request to World-Check Verify.
Step 1: Choose a tool to make your request
As mentioned above, there may be several different tools, code examples, and libraries that you can use to make an API request to World-Check Verify, but we are going to use the Postman tool in this developer portal for all the examples. We recommend checking out Getting Started with Postman section if you haven’t setup your Postman yet. This is necessary to make your first API request to World-Check Verify using this quick start guide.
Make sure below key environment variables are properly set along with service-account-uuid and service-account-password in whichever tool you use.
content-type: application/json
protocol: https://
gateway-host: api.ap.risk.lseg.com
gateway-url: /zfs/v1/
auth-gateway-url: /auth/oauth2/v1/
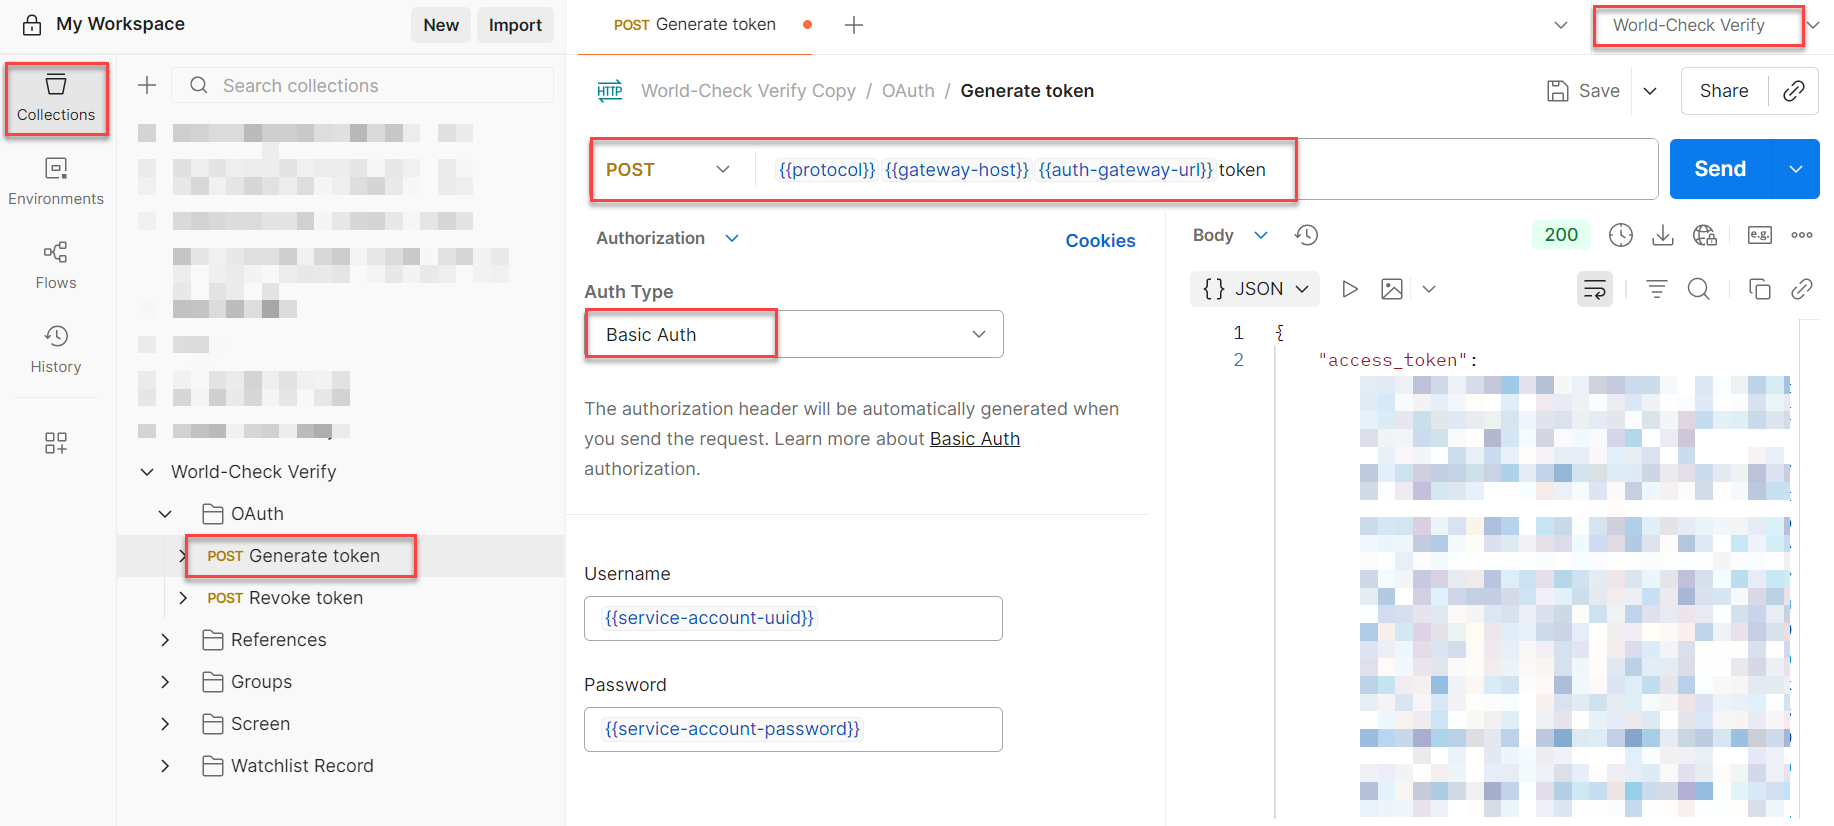
Step 2: Generate Access Token
Once you have your service-account-uuid and service-account-password, you can Generate Access Token using below endpoint. Ensure "Auth Type" is "Basic Auth" under Authorization.
Endpoint: “POST /auth/oauth2/v1/token”
Endpoint name in Postman collection: “Generate token”
Step 3: Select an endpoint
You can find the complete list of endpoints that are available in World-Check Verify within our API Schema Reference, but we recommend using below endpoint for the purpose of making your first API request to World-Check Verify.
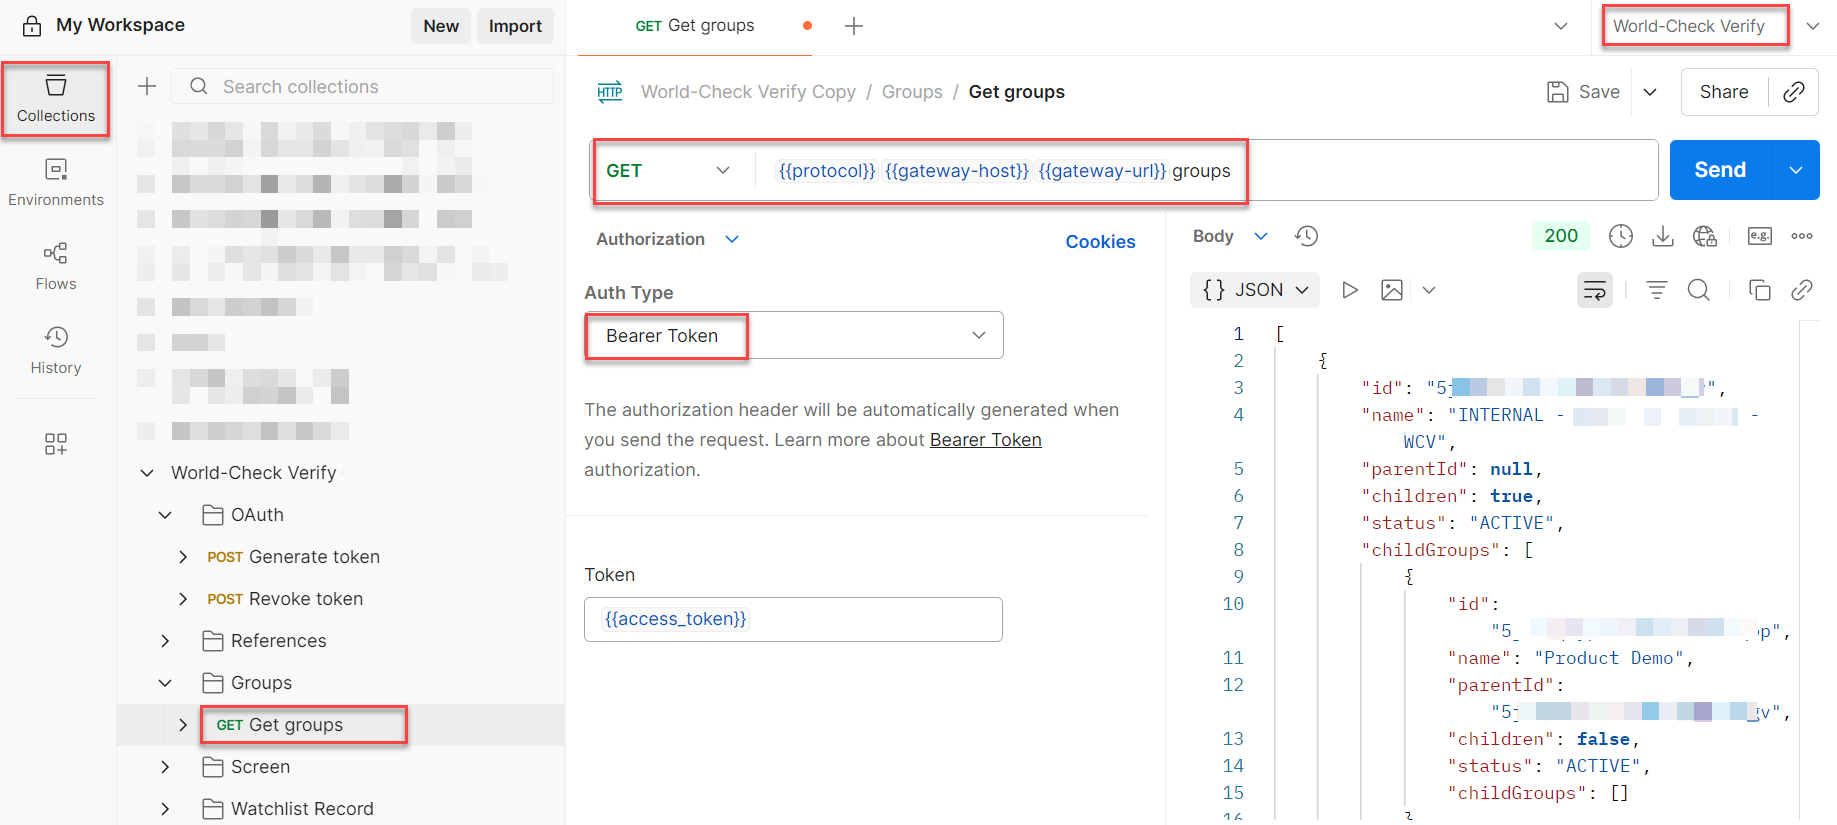
Endpoint: “GET /groups”
Endpoint name in Postman collection: “Get groups”
Step 4: Send your request and review your response
Select “GET /groups” endpoint within the imported Postman collection. Under Authorization, select "Auth Type" as "Bearer Token". Ensure you are using the access token you received in Step 2. If everything is setup properly, you should receive a response similar to below with a successful response code “200”.
Note: You may receive error 401 (unauthorized access) if you do not use correct URL or credentials, error 403 (permission denied) if you do not have necessary access permissions, and error 415 (unsupported media type) if you do not use correct content-type.
Screen a name and review the screening results
Assuming you have successfully made your first API request, you can follow the steps shown in How to perform a full screen tutorial to screen a name using Postman and review the screening results within the response.