
Moragodkrit Chumsri
Developer Advocate
Developer Advocate
Updated: 18 Mar 2025
Overview
Real-time SDK (RTSDK) C++ version 1.2 and higher supports open sourcing and uses more standards-based, freely-available open source tools to provide additional flexibility and benefit. There are changes in a directory structure and it also changes the ways developer compiles and builds the tools and examples inside the RTSDK package. The developer has to use CMake to generate Linux Makefile and Visual Studio solution for both EMA and ETA projects. In versions prior to 1.2, the RTSDK APIs were built without a CMake harness (i.e., developers used the static build files with other utilities such as Visual Studio or Linux make to build the APIs). With the open-source version 1.2 RTSDK release, no make files and Visual Studio project provided in the package. You can refer to RTSDK C/C++ 1.2 Migration Guide (RTSDK_C_Migration_Guide.pdf) provided in the RTSDK package for additional details about the change inside the package including the details about CMake specific options for EMA and ETA that you can use to generate Visual Studio solution and build files.
The main objective of this article is to help new API users who do not have experience with CMake to start using RTSDK as quick as possible. This article could be a quick starter guide to provides sample CMake command for the user so that they can use sample command to generate build files and it should save time to learn CMake. This article also describes how to use CMake GUI with the RTSDK, the GUI would be a better tool for the user who doesn't prefer the command line.
Getting Started with Real-Time C/C++ SDK with VS and Windows
In this tutorial video, we go through how one may go about getting started with C++, specifically using Real-Time Software Development Kit (RTSDK) to get tick financial market data. We start with the prerequisites, including the installation of CMake.. It covers a sub-set of this article that goes further, including Linux and CMake GUIs.
CMake Installation
The first step of using the new version of RTSDK, please make sure that you have CMake installed on your Windows or Linux. For both Windows and Linux, at the time of writing, LSEG supports only the use of CMake version 3.14 or later. You can download CMake from cmake.org and you can find installation instructions from the section 'Installing CMake'. After installing CMake you should see cmake and cmake-gui executable files under CMake installation folder such as C:\Program Files\CMake\bin. We suggest you add the binary path to system PATH for your convenience.
We use version 3.31.6 which is the latest version at the time we write this article. You can check your CMake version by using the command cmake --version.
c:\dev\RTSDK>cmake --version
cmake version 3.31.6
CMake suite maintained and supported by Kitware (kitware.com/cmake).
c:\dev\RTSDK>
Building with CMake on Windows
1.) You can download Real-time SDK C/C++ and Real-Time-SDK.binarypack from developer portal. Then unpack RTSDK packages to directory of your choice. Note that in this article, we install the RTSDK in folder "C:\dev\RTSDK", the path will be sourceDir in the next step.
2.) Open a command window: on the Windows menu, in Search programs and files, type cmd and press ENTER.
3.) Issue command cmake -HsourceDir -BbuildDir -G “VisualStudioVersion” [-Doption ... ]
Where:
• sourceDir is the directory in which the top-level CMake entry point (CMakeLists.txt) resides. By default, when you build using the Solution and vcxproj files, output is sent to directory specified in SourceDir.
• buildDir is the CMake binary directory (for the CMake build tree).
• VisualStudioVersion is the Visual Studio generator (e.g., Visual Studio 17 2022). You can find list of Visual Studio generator from CMake online manual.
• option is a command line option and its associated value (e.g., -DBUILD_EMA_UNITTESTS=OFF). You can control aspects of how CMake builds the RTSDK by using command line options (for further details on the use of options, refer to Section __CMake Build Configuration Options__) from the RTSDK Installation Guide (RTSDK_C_Installation_Guide.pdf).
You can also use the following sample of a command line to generate Visual Studio project files for specific use cases. Below is sample command line you can used to generate build files.
Sample 1 Generate Visual Studio 2022 project files for building both ETA and EMA Examples and TestTools. The command line will skip the UnitTest and GoogleTest projects. It will generate the projects under folder c:\dev\RTSDK\VisualStudio2022.
cd c:\dev\RTSDK
C:\dev\RTSDK>dir
Volume in drive C is OS
Volume Serial Number is 4A16-1A34
Directory of C:\dev\RTSDK
03/18/2025 03:28 PM <DIR> .
03/18/2025 03:28 PM <DIR> ..
01/18/2025 07:28 AM <DIR> CMake
01/18/2025 07:28 AM 1,409 CMakeLists.txt
01/18/2025 07:28 AM <DIR> Cpp-C
01/18/2025 07:29 AM <DIR> external
01/18/2025 07:29 AM <DIR> installdb
01/18/2025 07:28 AM 712 LICENSE.md
01/18/2025 07:28 AM 6,129 README.md
12/12/2024 11:15 PM <DIR> RTSDK-BinaryPack
3 File(s) 8,250 bytes
7 Dir(s) 41,981,923,328 bytes free
C:\dev\RTSDK>
c:\dev\RTSDK>cmake -H. -BVisualStudio2022 -G "Visual Studio 17 2022" -DBUILD_EMA_UNIT_TESTS=OFF -DBUILD_ETA_APPLICATIONS=ON -DBUILD_UNIT_TESTS=OFF -DBUILD_ETA_UNIT_TESTS=OFF
Below is sample outputs from the command line
C:\dev\RTSDK>cmake -H. -BVisualStudio2022 -G "Visual Studio 17 2022" -DBUILD_EMA_UNIT_TESTS=OFF -DBUILD_ETA_APPLICATIO
NS=ON -DBUILD_UNIT_TESTS=OFF -DBUILD_ETA_UNIT_TESTS=OFF
-- Selecting Windows SDK version 10.0.22621.0 to target Windows 10.0.19045.
-- The C compiler identification is MSVC 19.42.34436.0
-- The CXX compiler identification is MSVC 19.42.34436.0
-- Detecting C compiler ABI info
-- Detecting C compiler ABI info - done
-- Check for working C compiler: C:/Program Files/Microsoft Visual Studio/2022/Professional/VC/Tools/MSVC/14.42.34433/
bin/Hostx64/x64/cl.exe - skipped
-- Detecting C compile features
-- Detecting C compile features - done
-- Detecting CXX compiler ABI info
-- Detecting CXX compiler ABI info - done
-- Check for working CXX compiler: C:/Program Files/Microsoft Visual Studio/2022/Professional/VC/Tools/MSVC/14.42.3443
3/bin/Hostx64/x64/cl.exe - skipped
-- Detecting CXX compile features
-- Detecting CXX compile features - done
Setting possible configuration types to Debug_MDd and Release_MD
-- Selecting Windows SDK version 10.0.22621.0 to target Windows 10.0.19045.
-- Configuring done (2.8s)
-- Generating done (0.2s)
-- Build files have been written to: C:/dev/RTSDK/VisualStudio2022/external/BUILD/rtsdk-binarypack/build
MSBuild version 17.12.12+1cce77968 for .NET Framework
...
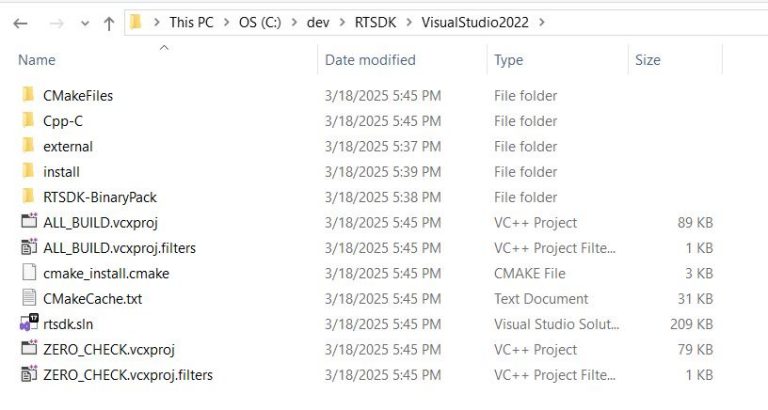
Please note that by default, CMake builds the RTSDK using the optimized build option. For the debug version, please add –DCMAKE_BUILD_TYPE=Debug to the command line. Open the folder in Windows Explorer you will see required files generate in folder VisualStudio2022. The RTSDK.sln contains all projects inside RTSDK package.
Open rtsdk.sln on Visual Studio 2022 you should see all projects from ETA and EMA package under the solution. Below screenshot is the project for EMA example: 100_MP_Streaming. CMake will add the location of source files, header files, and libraries required by the project based on the location of the sourceDir directory we specified in the first step.
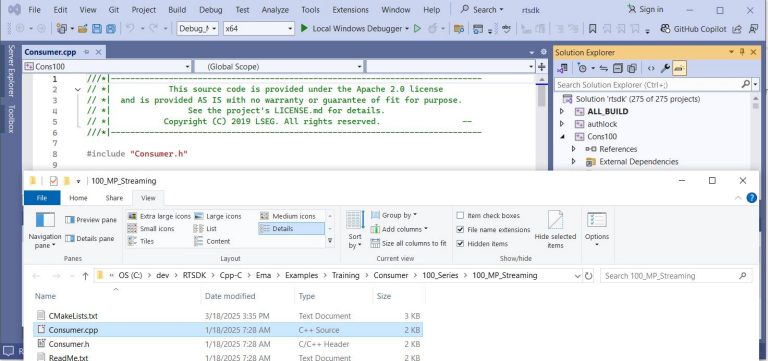
You can also access the project files for each Example directly, it locates under folder VisualStudio2022.
Sample 2 Generate only Visual Studio project for either EMA or ETA.
You can use the following command to generate EMA Example and TestTools solution file with the Debug build.
c:\dev\RTSDK>cmake -H. -BVisualStudio2022 -G "Visual Studio 17 2022" -DBUILD_EMA_UNIT_TESTS=OFF -DBUILD_ETA_APPLICATIONS=OFF -DBUILD_UNIT_TESTS=OFF -DBUILD_ETA_UNIT_TESTS=OFF -DCMAKE_BUILD_TYPE=Debug
To generate ETA Example and TestTools solution and project files with the Debug build, use the following command.
c:\dev\RTSDK>cmake -H. -BVisualStudio2022 -G "Visual Studio 17 2022" -DBUILD_EMA_UNIT_TESTS=OFF -DBUILD_ETA_APPLICATIONS=ON -DBUILD_UNIT_TESTS=OFF -DBUILD_ETA_UNIT_TESTS=OFF -DBUILD_EMA_EXAMPLES=OFF -DBUILD_EMA_PERFTOOLS=OFF -DBUILD_EMA_LIBRARY=OFF -DBUILD_EMA_TRAINING=OFF -DCMAKE_BUILD_TYPE=Debug
Building with CMake on Linux
RTSDK uses the default gnu compiler provided by CMake and included in the Linux distribution. For supported OS and compilers, refer to the API Compatibility Matrix.
1.) Obtains the RTSDK C++ Linux package and RTSDK.Binary package from the developer community and then unpack the packages to a directory of your choice. In this article, we use RedHat Enterprise Linux 9 and we unpack the package to /opt/RTSDK. We will use folder RTSDK2 as sourceDir when running CMake.
[root@bcc9512ba21c RTSDK2]# pwd
/opt/RTSDK/RTSDK2
[root@bcc9512ba21c RTSDK2]# ls -al
total 52
drwxr-xr-x 7 1069 1001 4096 Mar 18 10:18 .
drwxr-xr-x 1 root root 4096 Mar 18 10:17 ..
drwxr-xr-x 2 1069 1001 4096 Jan 18 00:30 CMake
-rwxr-xr-x 1 1069 1001 1409 Jan 18 00:30 CMakeLists.txt
drwxr-xr-x 5 1069 1001 4096 Jan 18 00:30 Cpp-C
-rwxr-xr-x 1 1069 1001 712 Jan 18 00:30 LICENSE.md
-rwxr-xr-x 1 1069 1001 4135 Jan 18 00:30 LinuxSoLink
-rwxr-xr-x 1 1069 1001 6129 Jan 18 00:30 README.md
drwxr-xr-x 6 root root 4096 Dec 12 16:15 RTSDK-BinaryPack
drwxr-xr-x 3 1069 1001 4096 Jan 18 00:30 external
drwxr-xr-x 5 1069 1001 4096 Jan 18 00:30 installdb
[root@bcc9512ba21c RTSDK2]#
There is a note for Linux developer that the RTSDK C++ requires OpenSSL development and Python so you may need to install openssl-devel and Python packages by calling the following command.
sudo yum install openssl-devel python3
2.) Run the LinuxSoLink script: at a command prompt (e.g., in a terminal window) from the sourceDir directory, issue the command:
./LinuxSoLink
3.) At a command prompt (e.g., in a terminal window), issue the command from the directory immediately above sourceDir:
cmake -HsourceDir -BbuildDir [-Doption ...]
Where:
• sourceDir is the directory in which the top-level CMake entry point (CMakeLists.txt) resides. By default, when you build using Makefile files, output is sent to directory specified in sourceDir.
• buildDir is the CMake binary directory (for the CMake build tree).
• option is a command line option and its associated value (e.g., -DBUILD_EMA_UNIT_TESTS=OFF). You can control aspects of how CMake builds the RTSDK by using command line options.
The CMake command builds all needed Makefile files (and related dependencies) in the CMake build tree in their associated directories (i.e., example executables are in the Executables directory and libraries (e.g., libema.lib, librssl.lib) in the Lib directory). You open these files and build all libraries and examples in the same fashion as you did with a prior version of RTSDK. You can run CMake to generate build files using the same options as the use cases from the previous topic.
For example,
You want to generate build files for EMA and ETA Training examples with TestTools and use Debug option. You can just use the following command line:
cmake -H. -Bbuildfiles_debug -DBUILD_EMA_UNIT_TESTS=OFF -DBUILD_ETA_APPLICATIONS=ON -DBUILD_UNIT_TESTS=OFF -DBUILD_ETA_UNIT_TESTS=OFF -DCMAKE_BUILD_TYPE=Debug
It will show below output and generate all needed Makefiles under folder RTSDK/buildfiles_debug. You can just access the examples folder under buildfiles_debug and issue make command to build an individual project.
[root@bcc9512ba21c RTSDK2]# cmake -H. -Bbuildfiles_debug -DBUILD_EMA_UNIT_TESTS=OFF -DBUILD_ETA_APPLICATIONS=ON -DBUILD_UNIT_TESTS=OFF -DBUILD_ETA_UNIT_TESTS=OFF -DCMAKE_BUILD_TYPE=Debug
-- The C compiler identification is GNU 11.5.0
-- The CXX compiler identification is GNU 11.5.0
-- Detecting C compiler ABI info
-- Detecting C compiler ABI info - done
-- Check for working C compiler: /usr/bin/cc - skipped
-- Detecting C compile features
-- Detecting C compile features - done
-- Detecting CXX compiler ABI info
-- Detecting CXX compiler ABI info - done
-- Check for working CXX compiler: /usr/bin/c++ - skipped
-- Detecting CXX compile features
-- Detecting CXX compile features - done
-- Configuring done (0.0s)
-- Generating done (0.0s)
-- Build files have been written to: /opt/RTSDK/RTSDK2/buildfiles_debug/external/BUILD/rtsdk-binarypack/build
[ 12%] Creating directories for 'rtsdk-binarypack'
[ 25%] No download step for 'rtsdk-binarypack'
[ 37%] No update step for 'rtsdk-binarypack'
[ 50%] No patch step for 'rtsdk-binarypack'
[ 62%] Performing configure step for 'rtsdk-binarypack'
-- The C compiler identification is GNU 11.5.0
-- The CXX compiler identification is GNU 11.5.0
-- Detecting C compiler ABI info
-- Detecting C compiler ABI info - done
-- Check for working C compiler: /usr/bin/cc - skipped
-- Detecting C compile features
-- Detecting C compile features - done
-- Detecting CXX compiler ABI info
...
CMake GUI
Apart from using CMake command line, you can use the CMake GUI to generate and configure CMake project. This is an alternative choice if you don’t like the command line.
Basically, CMake stores a lot of configuration settings in the project’s cache. This cache can be viewed and edited using the CMake GUI. It quite easy tool to help you set up the project as the settings are presented in a nice list. You can also change build type to a new value such as "Debug" or "Optimized" or you can add specific compiler flag using the tool.
1.) Start CMake GUI
Running cmake-gui command to use GUI on Linux(KDE or Gnome) or Windows. You can also start the following program on Windows
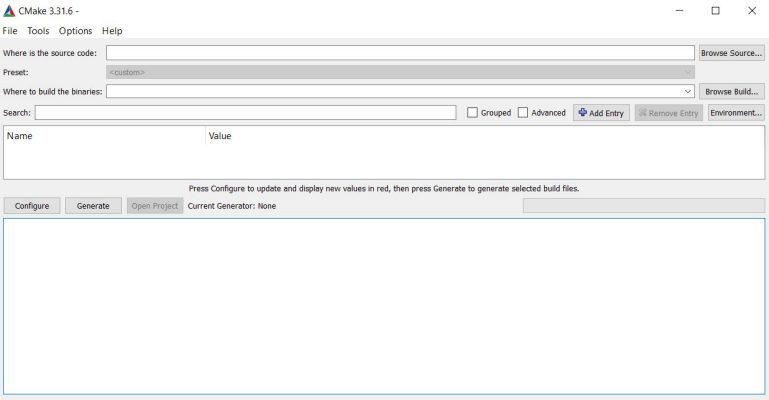
It will shows the GUI like below screenshots.
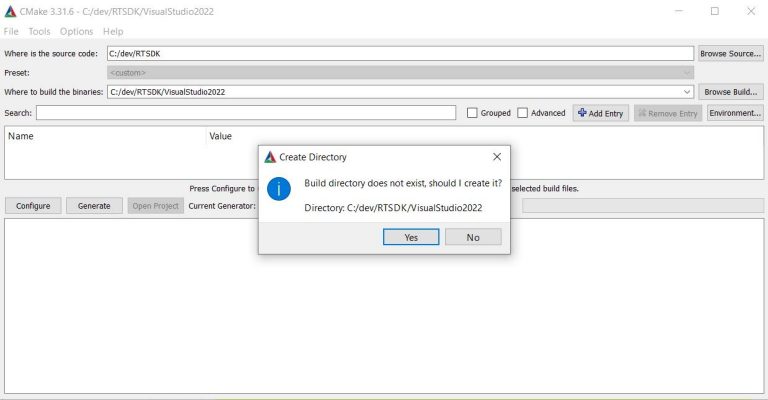
2.) Specify a path to source code like Building on Windows. We use sourceDir(C:/dev/RTSDK). We want to generate Visual Studio 2022 solution and project files under folder VisualStudio2022, therefore, we set build a path to (C:/dev/RTSDK/VisualStudio2022).
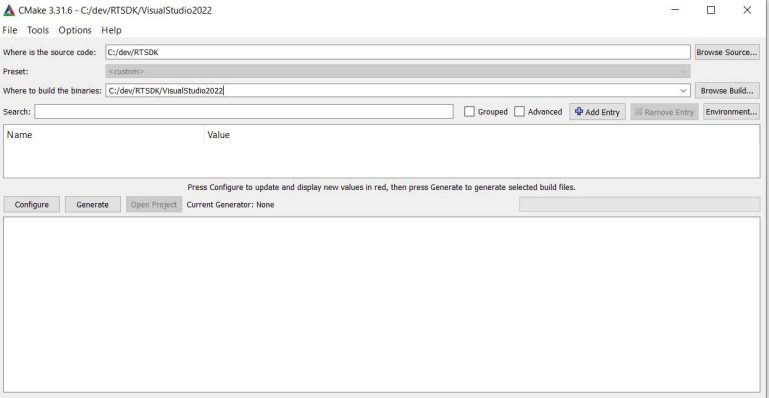
Then click Configure button, it will ask a user to confirm if they want to create folder VisualStudio2022 under folder c:/dev/RTSDK/.
3.) Choosing Visual Studio generator, this step, the GUI will ask the user to select the generator for this project. There is the same value as using CMake with -G from section Building with CMake on Windows. But it's quite easy for the user to choose the generator from the list and it can avoid typo comparing with using command line.
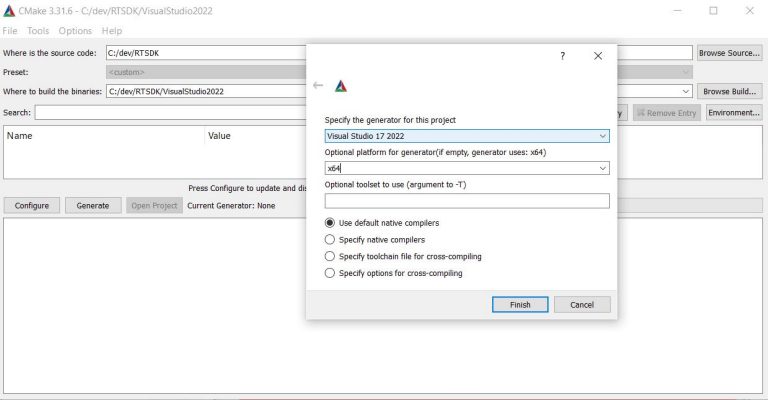
Then the GUI automatically call cmake command to generate build files with default options.
If you expand tab Build from the GUI, it will shows option that Cmake script currently use.
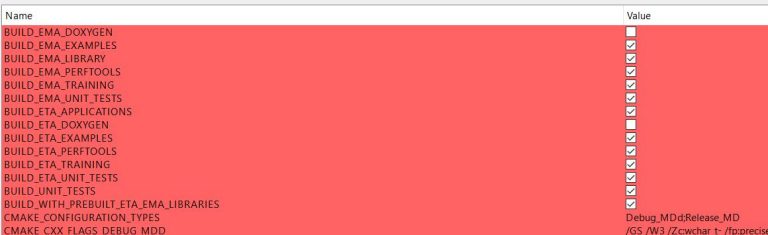
4.) Reconfigured the build options. At this steps, we can change the Build options as we needed and then click Generate button to regenerate the build files again. You can also change compile flag, build flag via the GUI tool.
Below sample is the options to generate both ETA and EMA examples and test tools like the Sample1 we talk earlier. We do not need UnitTests and Google Test so we remove it from Build list.
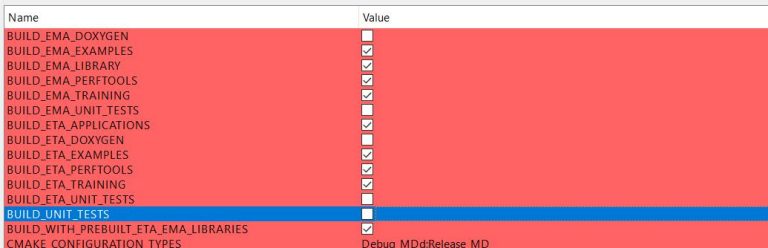
Open folder VisualStudio2022, you will see the rtsdk.sln and project files generate under this folder. It's the same as build files generated by CMake command line.
Regarding to cmak-gui on Linux, you can use the same steps as Windows and it should provide more flexible way to the developer who don't need to use command line to build RTSDK build files.
Conclusion
There are big changes in RTSDK regarding folder structures and the way developer use to build EMA and ETA examples and tools including the libraries. In the new version, developers must use CMake to dynamically generate Visual Studio solution and project files on Windows and they have to use CMake to generate Linux build files as well. This article explains the steps to use CMake and CMake-GUI tools to generate the build files so that a new API user or developer who has no experience with CMake can continue their works on the new version.
Get In Touch
Related Articles
Related APIs
Request Free Trial
Call your local sales team
Americas
All countries (toll free): +1 800 427 7570
Brazil: +55 11 47009629
Argentina: +54 11 53546700
Chile: +56 2 24838932
Mexico: +52 55 80005740
Colombia: +57 1 4419404
Europe, Middle East, Africa
Europe: +442045302020
Africa: +27 11 775 3188
Middle East & North Africa: 800035704182
Asia Pacific (Sub-Regional)
Australia & Pacific Islands: +612 8066 2494
China mainland: +86 10 6627 1095
Hong Kong & Macau: +852 3077 5499
India, Bangladesh, Nepal, Maldives & Sri Lanka:
+91 22 6180 7525
Indonesia: +622150960350
Japan: +813 6743 6515
Korea: +822 3478 4303
Malaysia & Brunei: +603 7 724 0502
New Zealand: +64 9913 6203
Philippines: 180 089 094 050 (Globe) or
180 014 410 639 (PLDT)
Singapore and all non-listed ASEAN Countries:
+65 6415 5484
Taiwan: +886 2 7734 4677
Thailand & Laos: +662 844 9576