

Introduction
Last Update: Oct 2024.
The Real-Time SDK (C# Edition) (RTSDK, formerly known as Elektron SDK) is a suite of modern and open source APIs (GitHub) that aim to simplify development through a strong focus on ease of use and standardized access to LSEG Real-Time Platform via the proprietary TCP connection named RSSL and proprietary binary message encoding format named OMM Message. The capabilities range from low latency/high-performance APIs right through to simple streaming Web APIs.
The RTSDK C# Edition can run on Windows, Oracle Linux Server, Red Hat Enterprise Server and Ubuntu Linux platforms. It supports the Visual Studio 2022 IDE for the full features development experience but the IDE is available for Windows developers only. Fortunately, the RTSDK C# Edition also supports the cross-platform .NET CORE and the Visual Studio Code (aka VS Code) editor is available for all major OS platforms. Linux and Windows developers who are using the VS Code editor can implement the real-time streaming application with LSEG Real-Time platform using the RTSDK C# Edition.
This example project shows a step-by-step guide to create the EMA API .NET project and solution with the RTSDK C# Edition connect to the Real-Time Optimized (RTO) server on VS Code and the C# extension. I am demonstrating with the RTSDK C# version 2.1.3.L1 on Ubuntu Linux, and this step-by-step guide can be applied to any supported OS platforms.
Note: For developers who connect to the Real-Time Distribution System (RTDS), you can apply the steps to set up the project, solution and the libraries. However, please check the 100_MP_Streaming example and Cons100 section on the RTSDK C# QuickStart page for the source code part.
Prerequisite
Before I am going further, there is some prerequisite, dependencies, and libraries that the project is needed.
.NET SDK
Firstly, you need .NET 6 SDK for this project. You can download the SDK based on your system from Microsoft .NET 6 website.
Please check How to check that .NET is already installed to verify installed .NET versions on your machine.
Note: Please check the RTSDK C# versions and .NET versions supported from the API Compatibility Matrix document.
Visual Studio Code
Next, the VS Code editor tool with the free C# extension.
Note:
- There is also the C# Dev Kit extension that gives developers more "Visual Studio like" experience and features than the C# extension. However, the C# Dev Kit extension requires Visual Studio License.
- The C# extension requires .NET 8.0 (As of April 2024), but you can setup and compile .NET 6.0 project with the .NET 8.0 SDK.
Access to the RTO
This project uses RTO access credentials for Version 2 Authentication (Service ID).
Please contact your LSEG representative to help you with the RTO account and services.
Note: For developers who connect to the Real-Time Distribution System (RTDS), you need the following information:
- Your ADS Server or Interactive-Provider application hostname or IP Address
- Your ADS Server or Interactive-Provider application RSSL Port number (14002 by default)
- Your Market Data Service Name
- Your Data Access Control System (DACS) User name
Internet Access
The RTSDK C# libraries (both ETA and EMA APIs) are available on the NuGet package manager and distribution platform. You can use the built-in VS Code CLI command to download the EMA and ETA libraries from NuGet over internet.
That covers the prerequisite of this project.
$>mkdir ema_project
Next, access the ema_project folder and create a new console project with the following command:
dotnet new console --framework net6.0 --use-program-main
Example result:
root:/mnt/c$cd ema_project
root:/mnt/c/ema_project$ dotnet new console --framework net6.0 --use-program-main
The template "Console App" was created successfully.
Processing post-creation actions...
Running 'dotnet restore' on /mnt/c/ema_project/ema_project.csproj...
Determining projects to restore...
Restored /mnt/c/ema_project/ema_project.csproj (in 77 ms).
Restore succeeded.
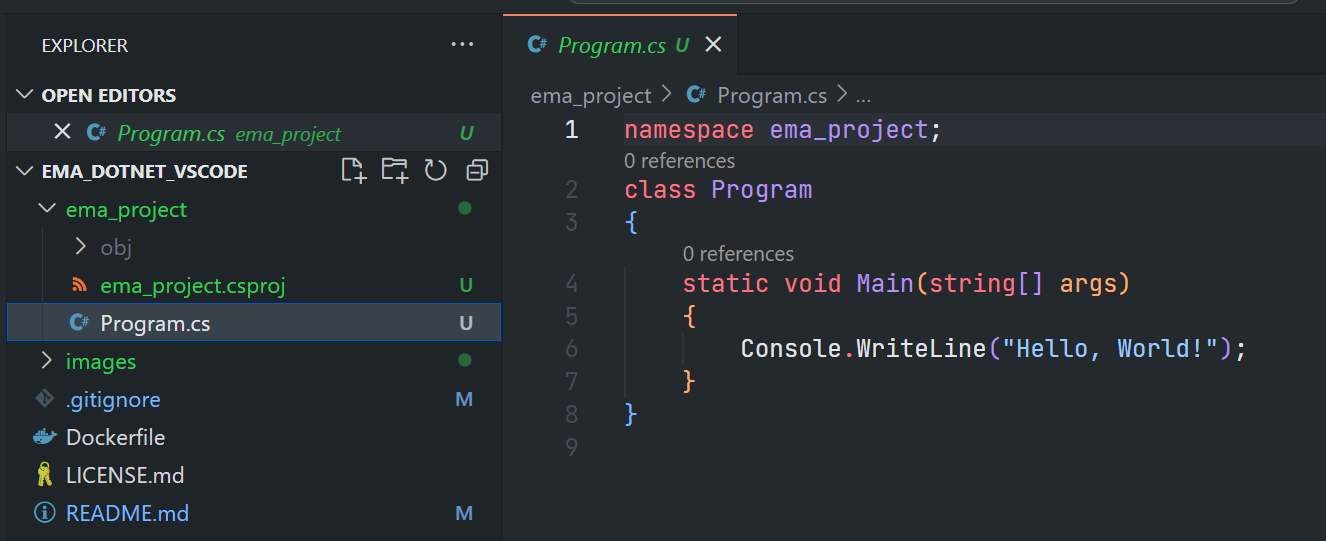
The dotnet new console --framework net6.0 --use-program-main command creates a new console project with .NET 6.0 framework for you. The command also create a simple application Program.cs as a starting point for the project as follows:
We can test our project creation and .NET SDK setup verification by running this Program.cs with the following command in a terminal:
dotnet run
Hello, World!
Add EMA Library
Now we come to how to add the EMA library to the project. The RTSDK C# libraries are available on the NuGet package manager and distribution platform.
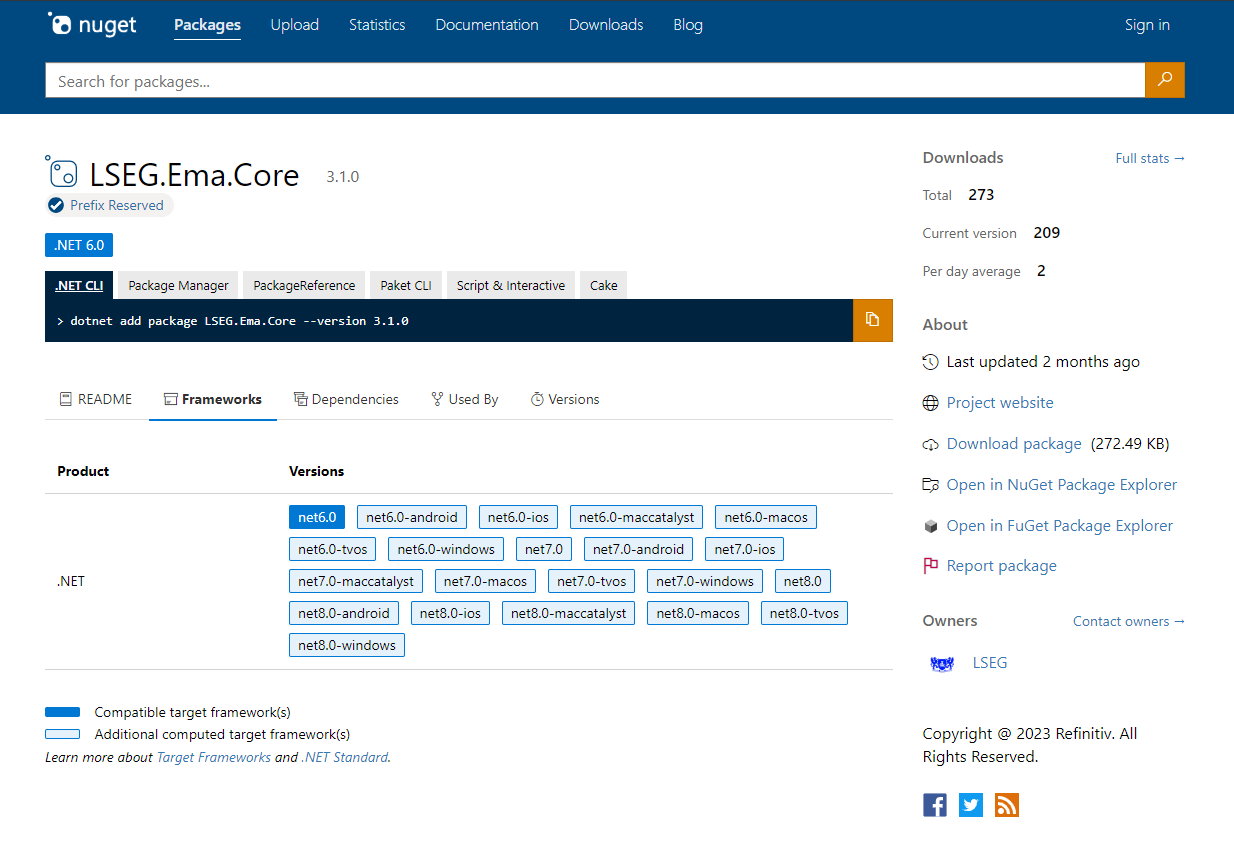
We can add the EMA Core library into the project with the dotnet add package LSEG.Ema.Core --version {version} command as follows.
dotnet add package LSEG.Ema.Core --version 3.1.0
Result:
root:/mnt/c/ema_project$ dotnet add package LSEG.Ema.Core --version 3.1.0
Determining projects to restore...
Writing /tmp/tmp9S2ovj.tmp
info : X.509 certificate chain validation will use the default trust store selected by .NET.
info : X.509 certificate chain validation will use the default trust store selected by .NET.
info : Adding PackageReference for package 'LSEG.Ema.Core' into project '/mnt/c/ema_project/ema_project.csproj'.info : Restoring packages for C:\ema_project\ema_project.csproj...
info : GET https://api.nuget.org/v3-flatcontainer/lseg.ema.core/index.json
info : OK https://api.nuget.org/v3-flatcontainer/lseg.ema.core/index.json 1492ms
info : GET https://api.nuget.org/v3-flatcontainer/lseg.ema.core/3.1.0/lseg.ema.core.3.1.0.nupkg
info : OK https://api.nuget.org/v3-flatcontainer/lseg.ema.core/3.1.0/lseg.ema.core.3.1.0.nupkg 829ms
....
info : Package 'LSEG.Ema.Core' is compatible with all the specified frameworks in project '/mnt/c/ema_project/ema_project.csproj'.
info : PackageReference for package 'LSEG.Ema.Core' version '3.1.0' added to file '/mnt/c/ema_project/ema_project.csproj'.
info : Writing assets file to disk. Path: /mnt/c/ema_project/obj/project.assets.json
log : Restored /mnt/c/ema_project (in 6.7 sec).
You can use dotnet list package command to verify the EMA library package installation.
root:/mnt/c/ema_project$ dotnet list package
Project 'ema_project' has the following package references
[net6.0]:
Top-level Package Requested Resolved
> LSEG.Ema.Core 3.1.0 3.1.0
Now the ema_project is ready for implementing the real-time application with EMA C# API.
Add the Real-Time Application Source Code with EMA
Please let me remind you again, if you environment connects to the Real-Time Distribution System (RTDS), please check the 100_MP_Streaming example source code and Cons100 section on the RTSDK C# QuickStart page for the source code part. The code below on this article connects to the RTO (Real-Time Optimized on the Cloud).
So, now let’s look at the real-time application source code. The next step is to changing the Program.cs file source code to call EMA library to connect and consume data from RTO.
To handle a .env file that store you RTO Authentication version 2 credential, we add the DotNetEnv library to the project with the following command:
root:/mnt/c/ema_project$ dotnet add package DotNetEnv --version 3.0.0
Then add a .env file to the ema_project folder with the following Authentication V2 content:
CLIENT_ID=<Your Auth V2 Client-ID>
CLIENT_SECRET=<Your Auth V2 Client-Secret>
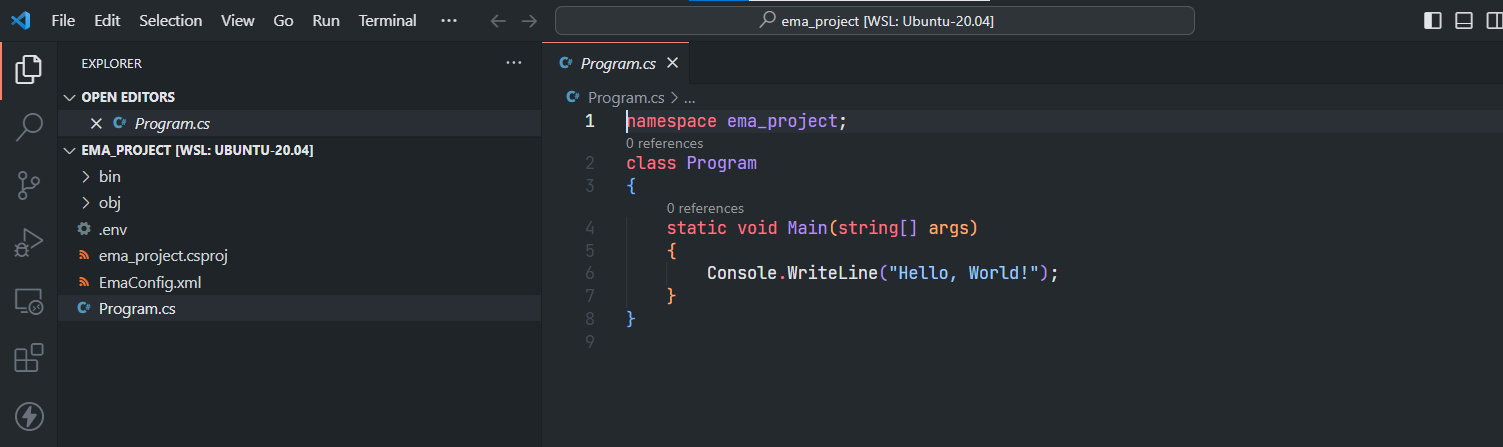
Now we come to the coding part. You can open the project in VS Code editor by running the code . command inside the ema_project folder.
The first step is to adding the AppClient class to the Program.cs file. The AppClient class can be a simple class that print Refresh, Update, and Status messages as follows:
namespace ema_project;
using LSEG.Ema.Access;
using LSEG.Ema.Domain.Login;
using System;
using System.IO;
using System.Threading;
using DotNetEnv;
internal class AppClient: IOmmConsumerClient
{
public void OnRefreshMsg(RefreshMsg refreshMsg, IOmmConsumerEvent consumerEvent)
{
Console.WriteLine(refreshMsg);
}
public void OnUpdateMsg(UpdateMsg updateMsg, IOmmConsumerEvent consumerEvent)
{
Console.WriteLine(updateMsg);
}
public void OnStatusMsg(StatusMsg statusMsg, IOmmConsumerEvent consumerEvent)
{
Console.WriteLine(statusMsg);
}
public void OnAllMsg(Msg msg, IOmmConsumerEvent consumerEvent) { }
public void OnAckMsg(AckMsg ackMsg, IOmmConsumerEvent consumerEvent) { }
public void onGenericMsg(GenericMsg genericMSg, IOmmConsumerEvent consumerEvent) { }
}
class Program
{
...
}
Moving on the the Program class that act as the Consumer:
//Program.cs
internal class AppClient: IOmmConsumerClient
{
...
}
class Program
{
static void Main(string[] args)
{
DotNetEnv.Env.Load();
OmmConsumer? consumer = null;
try{
// instantiate callback client
AppClient appClient = new();
Console.WriteLine("Connecting to market data server");
string? clientID = Environment.GetEnvironmentVariable("CLIENT_ID");
string? clientSecret = Environment.GetEnvironmentVariable("CLIENT_SECRET");
OmmConsumerConfig config = new OmmConsumerConfig().ClientId(clientID).ClientSecret(clientSecret);
// create OMM consumer
consumer = new OmmConsumer(config);
LoginReq loginReq = new();
consumer.RegisterClient(loginReq.Message(), appClient);
Console.WriteLine("Subscribing to market data");
consumer.RegisterClient(new RequestMsg().ServiceName("ELEKTRON_DD").Name("JPY="), appClient);
Thread.Sleep(60000); //
}catch (OmmException excp){
Console.WriteLine($"Exception subscribing to market data: {excp.Message}");
}
finally
{
consumer?.Uninitialize();
}
}
}
The final step is to create the EmaConfig.xml file with the configurations based on this Enterprise Message API (EMA) - Configuration Overview article. The main point is set the Channel configuration to connect to RTO.
<?xml version="1.0" encoding="UTF-8"?>
<EmaConfig>
<!-- ConsumerGroup provides set of detailed configurations to be used by named consumers -->
<!-- Application specifies which configuration to use by setting OmmConsumerConfig::consumerName() -->
<ConsumerGroup>
<!-- DefaultConsumer parameter defines which consumer configuration is used by OmmConsumer -->
<!-- if application does not specify it through OmmConsumerConfig::consumerName() -->
<!-- first consumer on the ConsumerList is a DefaultConsumer if this parameter is not specified -->
<DefaultConsumer value="Consumer_4"/>
<ConsumerList>
<Consumer>
<Name value="Consumer_4"/>
<!-- ChannelSet specifies an ordered list of Channels to which OmmConsumer will attempt to -->
<!-- connect, one at a time, if the previous one fails to connect -->
<ChannelSet value="Channel_4"/>
<Logger value="Logger_1"/>
<Dictionary value="Dictionary_1"/>
<XmlTraceToStdout value="0"/>
</Consumer>
</ConsumerList>
</ConsumerGroup>
<ChannelGroup>
<ChannelList>
<Channel>
<Name value="Channel_4"/>
<ChannelType value="ChannelType::RSSL_ENCRYPTED"/>
<CompressionType value="CompressionType::None"/>
<GuaranteedOutputBuffers value="5000"/>
<!-- EMA discovers a host and a port from RDP service discovery for the specified location
when both of them are not set and the session management is enable. -->
<Location value="ap-southeast-1"/>
<EnableSessionManagement value="1"/>
<EncryptedProtocolType value="EncryptedProtocolType::RSSL_SOCKET"/>
</Channel>
</ChannelList>
</ChannelGroup>
...
</EmaConfig>
That covers the coding part of the project.
Build and Run Real-Time Application Source Code
That brings us to build and run our source code step we just created. To build the project, we use the dotnet build command inside the ema_project folder.
dotnet build --configuration {Debug or Release}
Please note that the default configuration value is Debug.
Example:
root:/mnt/c/ema_project$ dotnet build
MSBuild version 17.3.2+561848881 for .NET
Determining projects to restore...
All projects are up-to-date for restore.
ema_project -> /mnt/c/ema_project/bin/Debug/net6.0/ema_project.dll
Build succeeded.
0 Warning(s)
0 Error(s)
Time Elapsed 00:00:02.44
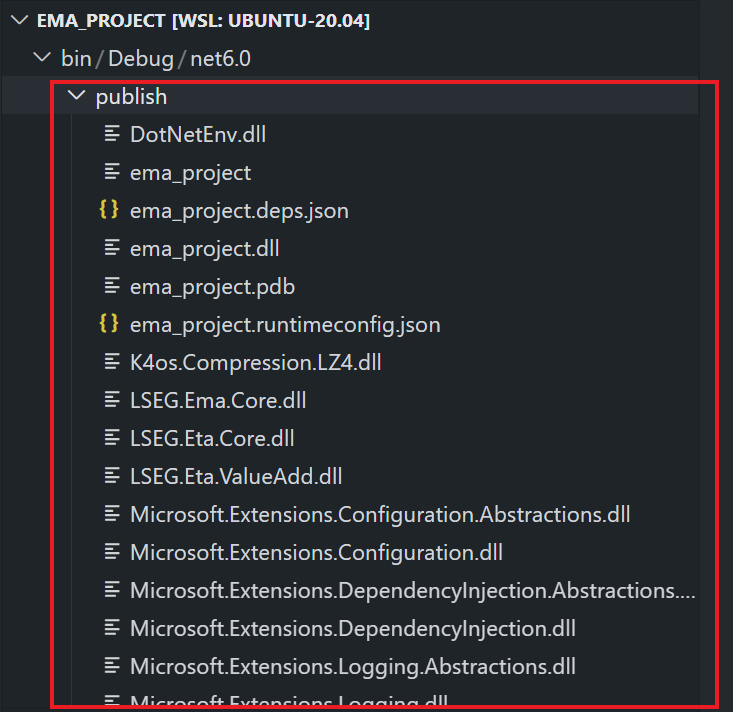
Then the generated executable project_name.dll files (and project_name.exe files if you are on Windows) will be available in the <project folder>/bin/<Debug/Release>/<dotnet target version> folder as follows:
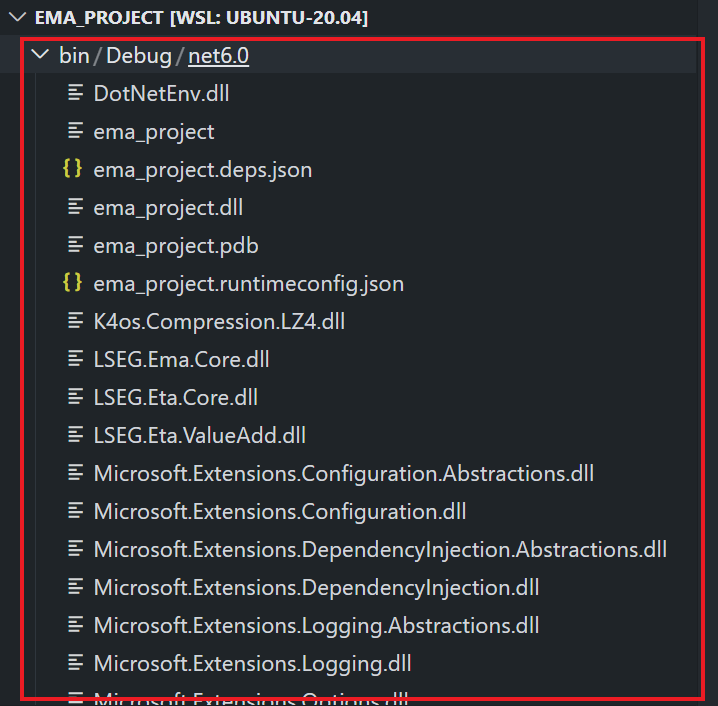
Please keep in mind that the product of dotnet build command isn't ready to be transferred to another machine to run. To create a version of the application that can be deployed, you need to publish it (for example, with the dotnet publish command).
For more detail about the dotnet build command options, please check the dotnet build document page.
Next, we come to the dotnet run command. This command provides a convenient option to run your application from the source code with one command.
dotnet run
Please note that the dotnet run command automatically build the project using dotnet build command if necessary.
Example:
root:/mnt/c/ema_project$ dotnet run
Connecting to market data server
INFO|: loggerMsg
ClientName: ChannelCallbackClient
Severity: Info Text: Received ChannelUp event on channel Channel_4
Instance Name Consumer_4_1
Component Version ads3.7.0.E4.linux.rrg 64-bit
loggerMsgEnd
Subscribing to market data
RefreshMsg
streamId="1"
domain="Login Domain"
solicited
RefreshComplete
state="Open / Ok / None / 'Login accepted by host ads-fanout-sm-az1-apse1-prd.'"
...
Attrib dataType="ElementList"
ElementList
ElementEntry name="AllowSuspectData" dataType="UInt" value="1"
ElementEntry name="ApplicationId" dataType="Ascii" value="256"
ElementEntry name="ApplicationName" dataType="Ascii" value="RTO"
...
ElementListEnd
AttribEnd
Payload dataType="NoData"
NoData
NoDataEnd
PayloadEnd
RefreshMsgEnd
RefreshMsg
streamId="5"
domain="MarketPrice Domain"
solicited
...
name="JPY="
nameType="1"
serviceId="257"
serviceName="ELEKTRON_DD"
Payload dataType="FieldList"
FieldList FieldListNum="99" DictionaryId="1"
FieldEntry fid="1" name="PROD_PERM" dataType="UInt" value="526"
FieldEntry fid="2" name="RDNDISPLAY" dataType="UInt" value="153"
FieldEntry fid="3" name="DSPLY_NAME" dataType="Rmtes" value="BARCLAYS LON"
FieldEntry fid="5" name="TIMACT" dataType="Time" value="08:58:00:000:000:000"
FieldEntry fid="11" name="NETCHNG_1" dataType="Real" value="0.15"
FieldEntry fid="12" name="HIGH_1" dataType="Real" value="147.88"
FieldEntry fid="13" name="LOW_1" dataType="Real" value="147.49"
FieldEntry fid="15" name="CURRENCY" dataType="Enum" value="392"
FieldEntry fid="17" name="ACTIV_DATE" dataType="Date" value="26 JAN 2024 "
FieldEntry fid="19" name="OPEN_PRC" dataType="Real" value="147.61"
FieldEntry fid="21" name="HST_CLOSE" dataType="Real" value="147.65"
FieldEntry fid="22" name="BID" dataType="Real" value="147.8"
FieldEntry fid="23" name="BID_1" dataType="Real" value="147.81"
FieldEntry fid="24" name="BID_2" dataType="Real" value="147.79"
FieldEntry fid="25" name="ASK" dataType="Real" value="147.83"
...
FieldEntry fid="14208" name="BID_HR_MS" dataType="Time" value="08:00:00:289:000:000"
FieldListEnd
PayloadEnd
RefreshMsgEnd
UpdateMsg
streamId="5"
domain="MarketPrice Domain"
updateTypeNum="0"
name="JPY="
serviceId="257"
serviceName="ELEKTRON_DD"
Payload dataType="FieldList"
FieldList
FieldEntry fid="22" name="BID" dataType="Real" value="147.81"
FieldEntry fid="393" name="PRIMACT_1" dataType="Real" value="147.81"
FieldEntry fid="25" name="ASK" dataType="Real" value="147.82"
FieldListEnd
PayloadEnd
UpdateMsgEnd
...
The dotnet run command is used in the context of projects, not built assemblies. If you're trying to run a framework-dependent application DLL instead, you must use dotnet without a command inside <project folder>/bin/<Debug/Release>/<dotnet target version> folder like the following example:
/mnt/c/ema_project/bin/Debug/net6.0/$ dotnet ema_project.dll
Please note that when running a framework-dependent application DLL above, you need to copy all necessary files (like the EmaConfig.xml or .env file) to the <project folder>/bin/<Debug/Release>/<dotnet target version> folder as well.
For more detail about the run options, please check the dotnet run document page.
Let’s leave the build and run step there.
Publishing the Project
Now let me turn to how to publish our project. The dotnet publish command compiles the application, reads through its dependencies specified in the project file, and publishes the resulting set of files to a directory (containing dll, configuration json files, dependencies files, etc). The command output is ready for deployment to a hosting system for execution. You can publish the .NET application in 2 modes as follows:
- self-contained mode: This mode produces an application that includes the .NET runtime and libraries, and your application and its dependencies. Users of the application can run it on a machine that doesn't have the .NET runtime installed.
- framework-dependent: This mode produces an application that includes only your application itself and its dependencies. Users of the application have to separately install the .NET runtime.
Please note that both publishing modes produce a platform-specific executable by default. Framework-dependent applications can be created without an executable, and these applications are cross-platform.
Example: creates a framework-dependent executable for the current platform.
#On Linux
root:/mnt/c/ema_project$ dotnet publish
MSBuild version 17.7.4+3ebbd7c49 for .NET
Determining projects to restore...
Restored /mnt/c/ema_project/ema_project.csproj (in 708 ms).
ema_project -> /mnt/c/ema_project/bin/Debug/net6.0/ema_project.dll
ema_project -> /mnt/c/ema_project/bin/Debug/net6.0/publish/
Result:
Example: creates a self-contained executable for the Windows platform.
# On Linux
root:/mnt/c/ema_project$ dotnet publish --configuration Release --runtime win-x64 --self-contained
MSBuild version 17.3.2+561848881 for .NET
Determining projects to restore...
Restored /mnt/c/ema_project/ema_project.csproj (in 648 ms).
ema_project -> /mnt/c/ema_project/bin/Release/net6.0/win-x64/ema_project.dll
ema_project -> /mnt/c/ema_project/bin/Release/net6.0/win-x64/publish/
Result:
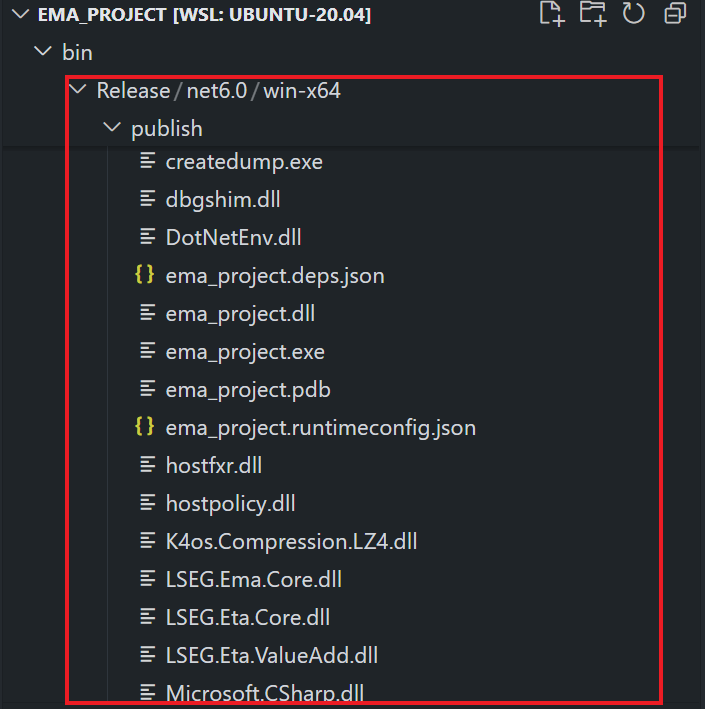
Then you can copy a result directory with all dependencies files to deploy and run on your target machine using the ema_project binary file (based on your runtime).
To learn more about the publish and deployment options, please check the following resources:
- dotnet publish document.
- .NET runtime identifier catalog document.
- .NET application publishing overview documents.
That all I have to say about creating single EMA C# API Project using VS Code.
Create the EMA API Real-Time Application Solution
My next point is creating a solution. When you are doing a software development project, your application may needs multiple source code projects for easy management and implementation by multiple developers. A Visual Studio solution is a container to organize one or more related projects. When you open a solution, Visual Studio and Visual Studio Code automatically loads all the projects that the solution contains.
Initialize A Solution
Firstly, create a new folder name ema_solution in your workbench environment.
$>mkdir ema_solution
Next, access the ema_solution folder and create a new console project with the following command:
dotnet new sln
Example result:
root:/mnt/c$cd ema_solution
root:/mnt/c/ema_solution$ dotnet new sln
The template "Solution File" was created successfully.
Our EMA Solution has 2 projects as follows:
- A JSONUtil class library project that contains a POCO object for storing RIC data and transform the RIC data into a JSON message format
- A EMA C# console project that connects and consume data from RTO, and print the market price data in JSON message format using a JSONUtil class library above.
Initialize A Class Library Project
Let's start with a class library project. Firstly, create a new project inside ema_solution folder with the following dotnet CLI command.
dotnet new classlib -f net6.0 -o JSONUtil
Result:
root:/mnt/c/ema_solution$ dotnet new classlib -f net6.0 -o JSONUtil
The template "Class Library" was created successfully.
Processing post-creation actions...
Running 'dotnet restore' on /mnt/c/ema_solution/JSONUtil/JSONUtil.csproj...
Determining projects to restore...
Restored /mnt/c/ema_solution/JSONUtil/JSONUtil.csproj (in 67 ms).
Restore succeeded.
Next, add this JSONUtil project to solution with the following command
dotnet sln add JSONUtil/JSONUtil.csproj
Result:
Project `JSONUtil/JSONUtil.csproj` added to the solution.
This JSONUtil project uses Newtonsoft.Json package from the NuGet platform for serialize/deserialize JSON data, so we add this package from NuGet to the project via the following command.
dotnet add package Newtonsoft.Json --version 13.0.3
Now the JSONUtil project is ready for implementing the class to JSON source code.
Add the Class Library Source Code
Once the package install succeed, open a solution with VS Code with the code . command in a ema_solution folder. The VS Code editor will be opened the EMA_SOLUTION solution like shown in the following image.
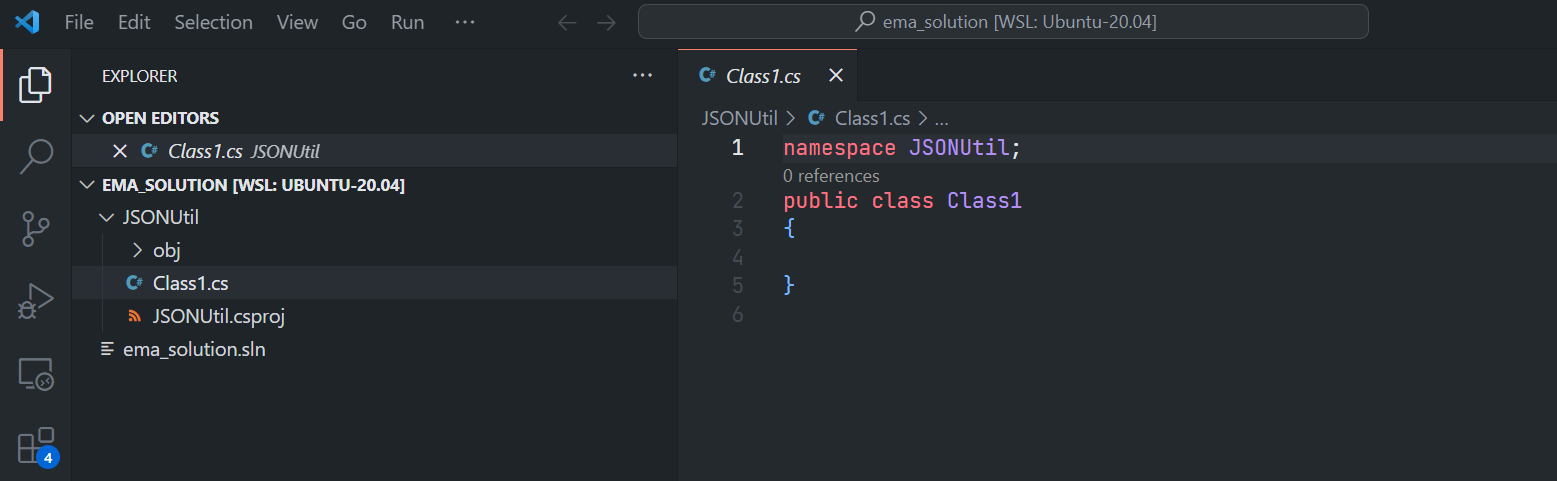
Open a Class.cs file and add the following POCO code to the file.
namespace JSONUtil;
using Newtonsoft.Json;
public class RIC{
public string Name {get; set;} = string.Empty;
public string ServiceName {get; set;} = string.Empty;
public double BID {get; set;}
public double ASK {get; set;}
public double NETCHNG_1 {get; set;}
public RIC() {}
public RIC(string ric, string serviceName, double bid = 0D, double ask = 0D, double netChange = 0D)
{
this.Name = ric;
this.ServiceName = serviceName;
this.BID = bid;
this.ASK = ask;
this.NETCHNG_1 = netChange;
}
public string ToJSON()
{
return JsonConvert.SerializeObject(this);
}
}
This POCO code just store RIC information such as Name, ServiceName, and Market Data information BID, ASK, and NETCHNG_1 fields data. It also contains a ToJSON() method that serialize self data from RIC object to JSON string message and sends that JSON string to a caller.
You can build entire solution by running dotnet build command inside a ema_solution folder or build just a JSONUtil project with a dotnet build command inside a ema_solution\JSONUtil folder.
Example (build entire solution):
root:/mnt/c/ema_solution$ dotnet build
MSBuild version 17.3.2+561848881 for .NET
Determining projects to restore...
All projects are up-to-date for restore.
JSONUtil -> /mnt/c/ema_solution/JSONUtil/bin/Debug/net6.0/JSONUtil.dll
Build succeeded.
0 Warning(s)
0 Error(s)
Time Elapsed 00:00:02.42
dotnet new console --framework net6.0 -o EMAConsumer --use-program-main
Next, add this EMAConsumer project to solution with the following command
dotnet sln add EMAConsumer/EMAConsumer.csproj
The newly created EMAConsumer project does not have access to the JSONUtil class library project, so we need to add a project reference to the JSONUtil project with the following command.
dotnet add EMAConsumer/EMAConsumer.csproj reference JSONUtil/JSONUtil.csproj
Example:
root:/mnt/c/ema_solution$ dotnet add EMAConsumer/EMAConsumer.csproj reference JSONUtil/JSONUtil.csproj
Reference `..\JSONUtil\JSONUtil.csproj` added to the project.
root:/mnt/c/ema_solution$
dotnet add package LSEG.Ema.Core --version 3.1.0
dotnet add package DotNetEnv --version 3.0.0
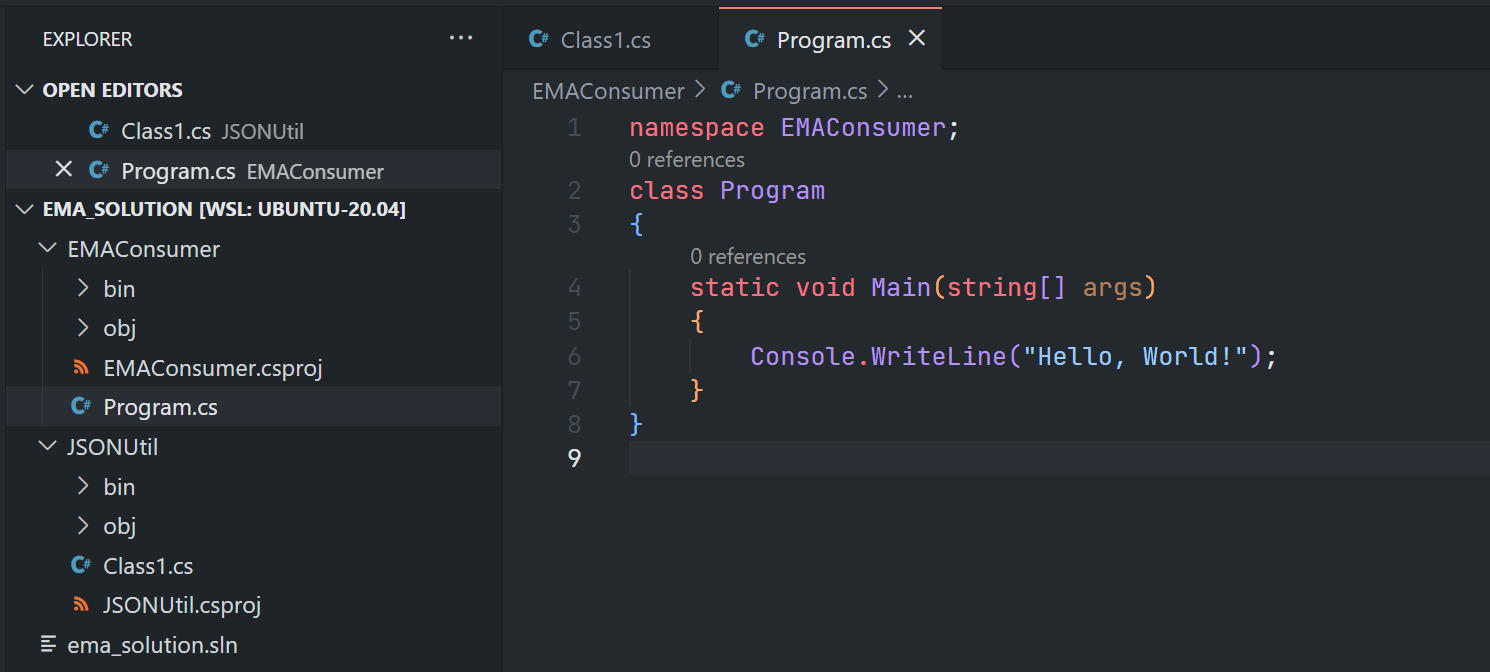
Once the EMAConsumer project is finished setup, the VS Code workspace contains both projects that you can develop in the same editor.
Add the Real-Time Application Source Code with EMA
That brings us to updating the source code to call EMA API interfaces and JSONUtil library to consume data from RTO and print that data as JSON message format.
Firstly, add a .env file to the ema_solution/EMAConsumer folder with the following Authentication Version 2 content:
CLIENT_ID=<Your Auth V2 Client-ID>
CLIENT_SECRET=<Your Auth V2 Client-Secret>
Secondly, open the EMAConsumer/Program.cs file and add the following library import to the file header.
using JSONUtil;
using System;
using System.IO;
using System.Threading;
using LSEG.Ema.Access;
using LSEG.Ema.Domain.Login;
using static LSEG.Ema.Access.DataType;
using LSEG.Ema.Rdm;
using DotNetEnv;
class Program
{
...
}
Next, modify the main() method to call the EMA API interfaces as follows:
class Program
{
static void Main(string[] args)
{
string RicName = "THB=";
string ServiceName = "ELEKTRON_DD";
RIC ric = new RIC(RicName,ServiceName);
DotNetEnv.Env.Load();
OmmConsumer? consumer = null;
try{
// instantiate callback client
AppClient appClient = new();
appClient.SetRicObj(ric);
Console.WriteLine("Connecting to market data server");
string clientID = Environment.GetEnvironmentVariable("CLIENT_ID") ?? "<Client_ID>";
string clientSecret = Environment.GetEnvironmentVariable("CLIENT_SECRET") ?? "<Client_Secret>";
OmmConsumerConfig config = new OmmConsumerConfig().ClientId(clientID).ClientSecret(clientSecret);
// create OMM consumer
consumer = new OmmConsumer(config);
Console.WriteLine("Subscribing to market data");
LoginReq loginReq = new();
consumer.RegisterClient(loginReq.Message(), appClient);
OmmArray array = new()
{
FixedWidth = 2
};
array.AddInt(11) //NETCHNG_1
.AddInt(22) //BID
.AddInt(25) //ASK
.Complete();
var view = new ElementList()
.AddUInt(EmaRdm.ENAME_VIEW_TYPE, 1)
.AddArray(EmaRdm.ENAME_VIEW_DATA, array)
.Complete();
RequestMsg reqMsg = new();
consumer.RegisterClient(reqMsg.ServiceName(ServiceName).Name(RicName).Payload(view), appClient);
Thread.Sleep(60000); //
}catch (OmmException excp){
Console.WriteLine($"Exception subscribing to market data: {excp.Message}");
}
finally
{
consumer?.Uninitialize();
}
}
}
The code above perform the following tasks:
- Create JSONUtil's RIC object.
- Create AppClient object and pass a RIC object to AppClient for storing data from the API.
- Create a OmmConsumerConfig object with the RTO Authentication Version 2 credential.
- Register the Login stream.
- Create a View request message that subscribes for NETCHNG_1, BID, and ASK fields, then subscribes item.
Now we come to the AppClient class path that needs to get a RIC object from the main class, update RIC object data with incoming data via the OnRefreshMsg and OnUpdateMsg callback methods and call RIC.ToJSON() method to print out incoming data as a JSON message.
namespace EMAConsumer;
using JSONUtil;
....
internal class AppClient: IOmmConsumerClient
{
RIC _ric;
private readonly LoginRefresh _loginRefresh = new();
private readonly LoginStatus _loginStatus = new();
public void SetRicObj(RIC ric)
{
this._ric = ric;
}
public void OnRefreshMsg(RefreshMsg refreshMsg, IOmmConsumerEvent consumerEvent)
{
Console.WriteLine("Refresh Message");
if(refreshMsg.DomainType() == EmaRdm.MMT_LOGIN)
{
_loginRefresh.Clear();
Console.WriteLine(_loginRefresh.Message(refreshMsg).ToString());
} else
{
if (DataType.DataTypes.FIELD_LIST == refreshMsg.Payload().DataType)
Decode(refreshMsg.Payload().FieldList());
Console.WriteLine(_ric.ToJSON());
}
Console.WriteLine();
}
public void OnUpdateMsg(UpdateMsg updateMsg, IOmmConsumerEvent consumerEvent)
{
Console.WriteLine("Update Message");
if (DataTypes.FIELD_LIST == updateMsg.Payload().DataType)
Decode(updateMsg.Payload().FieldList());
Console.WriteLine(_ric.ToJSON());
Console.WriteLine();
}
public void OnStatusMsg(StatusMsg statusMsg, IOmmConsumerEvent consumerEvent)
{
...
}
}
Moving on the the Decode() method that iterates incoming FieldList message and updates a RIC object's NETCHNG_1, BID, and ASK properties.
internal class AppClient: IOmmConsumerClient
{
...
void Decode(FieldList fieldList)
{
foreach (var fieldEntry in fieldList)
{
var FieldName = fieldEntry.Name;
_ric.GetType().GetProperty(FieldName).SetValue(_ric, Decode(fieldEntry));
}
}
double Decode(FieldEntry fieldEntry)
{
double ReturnValue = 0D;
if (Data.DataCode.BLANK == fieldEntry.Code)
{
return ReturnValue;
}
else
{
switch (fieldEntry.LoadType)
{
case DataTypes.REAL:
ReturnValue = fieldEntry.OmmRealValue().AsDouble();
break;
default:
ReturnValue = 0D;
break;
}
}
return ReturnValue;
}
}
The final step is to create the EmaConfig.xml file with the configurations like the ema_project above to configure the API to connect to RTO endpoint.
That covers the EMAConsumer project part.
Build and Run Real-Time Application Solution
Now, what about building the solution. You can build entire solution by running the dotnet build command in the ema_solution folder or build only this EMAConsumer project by running the dotnet build command in the ema_solution\EMAConsumer folder.
Example: Build entire solution
root:/mnt/c/ema_solution$ dotnet build
MSBuild version 17.3.2+561848881 for .NET
Determining projects to restore...
All projects are up-to-date for restore.
JSONUtil -> /mnt/c/ema_solution/JSONUtil/bin/Debug/net6.0/JSONUtil.dll
EMAConsumer -> /mnt/c/ema_solution/EMAConsumer/bin/Debug/net6.0/EMAConsumer.dll
Build succeeded.
0 Warning(s)
0 Error(s)
Time Elapsed 00:00:03.17
Unlike the Visual Studio IDE that you can set a solution default project and click the "Run" button on the IDE. With VS Code (and .NET CLI), you need to run the project in side a project folder using the dotnet run command or with dotnet run --project <project/project.csproj> (All required runtime file must be located on the solution home folder).
Run Result: Run inside the EMAConsumer project folder.
root:/mnt/c/ema_solution$ cd EMAConsumer/
root:/mnt/c/ema_solution/EMAConsumer$ dotnet run
Connecting to market data server
INFO|: loggerMsg
ClientName: ChannelCallbackClient
Severity: Info Text: Received ChannelUp event on channel Channel_4
Instance Name Consumer_4_1
Component Version ads3.7.0.E4.linux.rrg 64-bit
loggerMsgEnd
Subscribing to market data
Refresh Message
AllowSuspectData : True
ApplicationId : 256
ApplicationName : RTO
...
UserNameType : 1
State : StreamState: 1 DataState: 1 StatusCode: 0 StatusText: Login accepted by host ads-fanout-sm-az2-apse1-prd.
Refresh Message
{"NETCHNG_1":-0.08,"BID":149.22,"ASK":149.24,"Name":"JPY=","ServiceName":"ELEKTRON_DD"}
Update Message
{"NETCHNG_1":-0.08,"BID":149.22,"ASK":149.23,"Name":"JPY=","ServiceName":"ELEKTRON_DD"}
Update Message
{"NETCHNG_1":-0.09,"BID":149.21,"ASK":149.24,"Name":"JPY=","ServiceName":"ELEKTRON_DD"}
Update Message
{"NETCHNG_1":-0.08,"BID":149.22,"ASK":149.23,"Name":"JPY=","ServiceName":"ELEKTRON_DD"}
Update Message
{"NETCHNG_1":-0.09,"BID":149.21,"ASK":149.24,"Name":"JPY=","ServiceName":"ELEKTRON_DD"}
...
That’s all I have to say about how to build and run the EMA solution.
Publishing the Solution
So, now let’s look at how to publish our solution. You can publish the solution using the dotnet publish like the project by specify the the path and filename of a solution file (.sln extension) after the command.
Example:
dotnet publish ./ema_solution.sln
All dotnet publish command arguments are supported in the solution level too.
Example: creates a self-contained executable for the Windows platform.
root:/mnt/c/ema_solution$ dotnet publish ./ema_solution.sln --configuration Release --runtime win-x64 --self-contained
MSBuild version 17.3.2+561848881 for .NET
Determining projects to restore...
Restored /mnt/c/ema_solution/JSONUtil/JSONUtil.csproj (in 361 ms).
Restored /mnt/c/ema_solution/EMAConsumer/EMAConsumer.csproj (in 731 ms).
JSONUtil -> /mnt/c/ema_solution/JSONUtil/bin/Release/net6.0/JSONUtil.dll
JSONUtil -> /mnt/c/ema_solution/JSONUtil/bin/Release/net6.0/win-x64/JSONUtil.dll
...
EMAConsumer -> /mnt/c/ema_solution/EMAConsumer/bin/Release/net6.0/win-x64/EMAConsumer.dll
JSONUtil -> /mnt/c/ema_solution/JSONUtil/bin/Release/net6.0/win-x64/publish/
EMAConsumer -> /mnt/c/ema_solution/EMAConsumer/bin/Release/net6.0/win-x64/publish/
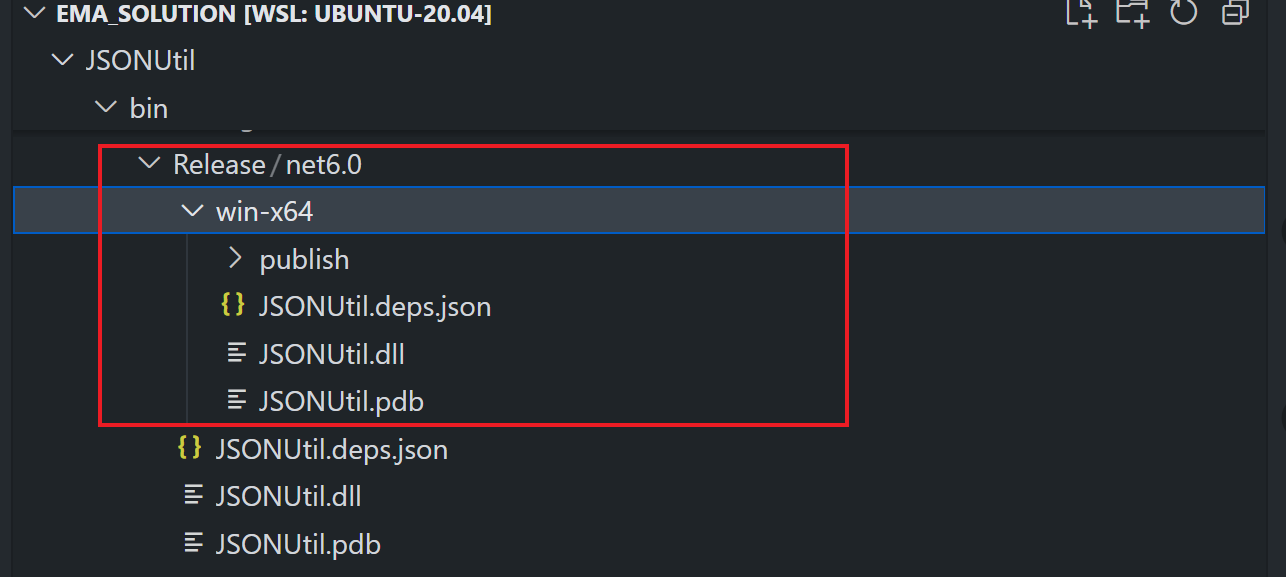
The publish result will be available inside each Project' /bin/<Debug/Release>/<dotnet target version> folder like the following example of the Class Library project.
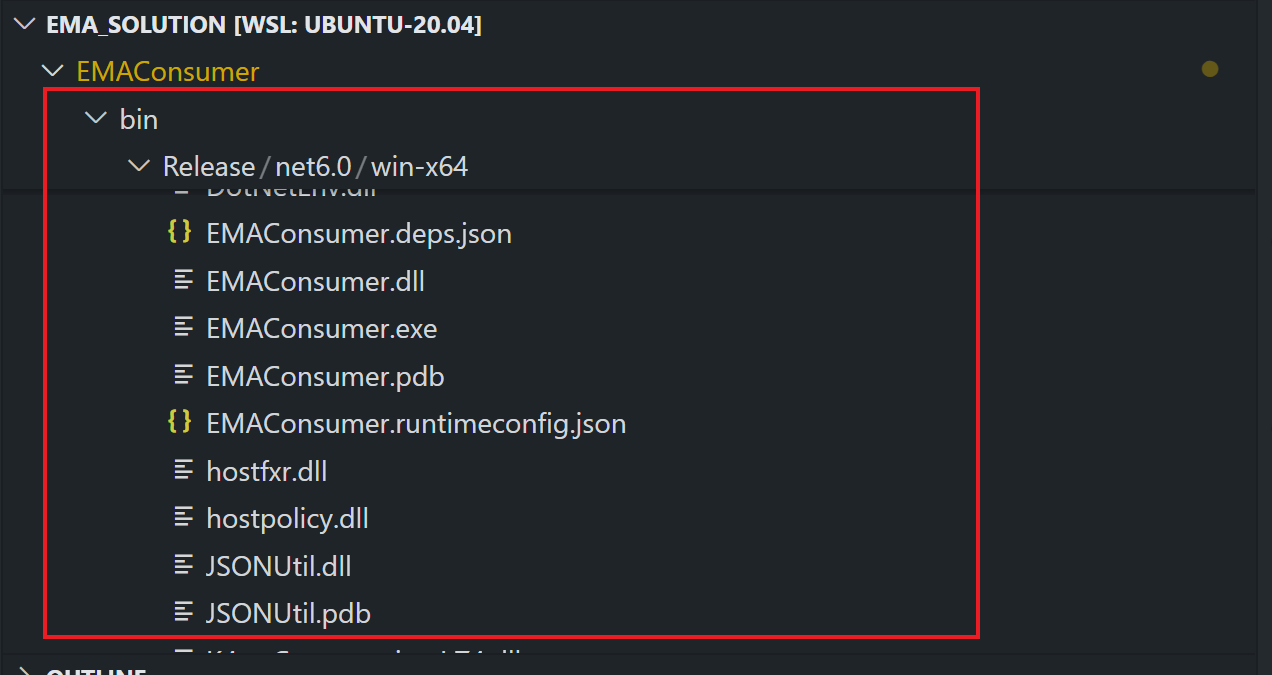
About the EMAConsumer, the publish result also contains the JSONUtil class library's dll file because we have added a project reference to the JSONUtil project.
That covers the EMA Solution creation with VS Code.
Update June 2024, For the multiple .NET SDK versions
If you have multiple .NET SDK versions installed on your machine, you can run the following steps to configure the SDK version for the project/solution.
Firstly go to the project or solution root folder, and run the following command:
dotnet --list-sdks
It shows all available SDK in your machine (based on your installation) as follows:
#windows
2.1.526 [C:\Program Files\dotnet\sdk]
5.0.104 [C:\Program Files\dotnet\sdk]
6.0.423 [C:\Program Files\dotnet\sdk]
7.0.201 [C:\Program Files\dotnet\sdk]
8.0.206 [C:\Program Files\dotnet\sdk]
#linux
2.1.818 [/usr/share/dotnet/sdk]
3.1.426 [/usr/share/dotnet/sdk]
5.0.408 [/usr/share/dotnet/sdk]
6.0.419 [/usr/share/dotnet/sdk]
7.0.406 [/usr/share/dotnet/sdk]
Next, run the following command to create a dotnet global.json file:
dotnet new globaljson
Open a newly generated global.json file, and change the value of the version property from the latest version in your machine to version 6.x in your machine as follows:
{
"sdk": {
"version": "6.0.419"
}
}
Conclusion and Next Steps
Before I finish, let me just say the RTSDK C# give developers access to the LSEG Real-Time platform's real-time streaming data with both low-level and high-levels APIs interfaces for every developers' requirements. For ultra-high performance applications, there is the ETA API that provides high performance, low latency, and open source low-level API interfaces for developers. For the majority of use cases, there is the ease-of-use EMA API with high-level API interfaces for developers. The C# edition SDK supports the cross-platform .NET SDK 6 (aka .NET Core 6) which makes the application can be developed on various types of development environments such as the full-feature Visual Studio 2022 IDE on Windows, or the .NET CLI tool with any editors on the supported platforms.
Visual Studio Code (or just VSCode) is a free, cross-platform source code editor that took over developers' popularity based on its fast and lightweight, supports a variety of programming languages with IntelliSense, and has complete development operations like debugging, task running, and version control. With the the free C# extension, the VS Code can do basic development tasks with .NET development including the RTSDK C# APIs using the editor with the .NET CLI tool. The combination of the VS Code C# extension and .NET CLI tool make they suitable for developing the real-time applications on non-Windows platforms, or even on Windows for developers who do not have the Visual Studio Professional/Enterprise subscriptions.
If you want more powerful development feature on VS Code for the RTSDK C# edition, there is the C# Dev kit extension that gives you the development experience much closer to the full feature Visual Studio IDE while maintain its lightweight and supports all major OS platforms. However, the C# Dev kit extension requires the Visual Studio Professional or Enterprise subscriptions license.
That’s all I have to say about the RTSDK C# development with VS Code.
References
For further details, please check out the following resources:
- Real-Time SDK C# page on the LSEG Developer Community website.
- Real-Time SDK Family page.
- Real-Time SDK C# Quick Start.
- Developer Article: 10 important things you need to know before you write an Enterprise Real Time application.
- Changes to Customer Access and Identity Management: Real-Time - Optimized.
- EMA C# API Library on NuGet platform.
- .NET SDK page.
- Tutorial: Create a .NET console application using Visual Studio Code.
- Tutorial: Create a .NET class library using Visual Studio Code.
- Setting up VS Code for .NET development page.
- Getting Started with C# in VS Code document.
- How YOU can get started with .NET Core and C# in VS Code blog post.
- Tutorial: Containerize a .NET app.
- .NET SDK on DockerHub platform.
- .NET Runtime on DockerHub platform.
For any question related to this article or the RTSDK page, please use the Developer Community Q&A Forum.