

Introduction
This article shows a step-by-step guide to public a container application to Microsoft Azure Container Registry repository. I am reusing the WebSocket API MRN Python examples application (RTO with Version 2 Authentication) as an example Docker image application. However, the concept and main logic can be applied to any technologies that support containerization.
Note:
- My Azure Account is based on my Visual Studio Enterprise Subscription service which is may be different from your Azure account type.
- The Azure Portal website UI/UX are subjected to change.
Introduction to Azure Container Registry
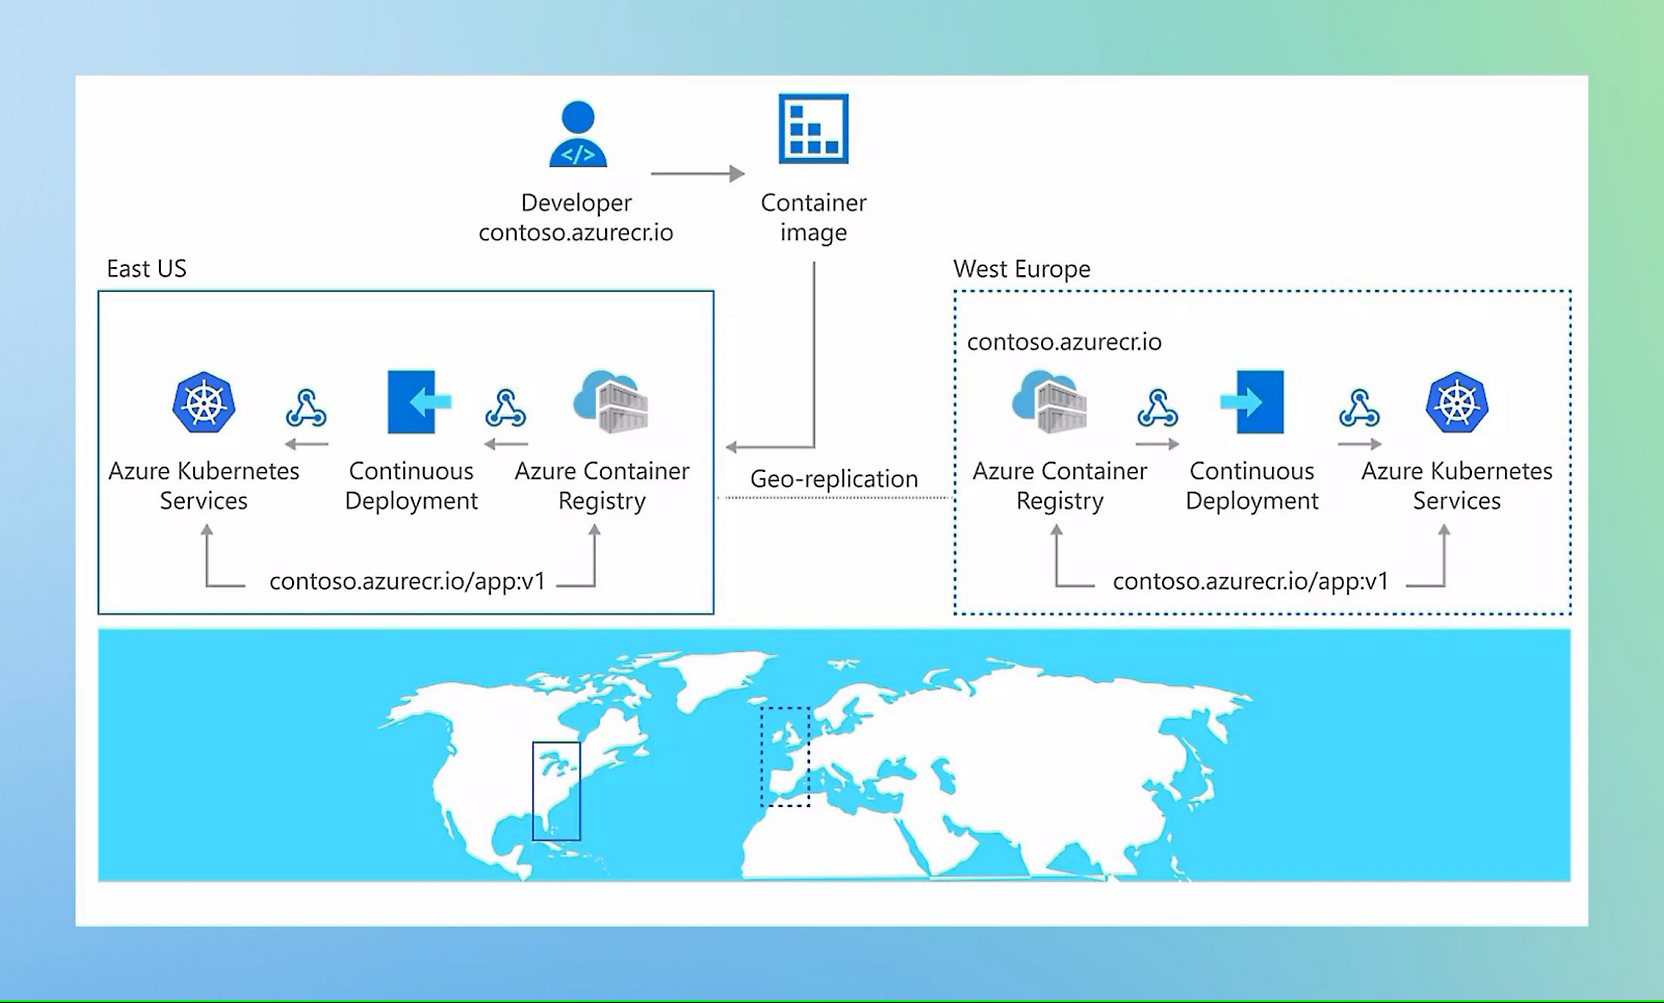
Azure Container Registry is Microsoft own container hosing platform (the same as Docker's dockerhub). The repository handles private Docker/OCI - Open Container Initiative images and artifacts with a fully managed, geo-replicated instance of OCI distribution. Developers can build, store and manage containers/artifacts to connect to across Azure services such as Azure Kubernetes Service (AKS), Azure App Service and much more.
The service also lets Developers/DepOps streamline building, testing, pushing, and deploying images with Tasks. The example is developers can targeting a container registry from a continuous integration and continuous delivery (CI/CD) tool such as Azure Pipelines or Jenkin.
This project shows the first step which is how to set up an image registry, upload an application image to Azure and how to pull it to a local environment.
Prerequisite
This project requires the following software and account on your machine.
- RTO Access credentials (Version 2 - Service ID) with MRN data permission.
- Microsoft Azure account.
- Azure CLI application.
- Docker desktop application.
- Internet connection.
Please contact your LSEG representative to help you to access the RTO account and MRN service.
Application Container Preparation
Let’s start with how to prepare your application image on your local machine. Developers need the following files from the WebSocket API Machine Readable News Example with Python project to create an application image with Docker.
- mrn_console_rto_v2.py Python application file.
- requirements.txt Python dependencies configurations file.
Docker Image Set Up
Next, create a text file name Dockerfile as a blueprint for our image.
#Build stage
ARG PYTHON_VERSION=3.11
ARG VARIANT=slim-bookworm
FROM python:${PYTHON_VERSION}-slim-bookworm AS builder
LABEL maintainer="LSEG Developer Relations"
#Copy requirements.txt
COPY requirements.txt .
# install dependencies to the local user directory (eg. /root/.local)
RUN pip install --trusted-host pypi.python.org --trusted-host files.pythonhosted.org --trusted-host pypi.org --no-cache-dir --user -r requirements.txt
# Run stage
FROM python:${PYTHON_VERSION}-alpine3.20
WORKDIR /app
# Update PATH environment variable + set Python buffer to make Docker print every message instantly.
ENV PATH=/root/.local:$PATH \
PYTHONUNBUFFERED=1\
PYTHONIOENCODING=utf-8\
PYTHONLEGACYWINDOWSSTDIO=utf-8
# copy only the dependencies installation from the 1st stage image
COPY --from=builder /root/.local /root/.local
COPY mrn_console_rto_v2.py .
#Run Python
ENTRYPOINT ["python", "mrn_console_rto_v2.py"]
Please note that if you are not in the controlled network environment (like our beloved ZScaler), you can replace the RUN pip instal .... line above with the following Docker instruction instead.
# install dependencies to the local user directory (eg. /root/.local)
RUN pip install --no-cache-dir --user -r requirements.txt
Docker Image Testing
To test our newly created Dockerfile, developers can build a test image on their local machine with a docker build command.
docker build -t rto_v2_ws_mrn_python .
Then verify if the build is succeed with a docker images command.

You can check on RTO Version 2 Authentication console Docker example section of the MRN example project to see how to run an application locally to test your RTO account and MRN subscription.
That is all for a Docker image set up stage.
Azure Container Registry Repository Set Up
That brings us to the second step, create your repository the Container Registry service. I am demonstrating with the Azure Portal. If you prefer using the Azure CLI, please check this document.
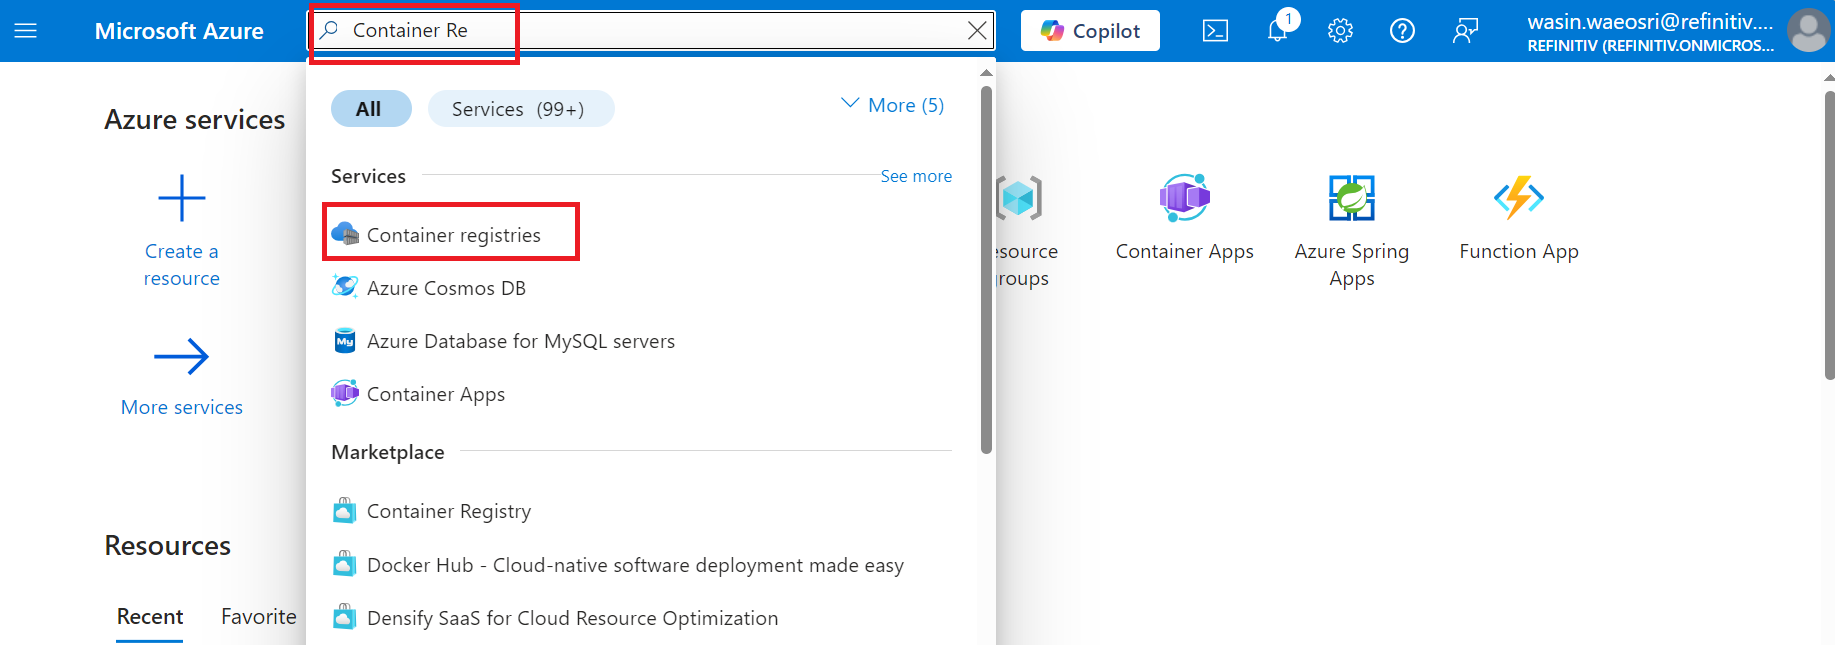
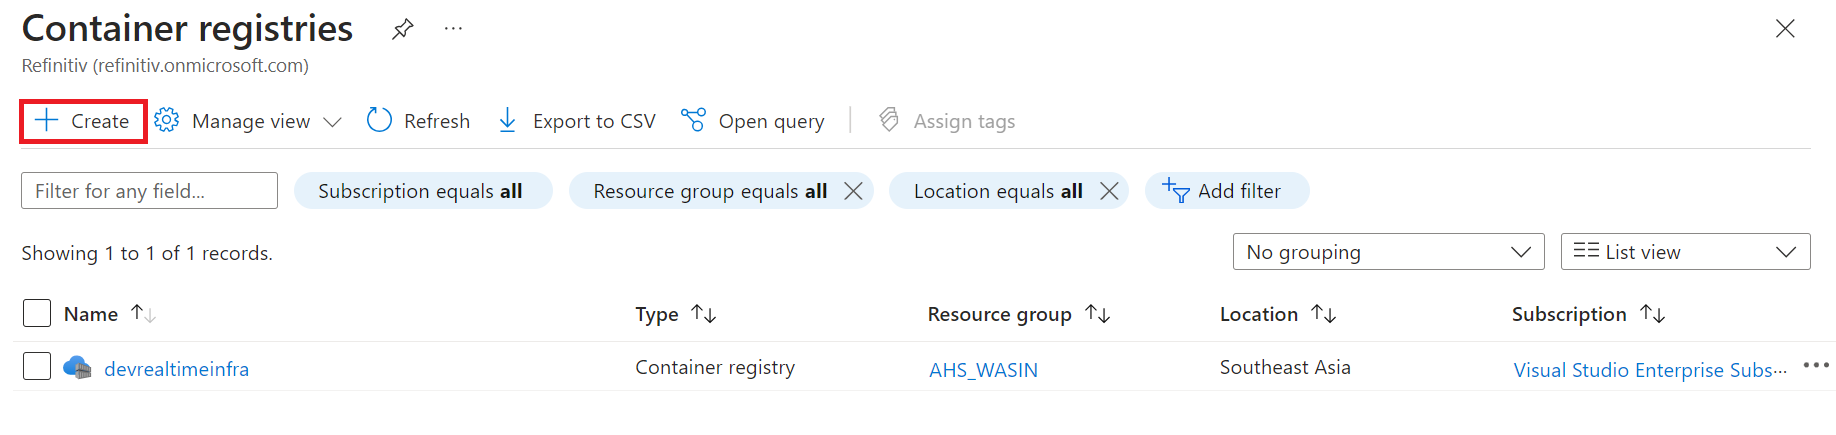
Once you have logged in to Azure Portal website, type Container Registry on the portal search box to find the Container Registry service. Then click into the service.
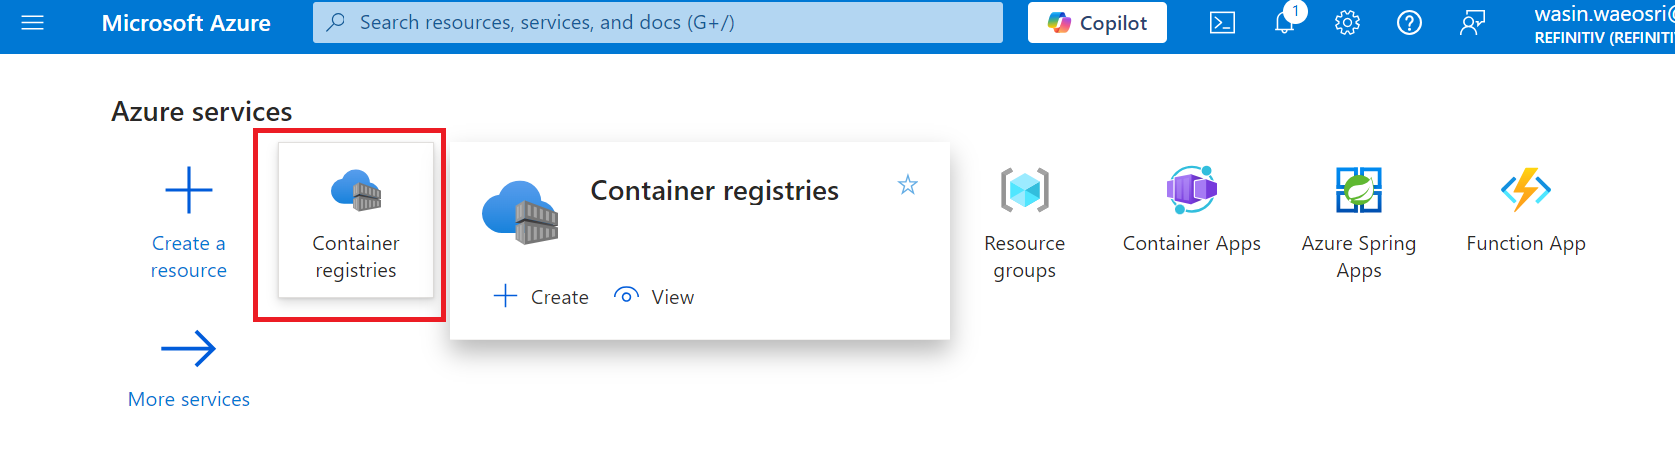
Please note that the next time you logged in to the portal, the Container Registry service will be available on the index page.
Now you are in the Container Registry page, click the + Create button to create new registry for storing the MRN Python container.
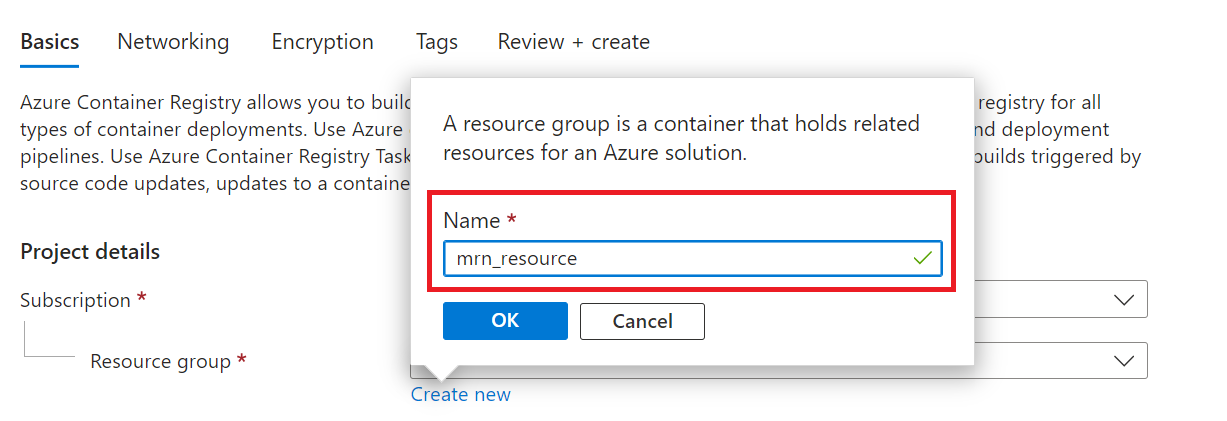
In the Basics tab, select your Azure subscription and choose Create new option for the Resource group value.
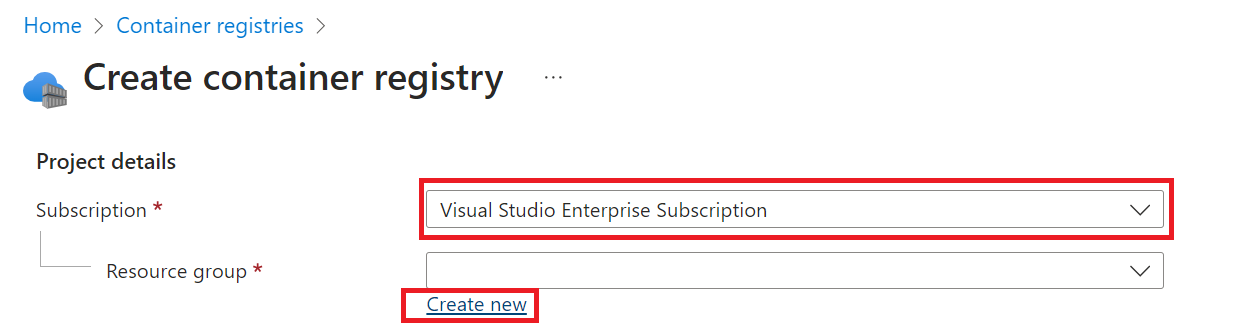
I am naming my resource group as mrn_resource.
Next, input your registry name. I am choosing devrelmrn as my registry resource name, you may choose the one that you prefer. Then select your nearest location (Southeast Asia in my case) and choose your prefer Pricing Plans which I am choosing the Basic plan for this demonstration.

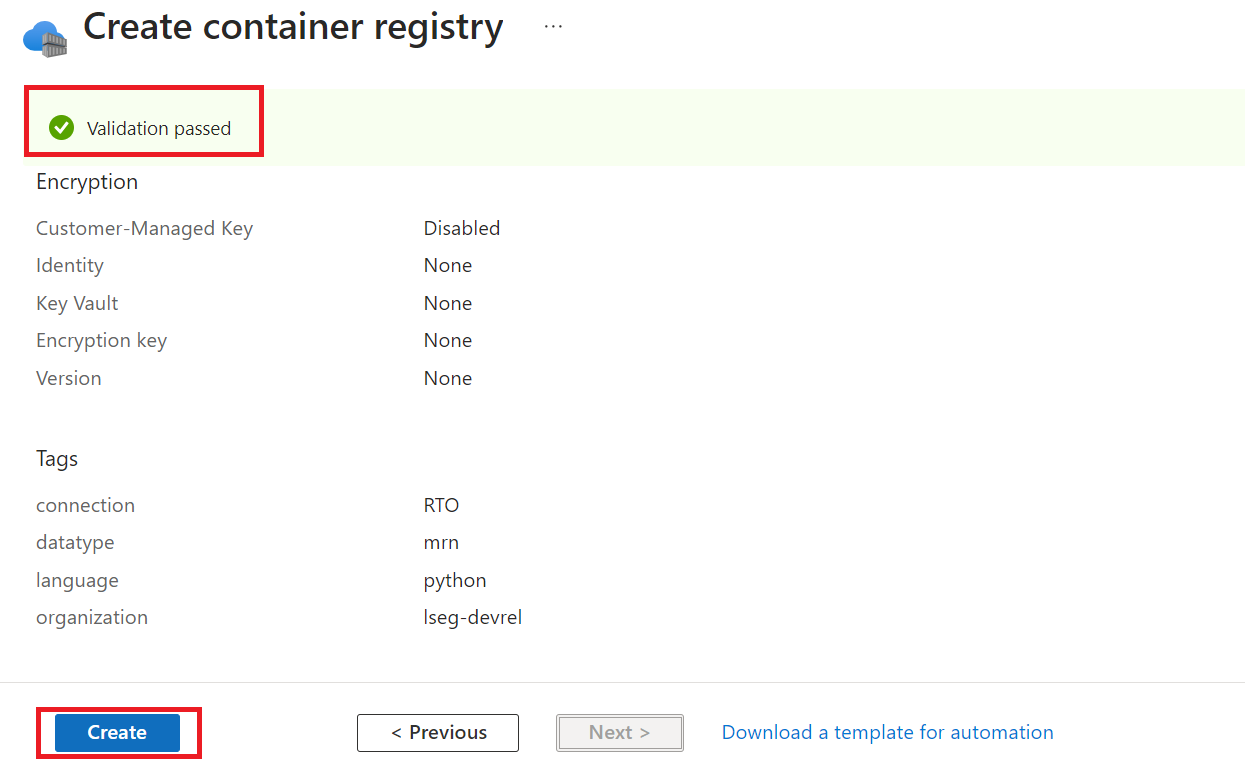
Next, click the Review + create button.
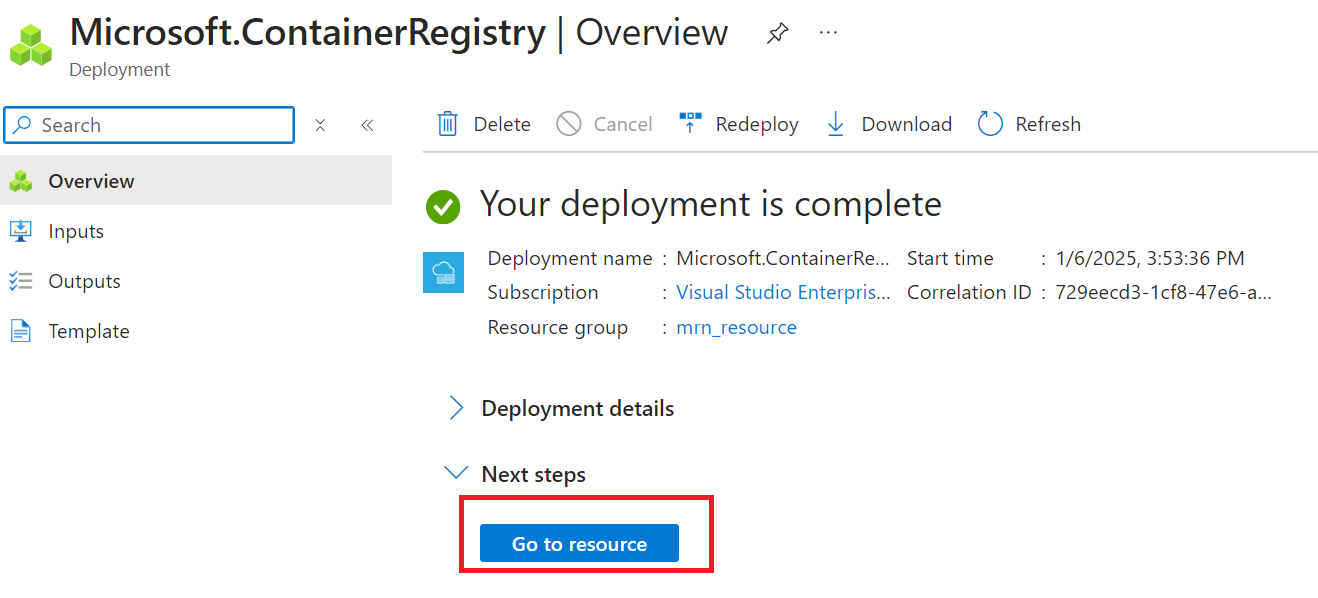
Once the page shows Validation passed message, click the Create button, then Azure will create your Container Registry resource.
When the page shows Your deployment is complete message, click on the Go to resource button.
Now we are on the newly created devrelmrn Container Registry main page. The URL for this registry is showed under the Login server information which is devrelmrn.azurecr.io. You can use this URL name to refer to this container repository.
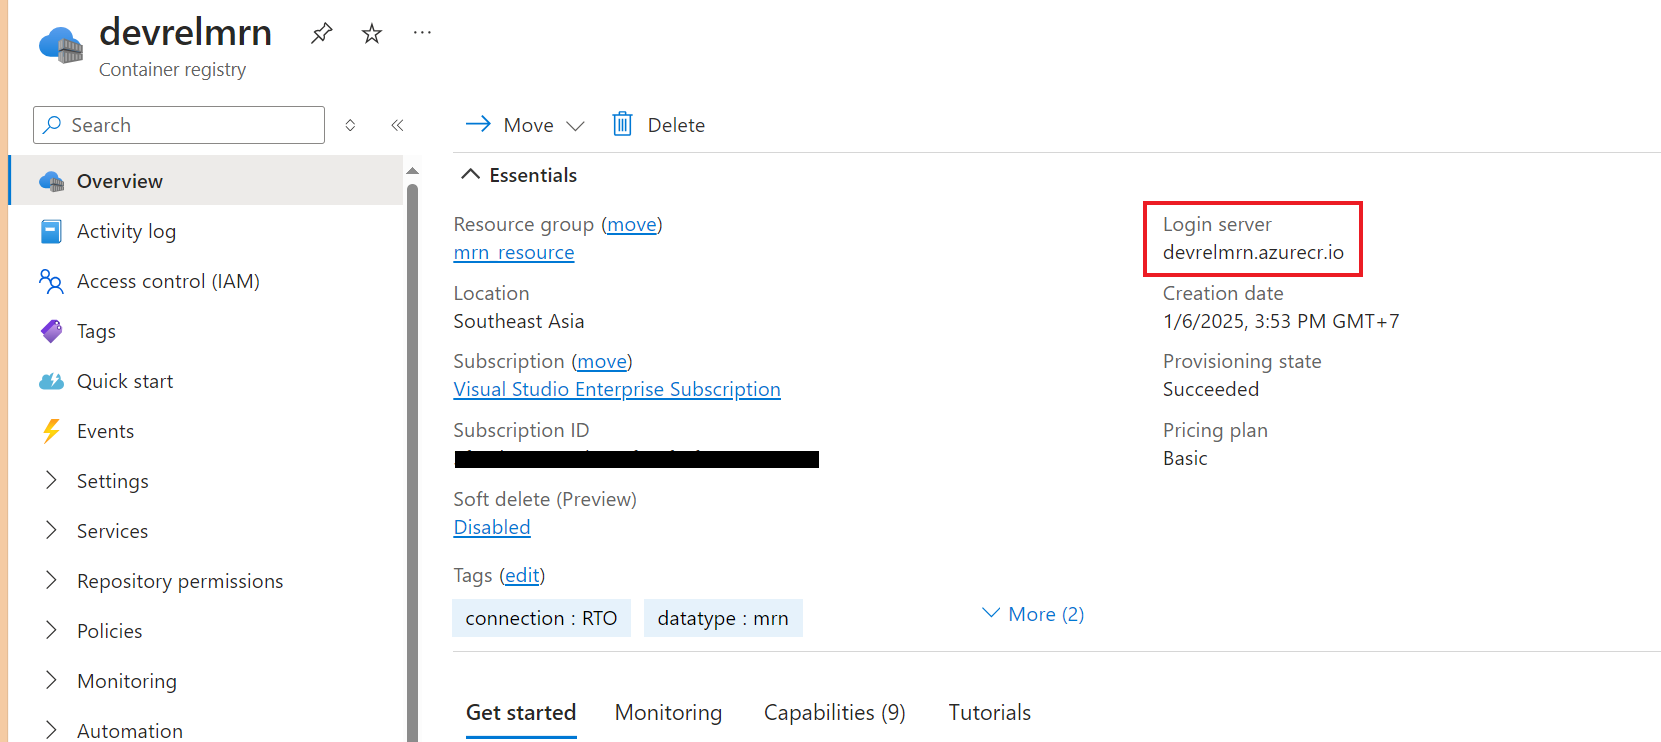
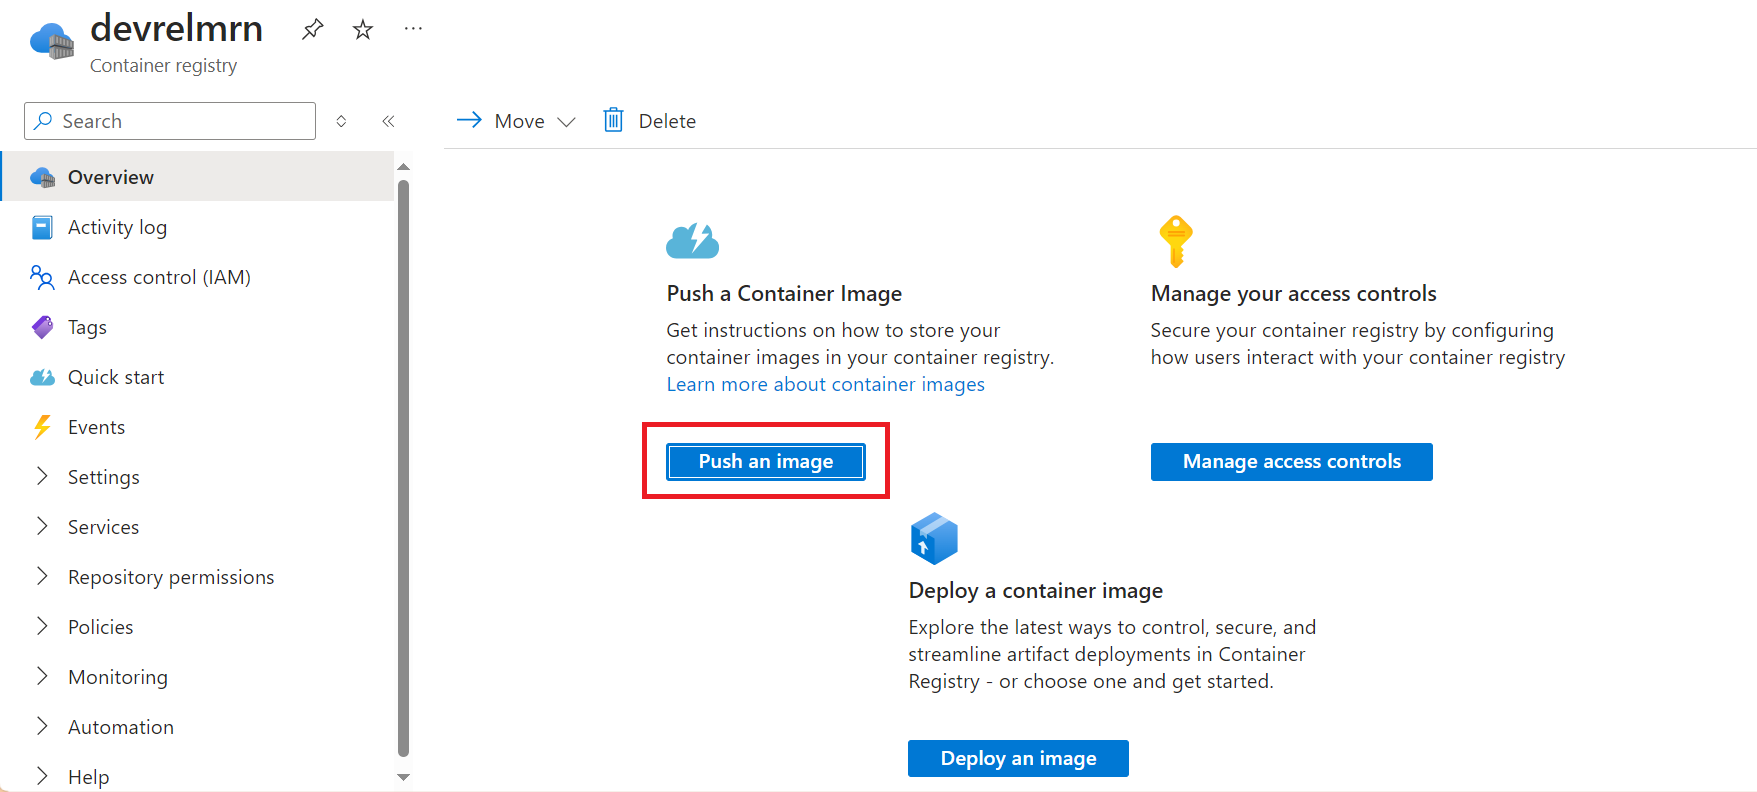
If you scroll the page down, there are some useful links on the Get started tab like the Push an image button that give you a quick guide on how to push an application image to this devrelmrn.azurecr.io container registry.
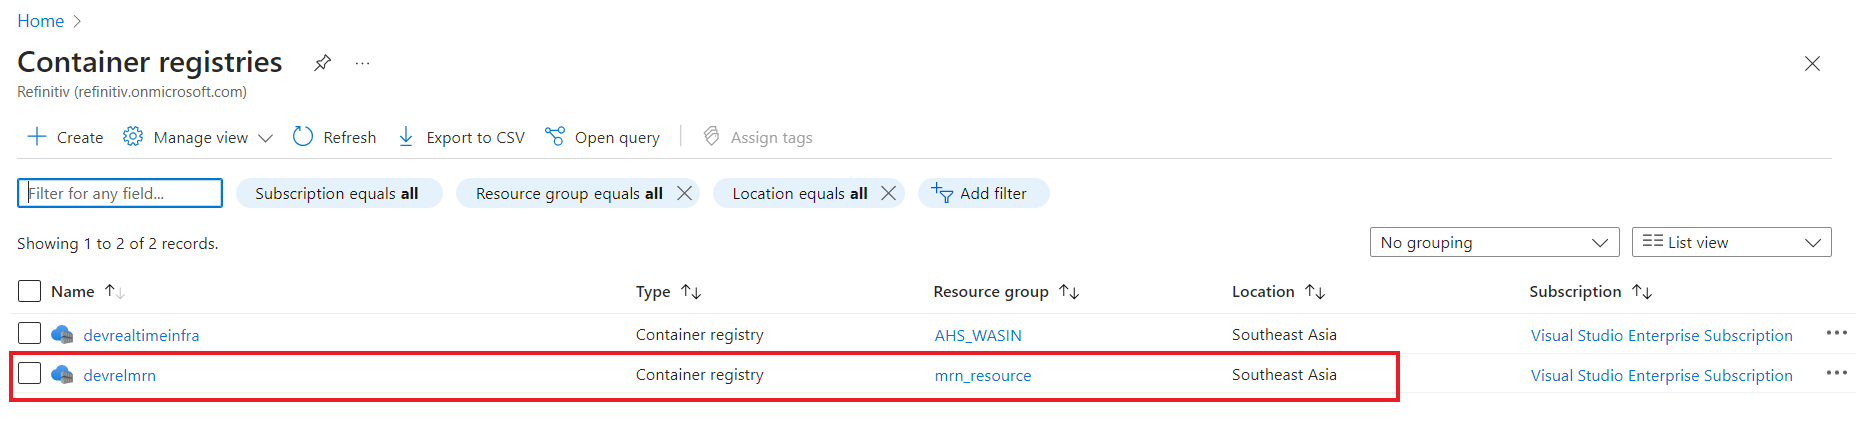
The next time you access the main Container Registry service page, this repository will be available on the main page as follows.
That is all for the repository preparation.
Push your local application image to Azure Container Registry Repository
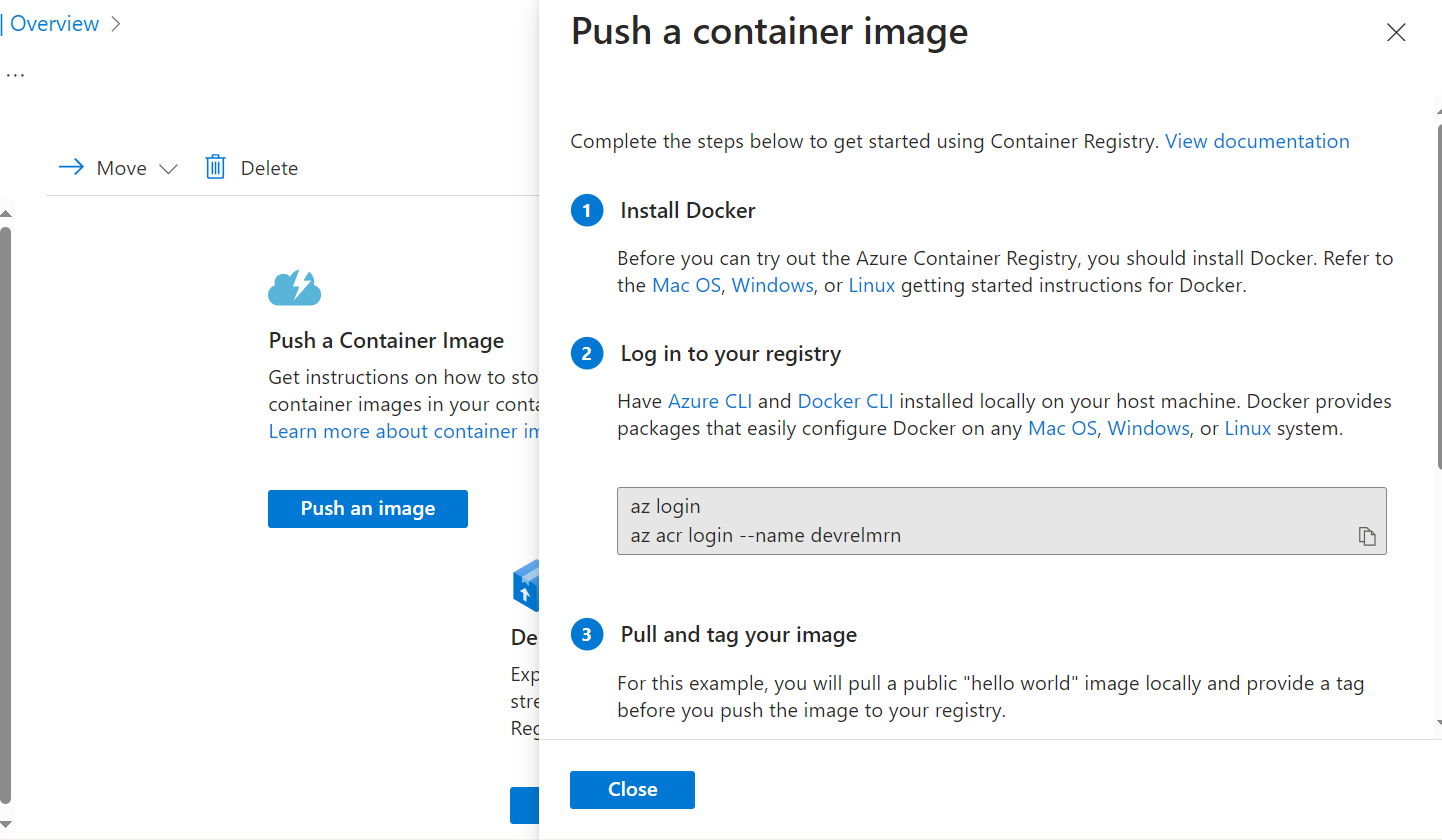
Now it is time to push an application image to the newly created devrelmrn.azurecr.io container registry. You need the Azure CLI tool in this step.
The first step is log in to your Azure account via the CLI tool. I am demonstrating with my Ubuntu 20.04 WSL.
$ az login
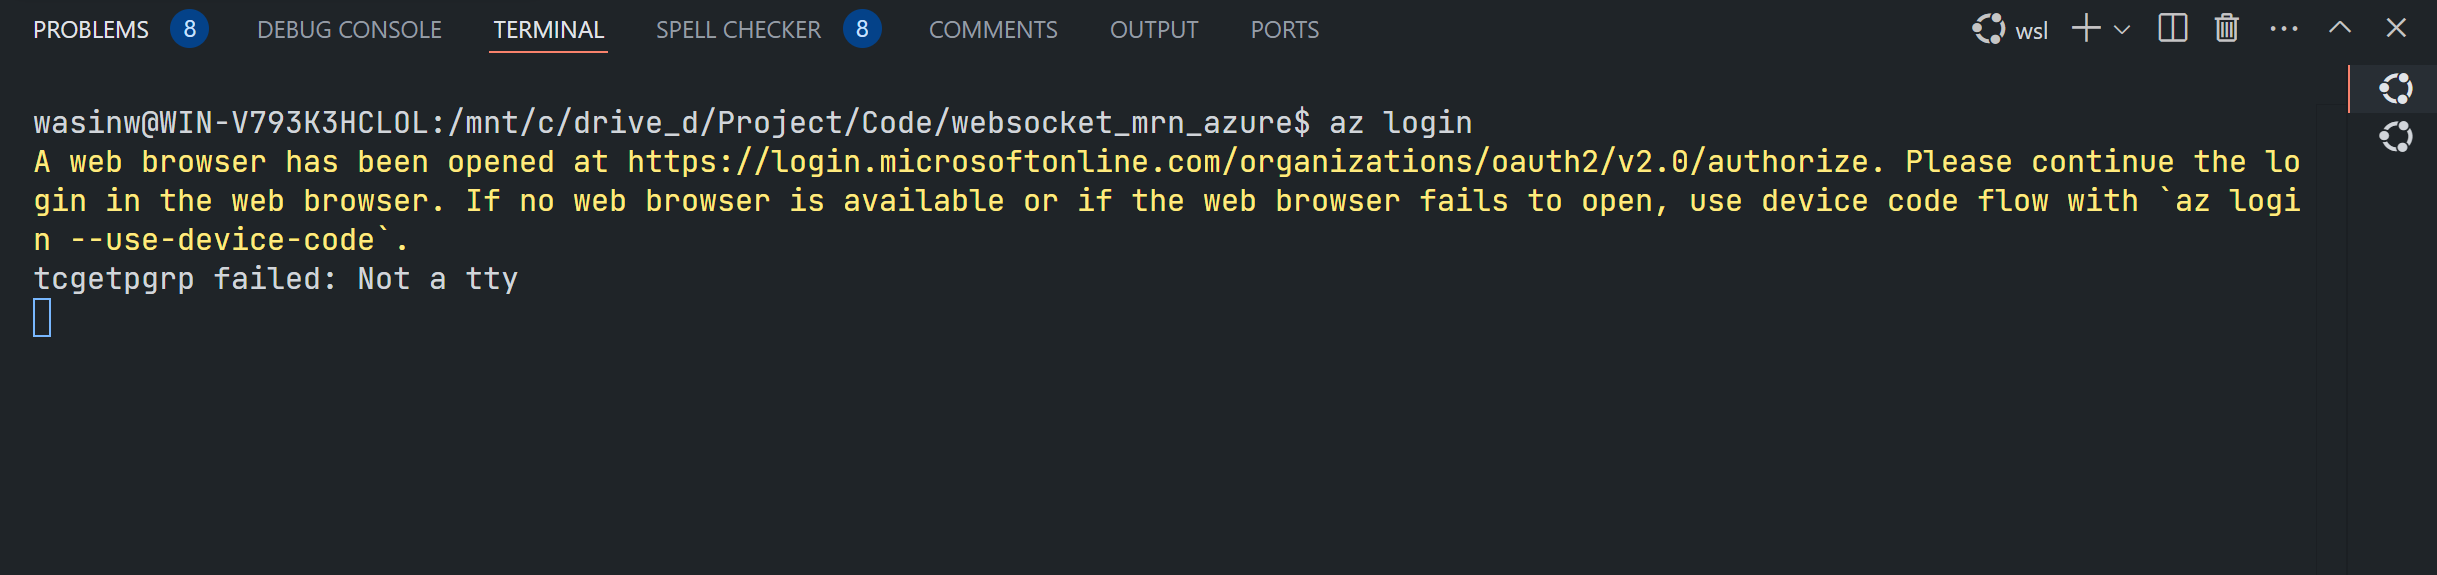
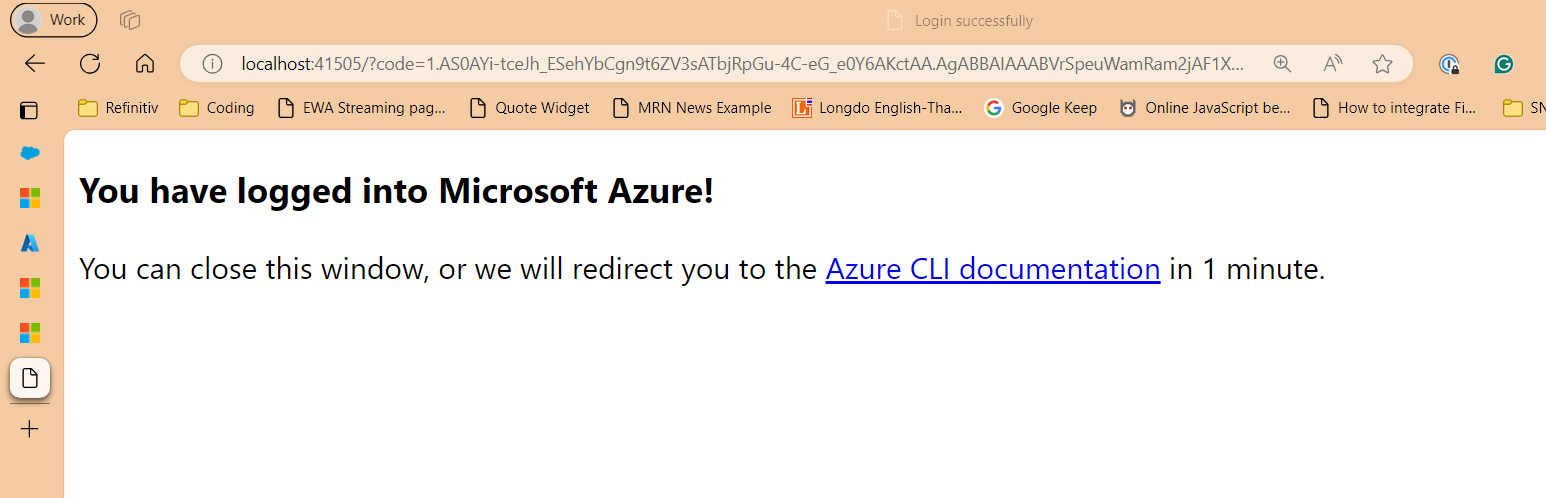
Then log in to the opened browser with your Azure account and credential. The page should shows this logged in success message.
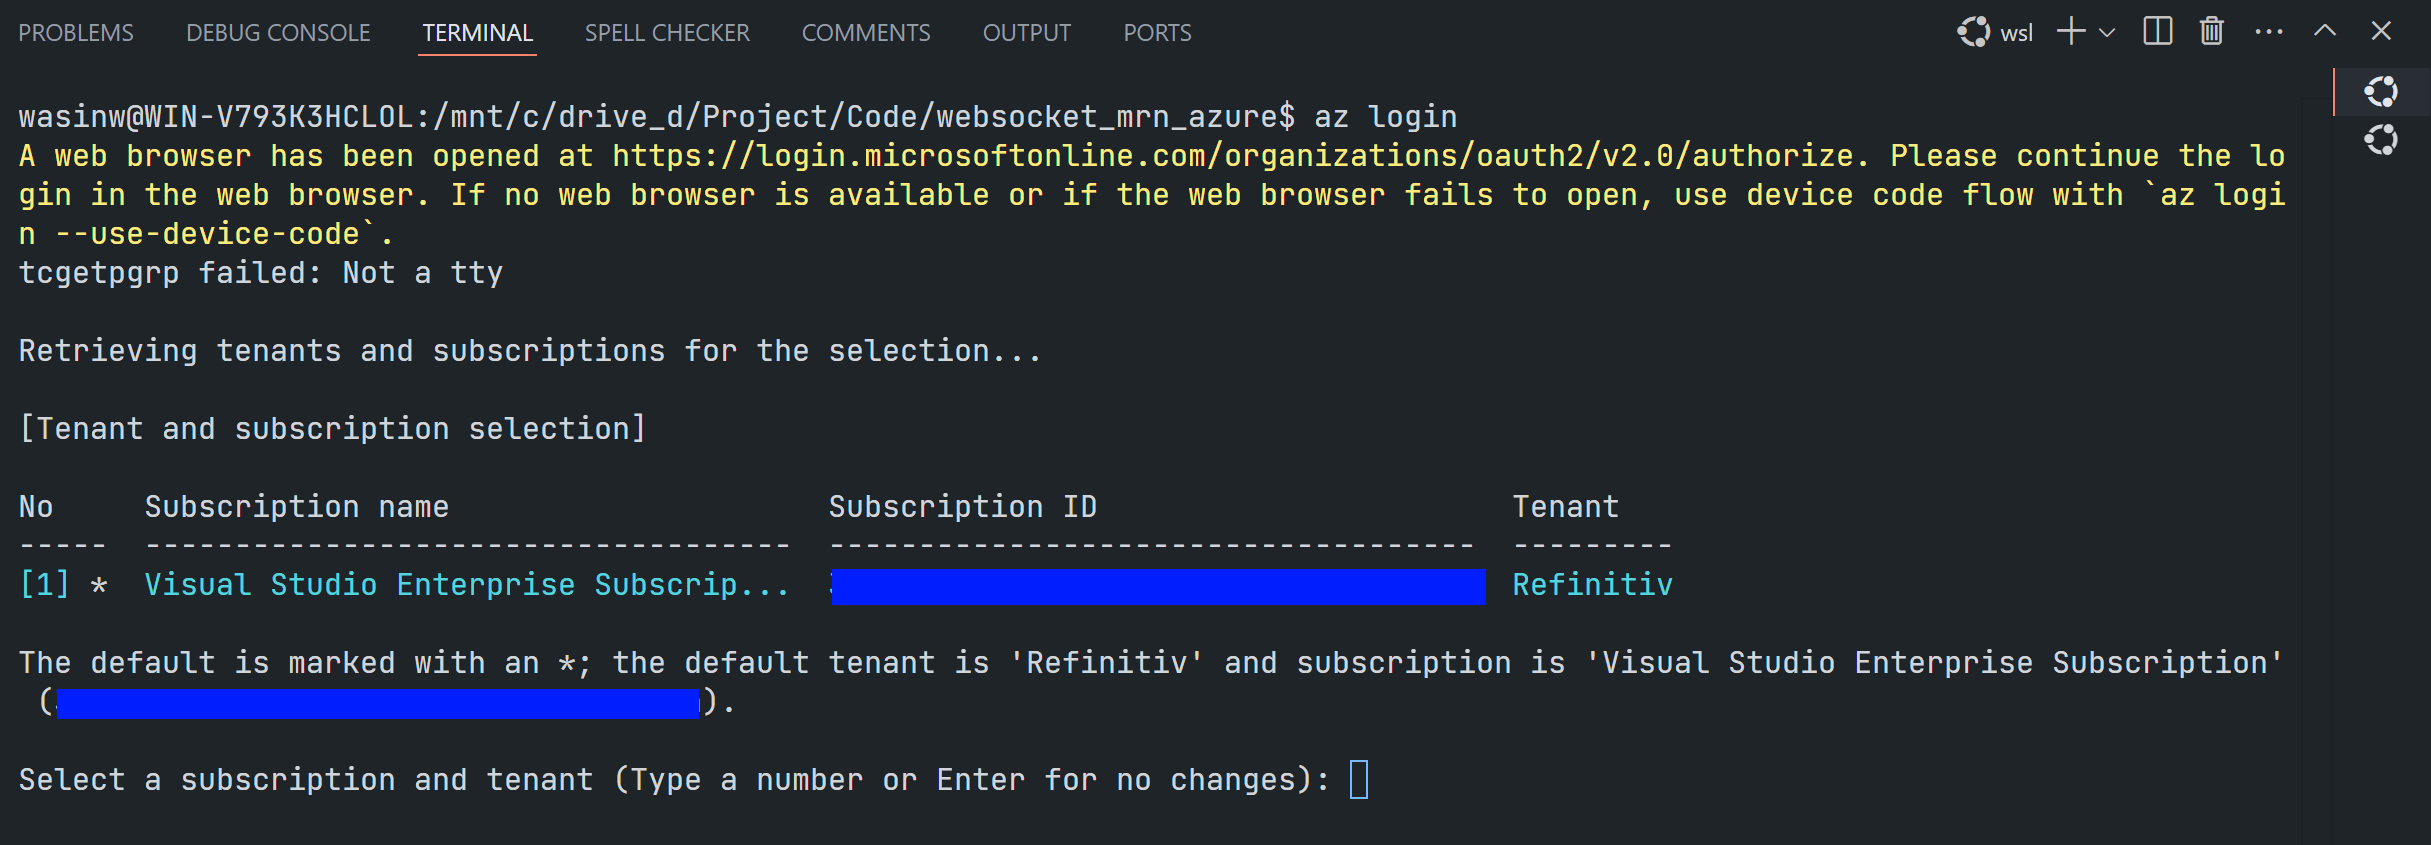
Then proceed the steps on your CLI terminal by choosing your subscription tenant.
If you're using Azure CLI over a proxy server, you may encounter the SSLError("bad handshake: Error([('SSL routines', 'tls_process_server_certificate', 'certificate verify failed')],)",) error message. To address this issue, please follows an instruction on this Azure CLI: Work behind a proxy page.
There are other ways and options to log in to Azure service via the Azure CLI, please check this Sign into Azure interactively using the Azure CLI document for more detail.
Now you have logged in to Azure, the next step is log in to the the registry instance with the registry resource name (not the fully qualified login server name).
$ az acr login --name <registry-name>
Example:
$ az acr login --name devrelmrn

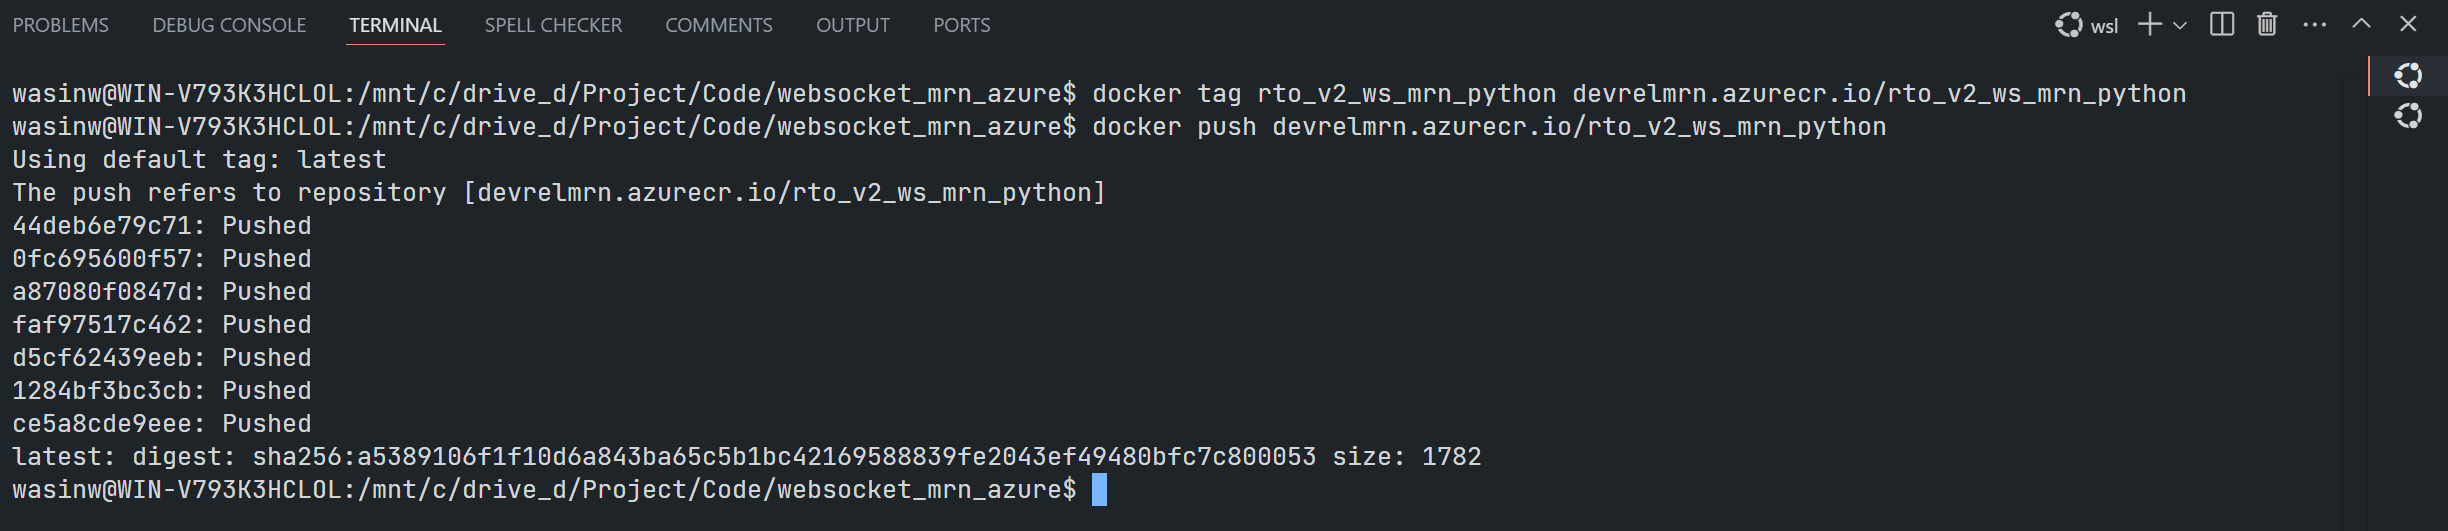
Next, tag the image with the fully qualified name of the registry name (which is devrelmrn.azurecr.io in this case) with a Docker tag command.
$ docker tag rto_v2_ws_mrn_python devrelmrn.azurecr.io/rto_v2_ws_mrn_python
Please be noticed that I did not specify the version of this image, so the version is latest by default

Finally, push an image to Azure Container registry with a Docker push command command as follows
$ docker push <fully qualified login server name>/image-name:version
Example:
$ docker push devrelmrn.azurecr.io/rto_v2_ws_mrn_python
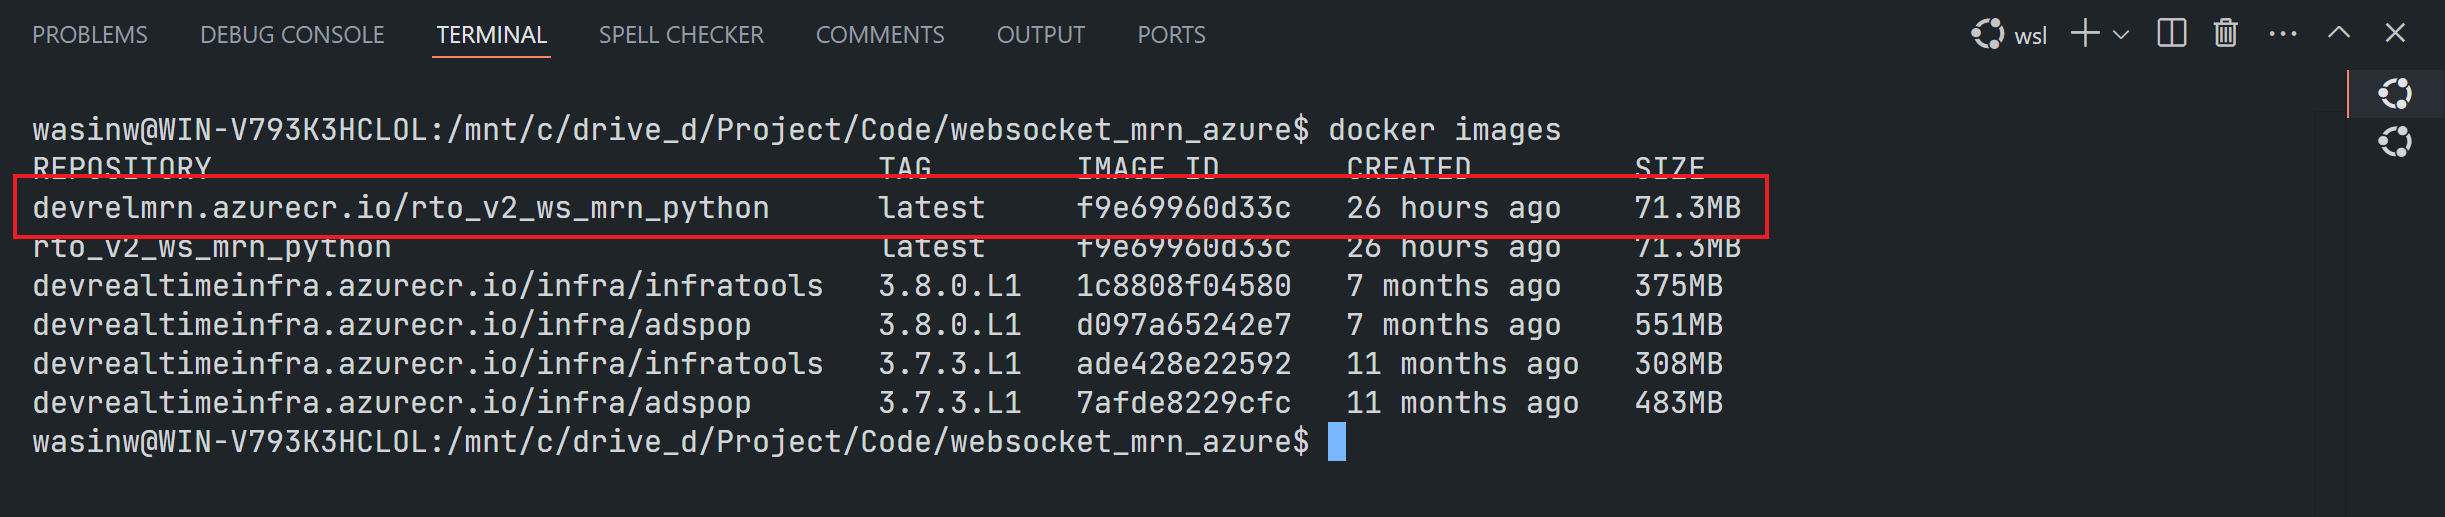
A docker images command shows this newly pushed image as follows.
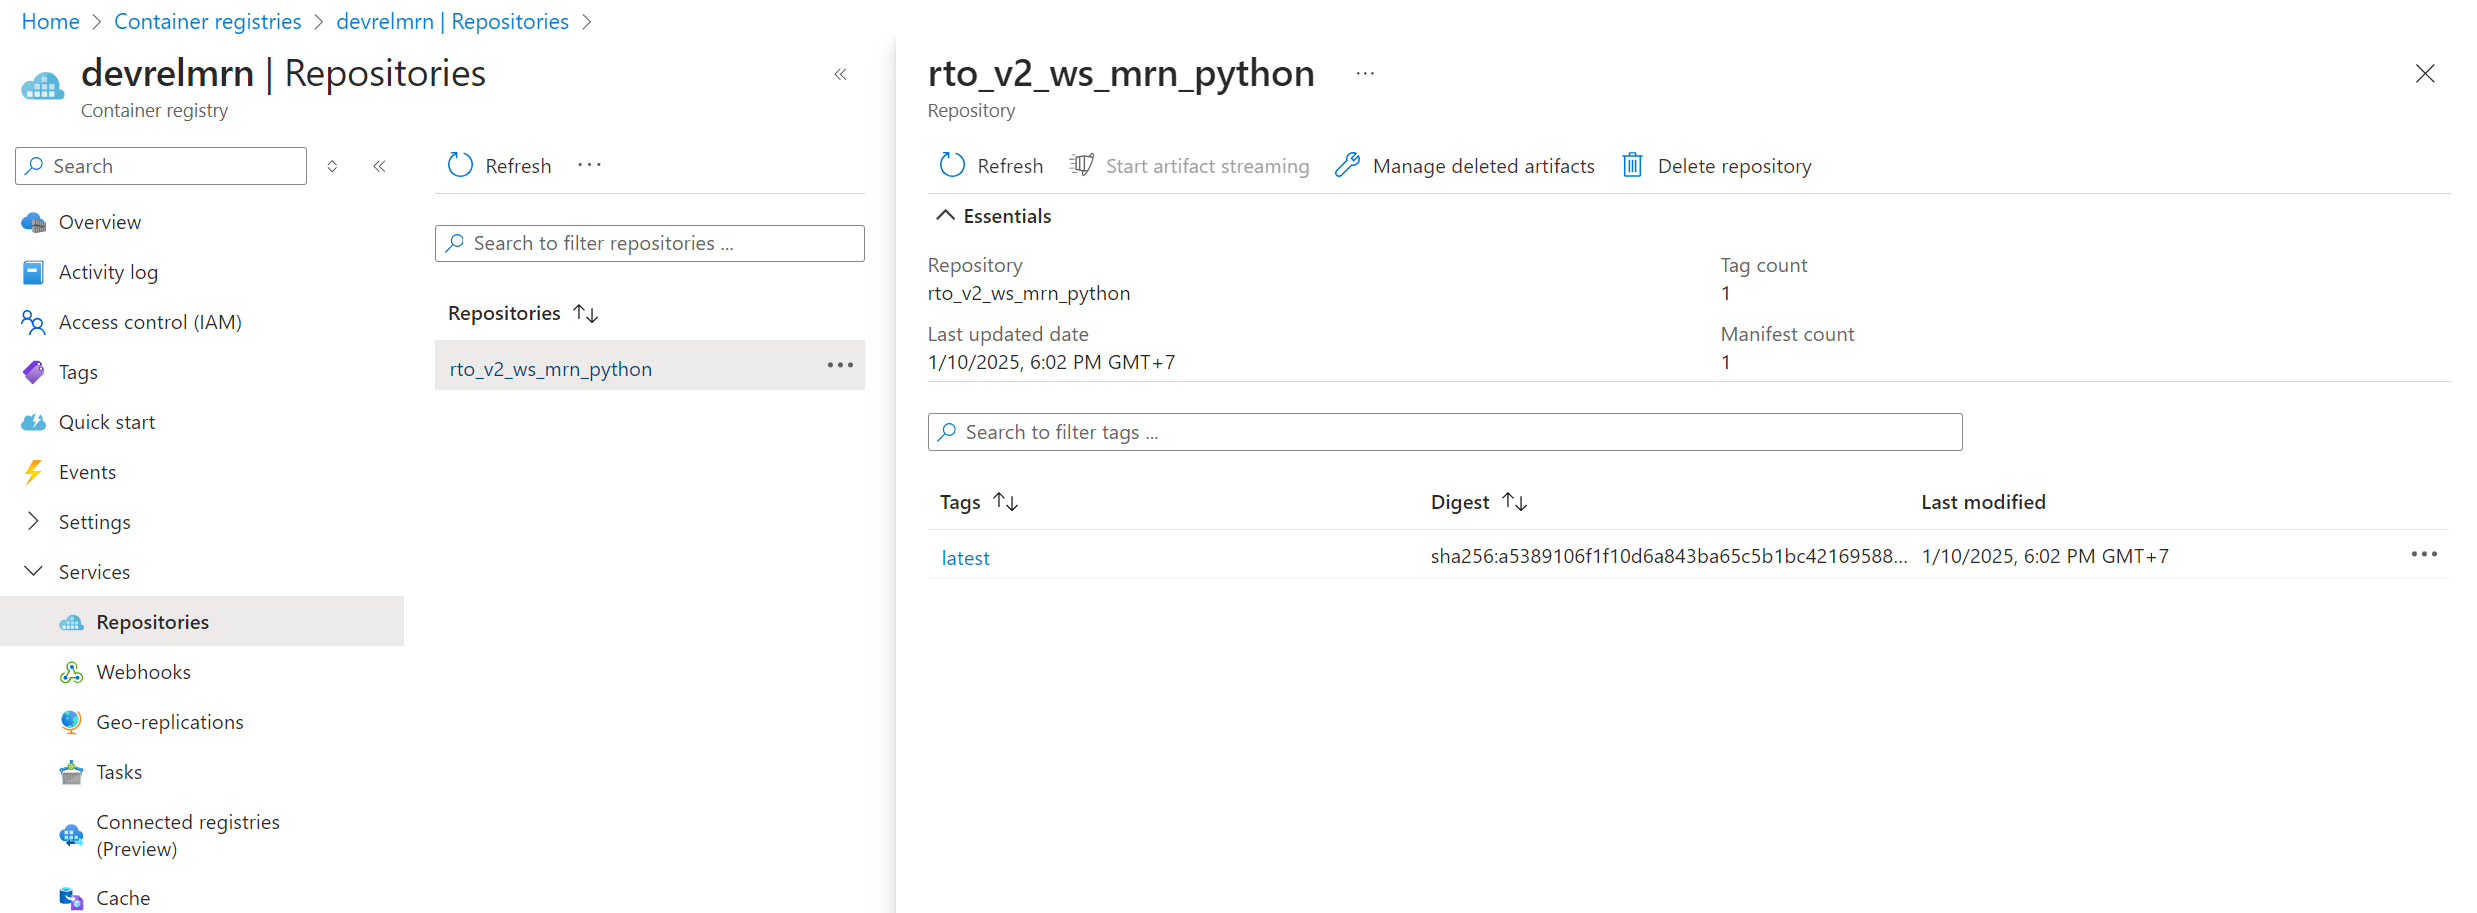
If you get back to your container registry on the Azure panel, an image will be available on the Services --> Repositories tab.
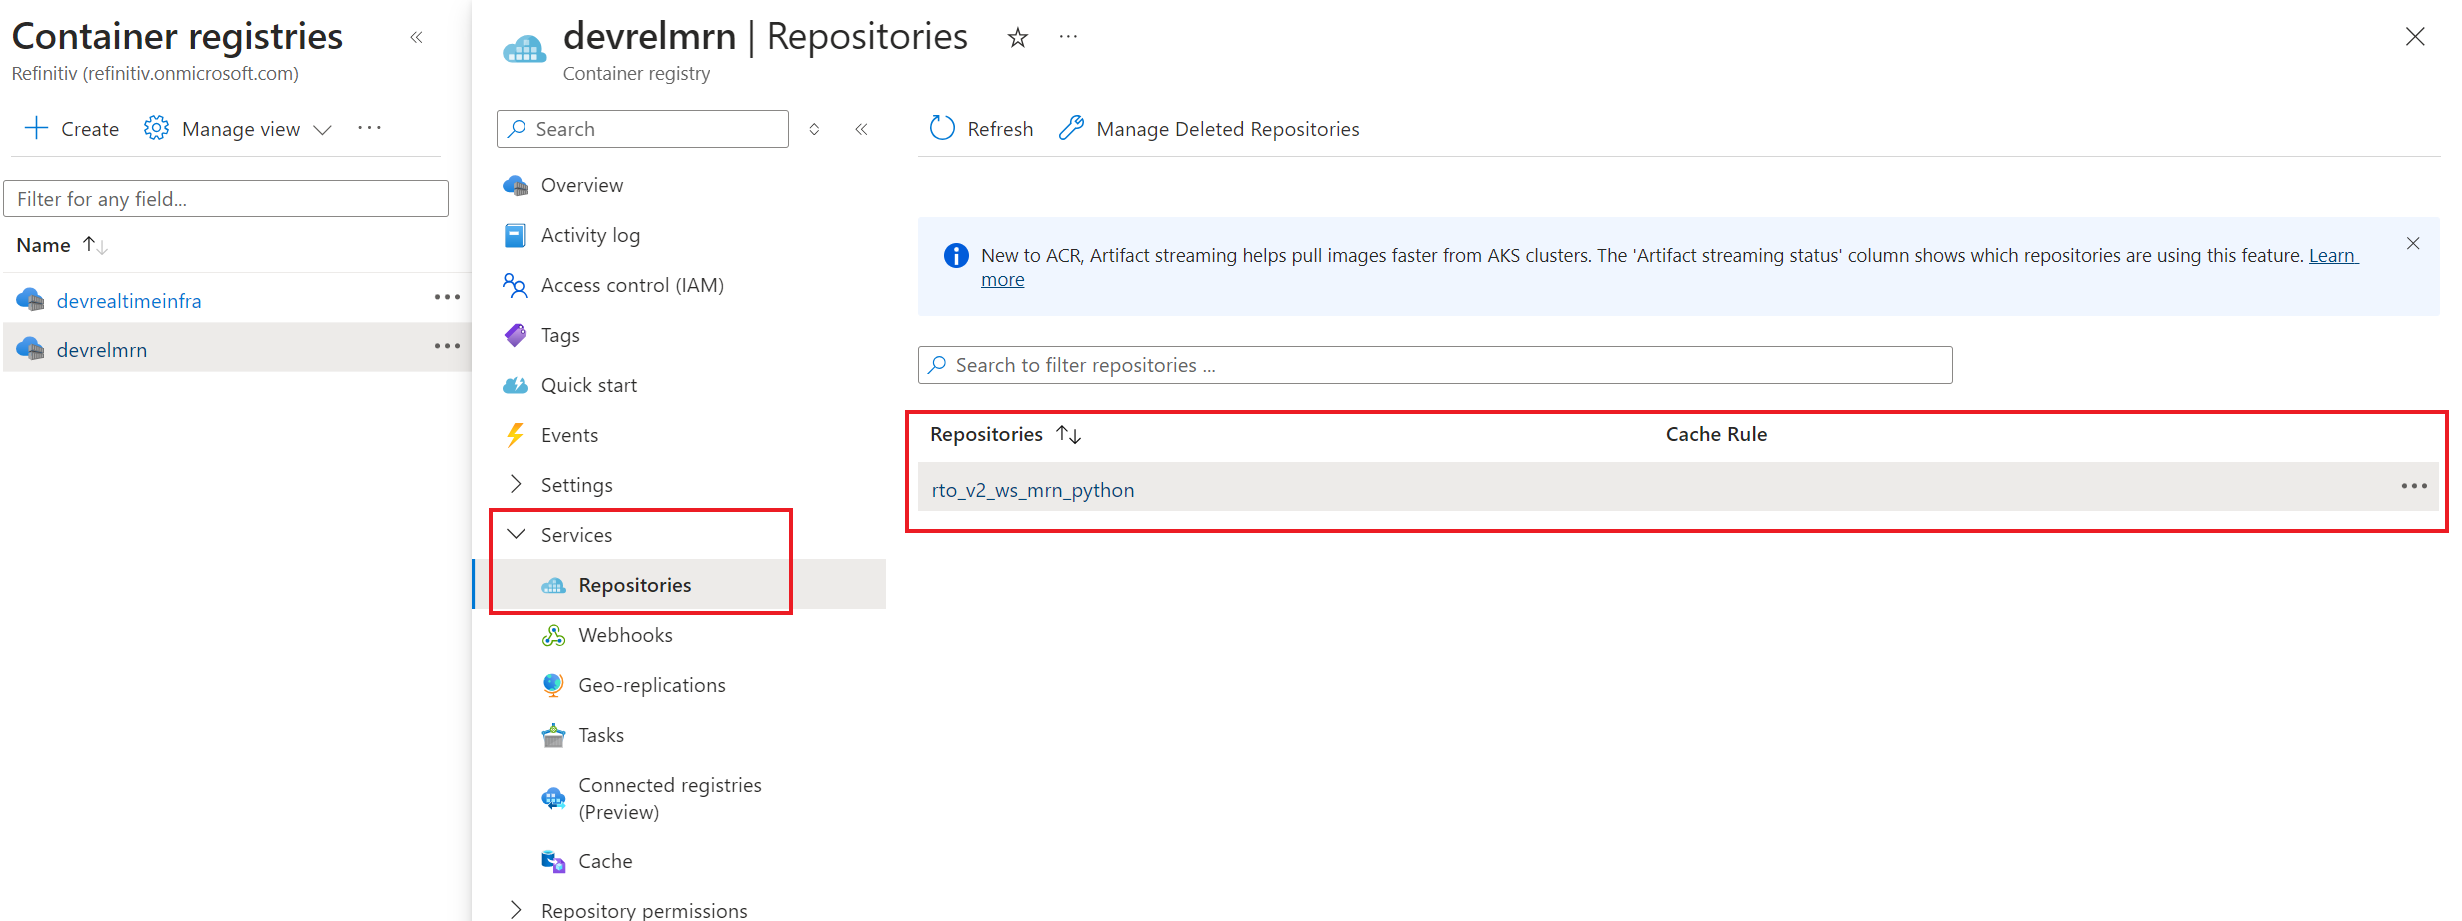
You can click on an image name to see its details.
Now your image is deployed on Azure Container registry, and you can pull it for later use anytime.
That is all I have to say about how to push an image to Azure.
Pull your image from the Container Registry to local
My next point is how to pull that image to run it locally. To pull an image from Azure Container Registry to your local environment, you can use a Docker pull command with <registry-name>.azurecr.io/<image-name> format as an image name.
Please note that you need to log in to Azure account and your container registry instance with the CLI tool before running a Docker pull command. Otherwise, a command returns "unauthorized" error message back to you. You can use a az account show -o jsonc command to check if your Azure CLI session is logged in.

$ az login
$ az acr login --name devrelmrn
$ docker pull devrelmrn.azurecr.io/rto_v2_ws_mrn_python
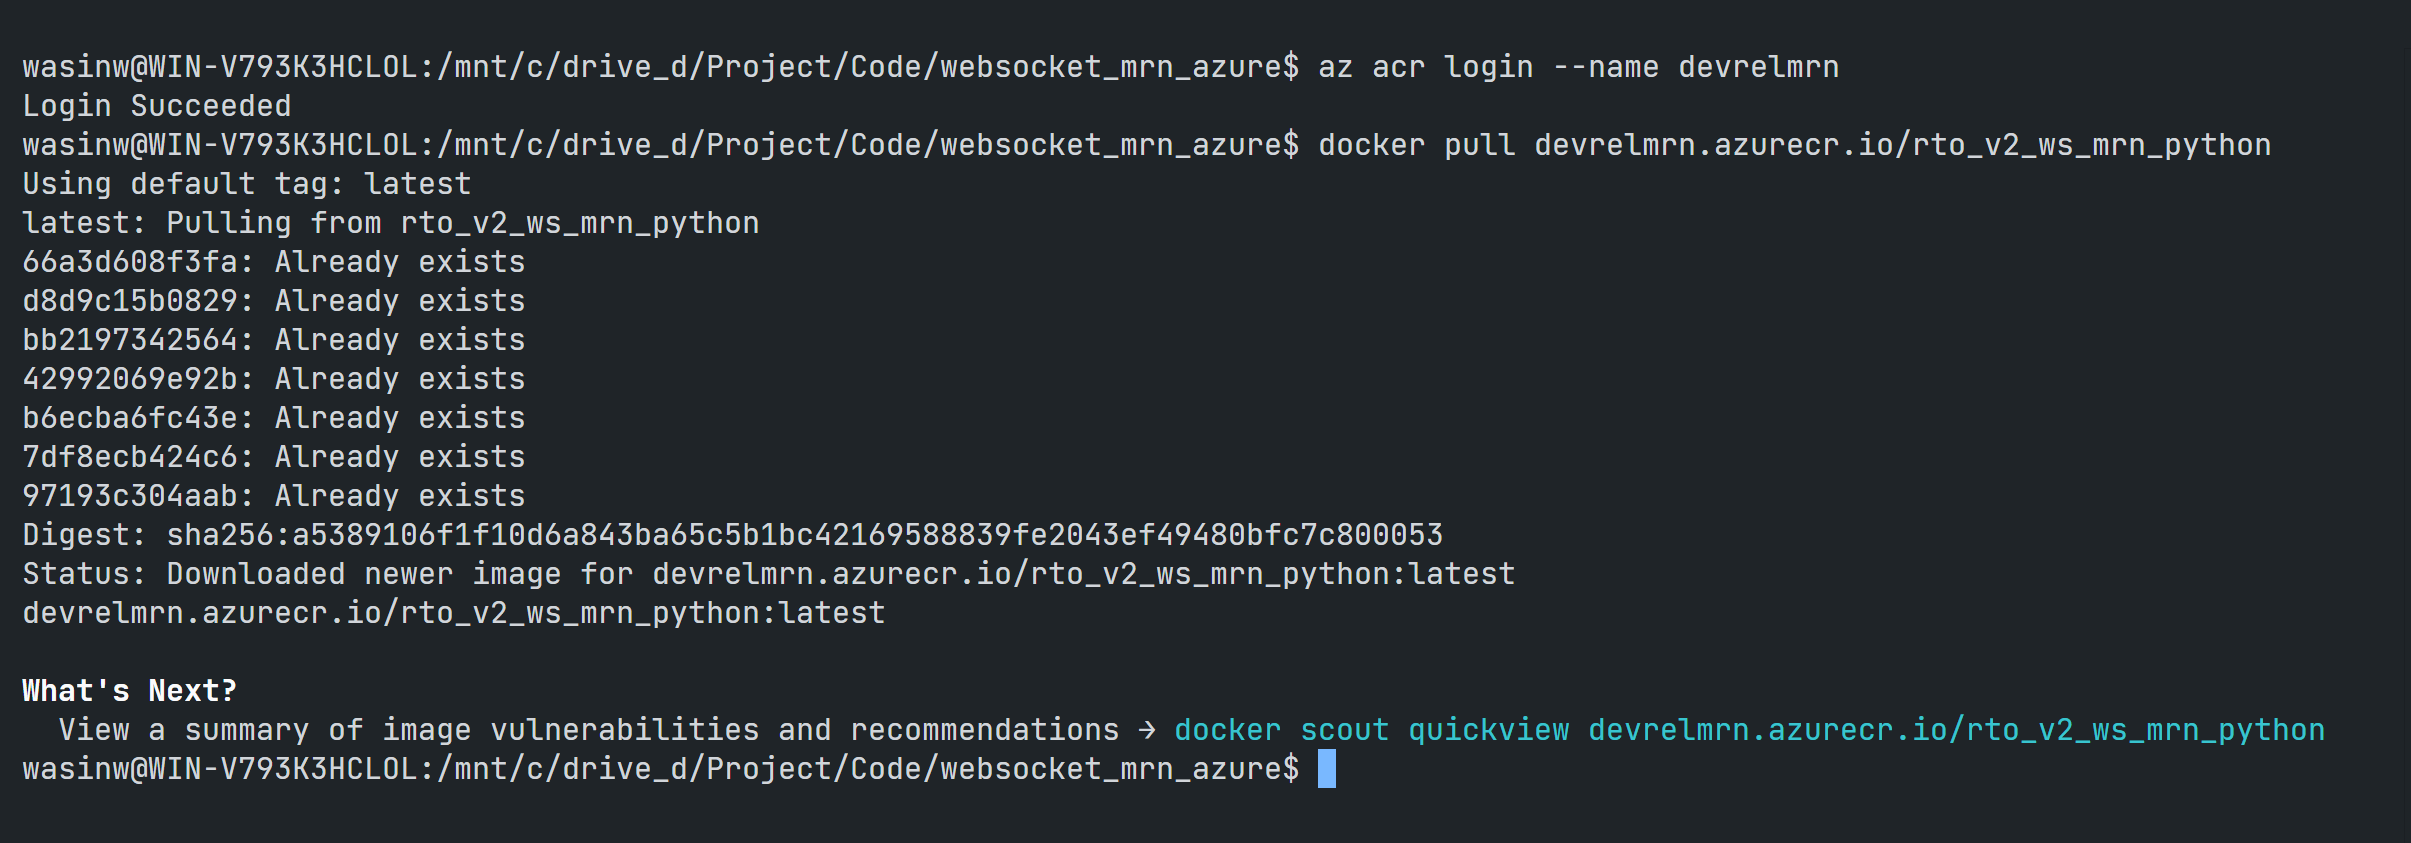
A Docker images shows your newly pull image as follows:

Then you can run this image locally from the steps on Docker Image Testing section above.
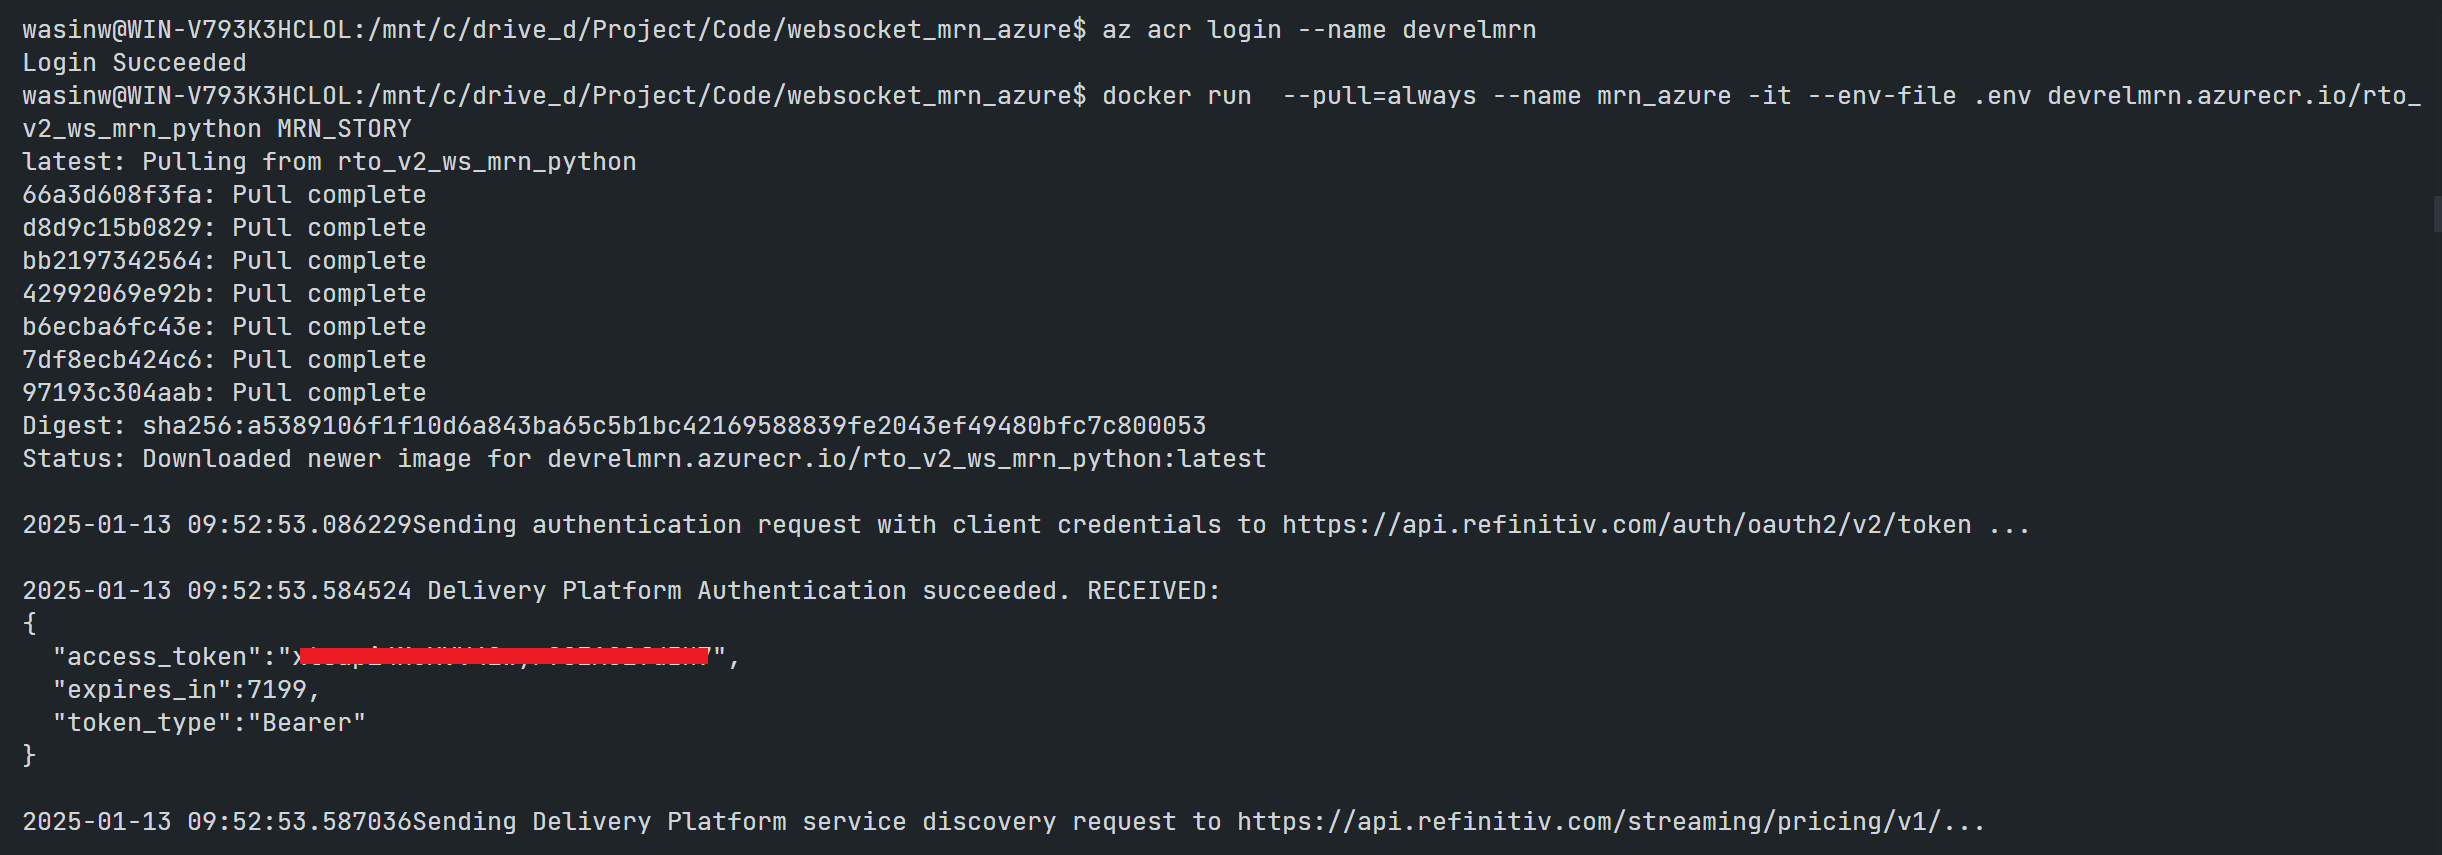
Alternatively, you can use a Docker run command with --pull=always parameter to pull an image from Azure automatically and run it with a single command.
Note: You still need to log in to Azure account and your container registry instance with the CLI tool.
$ az login
$ az acr login --name devrelmrn
$ docker run --pull=always --name mrn_azure -it --env-file .env devrelmrn.azurecr.io/rto_v2_ws_mrn_python MRN_STORY
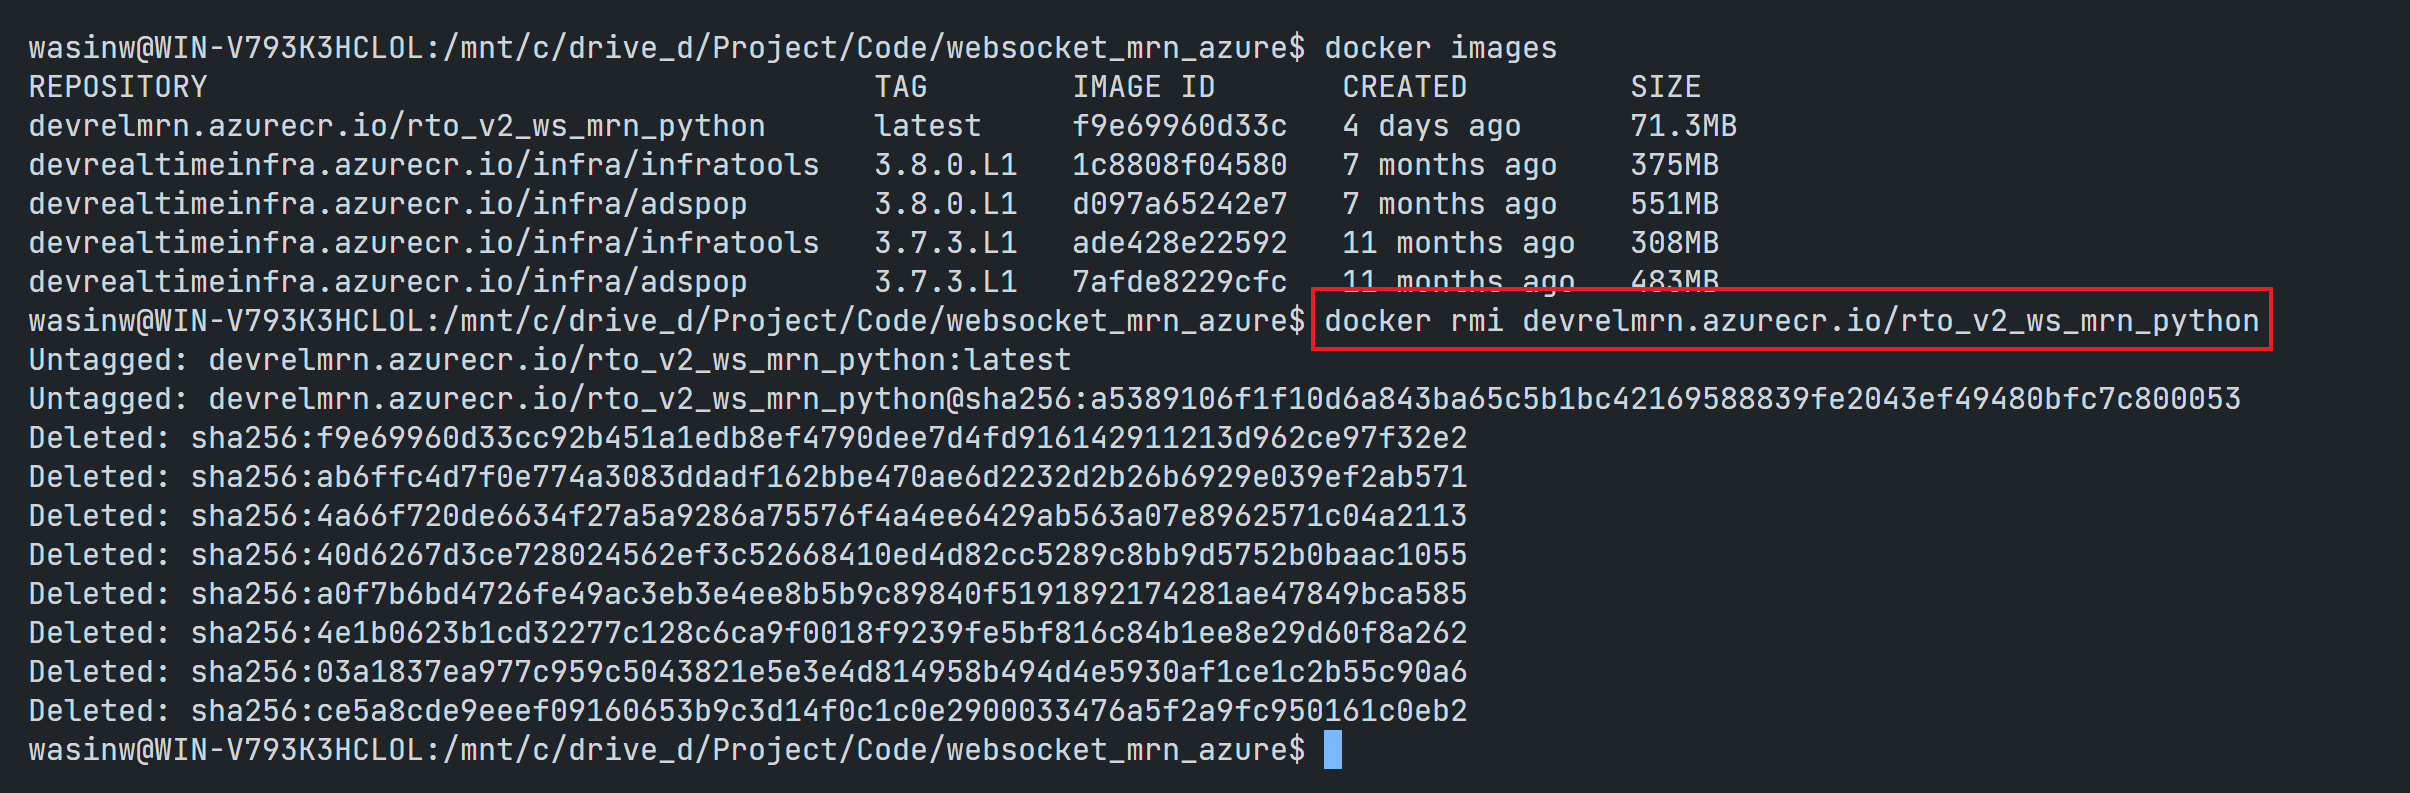
To delete an image, you can use a Docker image rm command with the <registry-name>.azurecr.io/<image-name> format as an image name. Note: A associate container must be stopped and deleted before delete an image.
$ docker rmi devrelmrn.azurecr.io/rto_v2_ws_mrn_python
That cover how to pull an image from Azure and run it locally.
Next Steps
That brings me to the end of this project. This project shows only step-by-step guide for the basic tasks such as set up Azure Container Registry repository, push your local application image to Azure, and pull an image back to your machine. There are more tasks that help you improve container lifecycle management like the following:
- Use the development pipelines to automate container building, testing, pushing and deploying when developers commit code to Git repository
- Scale your container registry to serve developers across regions
- Connect to other Azure services like Azure Kubernetes Service (AKS) or Azure App Service or Azure Container Apps, and much more.
You can find more information on the following Azure resources pages
- Automate container image builds and maintenance with Azure Container Registry tasks
- Azure Container Registry documentation
- List of Azure Container Services
Please note that your application image does not limit to the WebSocket API/Real-Time APIs or Machine Readable News data, any applications that support containerization can be utilized Azure Container Registry service.
Reference
For further details, please check out the following resources:
- Real-Time WebSocket API page on the LSEG Developer Community website.
- WebSocket API Quickstart page.
- MRN Data Models Implementation Guide document.
- MRN WebSocket Python example application
- Introduction to Machine Readable News with WebSocket API article.
- Machine Readable News (MRN) & N2_UBMS Comparison and Migration Guide article.
- Azure Container Registry page
- Azure Container Registry documentation
- Introduction to Azure Container Registry
- Quickstart: Create an Azure container registry using the Azure portal
- What is Azure Container Registry? blog post.
- How to install the Azure CLI.
- Automate container image builds and maintenance with Azure Container Registry tasks.
- Azure Container Registry documentation.
- List of Azure Container Services.
For any question related to this article or the LSEG APIs, please use the Developer Community Q&A Forum.
Source Code
Related APIs
Related Articles
-
Introduction to Machine Readable News with WebSocket API
-
Machine Readable News (MRN) & N2_UBMS Comparison and Migration Guide
-
Migrating the WebSocket Machine Readable News to Version 2 Authentication
-
How to build a scalable web service for stock prices
-
How to deploy a web service on AWS
-
How to Deploy EMA Application to Azure Container Instances Service