
-
 Raksina SamasiriDeveloper Advocate
 -
 Jirapongse PhuriphanvichaiDeveloper Advocate
Introduction
Have you ever wondered how much of your usage quota remains before you reach a limit?
To help users proactively manage their API consumption and avoid errors caused by exceeding usage thresholds, the LSEG Data Library applies usage limits. You can find the official guidance in the Data Library documentation.
Currently, there are two methods to check your Data Library usage
- Query the throttling endpoint of the API when using a Data Library desktop session.
- Enable debug logging in LSEG Workspace and inspect the HTTP response headers returned by the platform.
This article walks through both approaches and shows how to monitor your remaining usage, helping you detect and handle situations such as HTTP 429 (Too Many Requests) before they impact your application.
Note: The examples in this article use LSEG Data Library for Python version 2.1.1.
Method 1:
Check Usage Limits via the endpoint
When your application uses a desktop session, you can query the DAPI throttling endpoint (localhost:<port>/api/throttling/limits) to retrieve the current usage limits and remaining quota.
For example, open:
http:// localhost:9001/api/throttling/limits
(Remove the space before localhost when using the URL.)
The response will be like below
Understanding the Response
The response contains information about both request-based and volume-based usage limits, including the configured limits and the remaining quota available to your application.
The fields are described below:
- daily_request_max – Maximum number of requests allowed per day.
- daily_request_remaining – Number of requests remaining in the current day.
- request_max – Maximum number of requests allowed within a throttling period.
- request_remaining – Number of requests remaining in the current throttling period.
- request_period – Duration of the request throttling period, in seconds.
- daily_volume_max – Maximum daily data volume allowance.
- daily_volume_remaining – Remaining daily data volume allowance.
- volume_max – Maximum data volume allowed within a throttling period.
- volume_remaining – Remaining data volume available within the current throttling period.
- volume_period – Duration of the volume throttling period, in seconds.
For example, in the response above:
- request_max: 5 and request_period: 1 indicate that up to 5 requests per second are allowed.
- request_remaining: 5 means the application has not consumed any requests within the current one-second window.
- daily_request_remaining: 9999 indicates that 9,999 requests are still available for the current day.
Monitoring these values can help applications proactively manage request rates and avoid encountering HTTP 429 (Too Many Requests) errors when usage limits are reached.
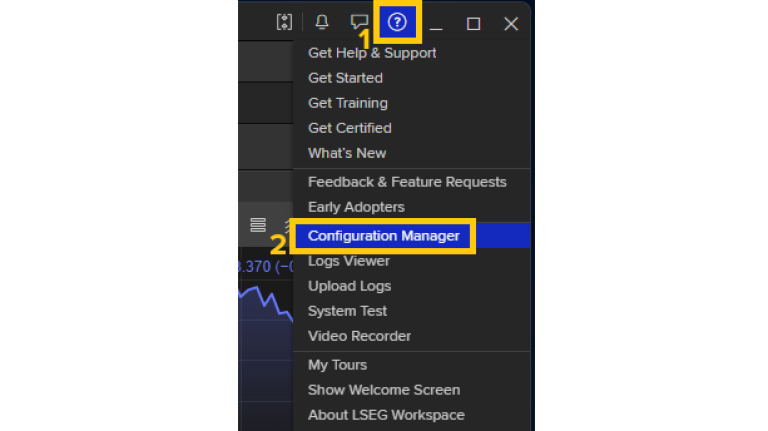
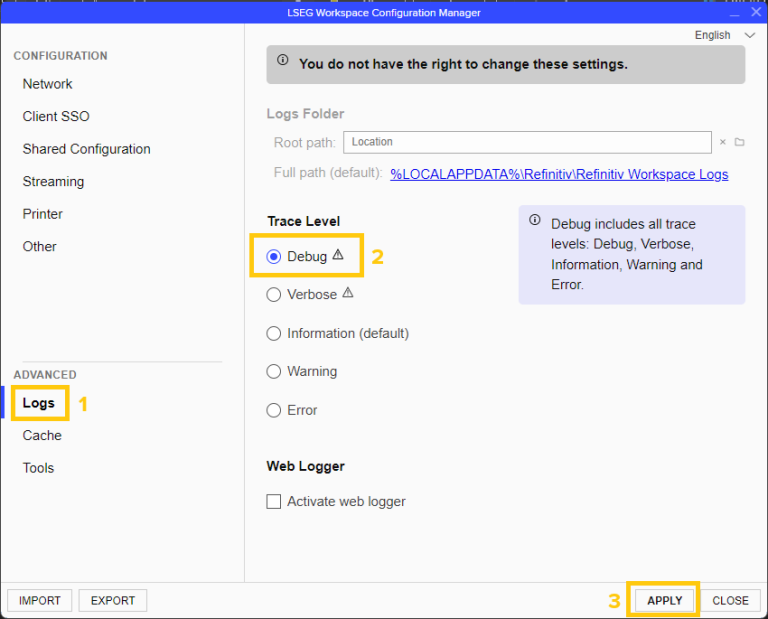
2. Navigate to the Logs page under the Advanced section.
3. Set the Trace Level to Debug, then click Apply (see screenshot below)
Note: Setting the trace level to Debug may impact system performance. Use this level only when troubleshooting or monitoring usage.
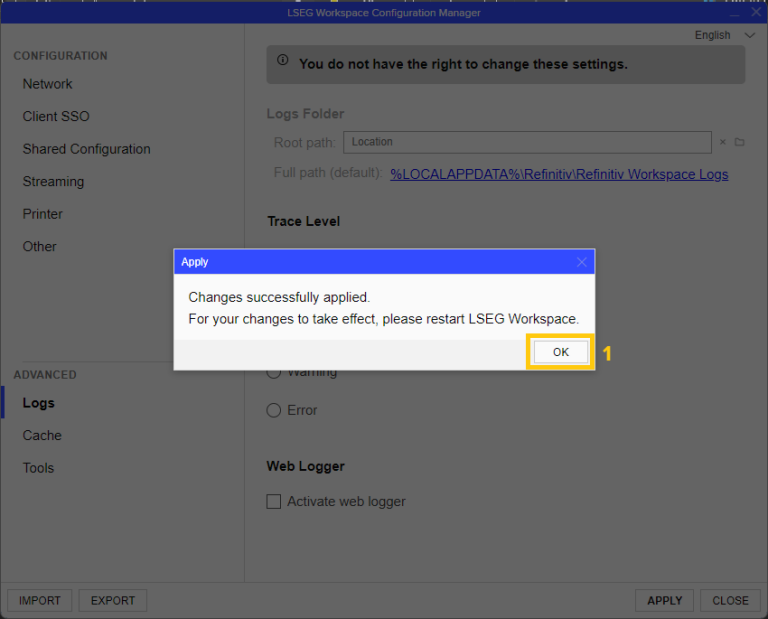
4. Click OK to apply the configuration and Restart LSEG Workspace to activate the changes.
Step 2: Configure Logging in Your Python Script
You can set the log level to debug either in your configuration file or directly in your code. Here’s the example configuration file: (see more detail and example of configuration file here)
And here's how to do it in-line:
Step 3: Monkey-Patch the Data Library to Log HTTP Response Headers
To print out the HTTP response headers (which often include usage and limit information), you can monkey-patch the request method in the HTTPService class:
Step 4: Run Your Data Retrieval Code
Now, when you run your Data Library functions to retrieve data, the HTTP response headers—including any limit or usage information—will be printed in your console log (or log file, depending on your configuration).
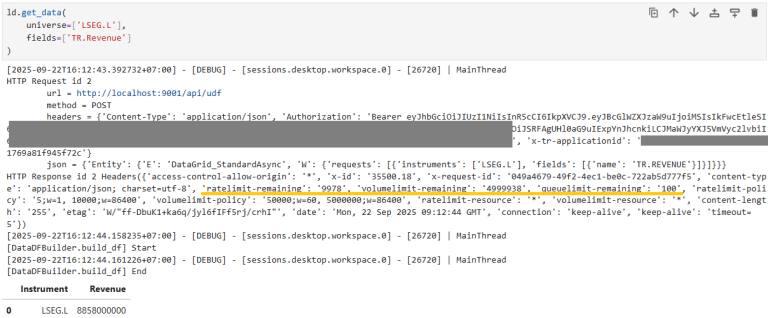
Step 5: Check Detailed Logs in Workspace
For more detailed information about your API usage and limits:
- Go to the Workspace Logs folder. The Full Path to it can be found in Logs section of Configuration Manager
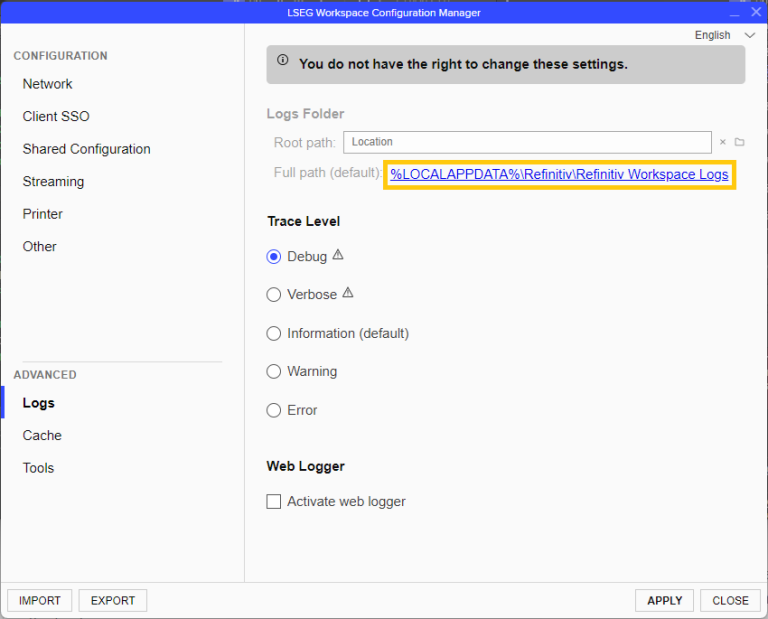
- Open the most recently created sub-folder named like Desktop.<date>.<time>.p<process-ID>.
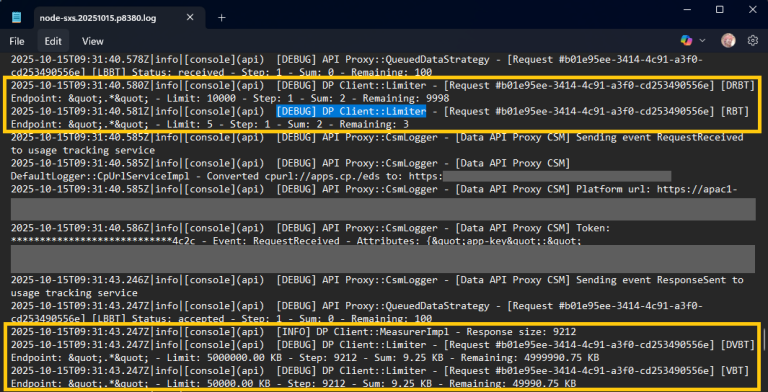
- Look for the file named node-sxs.<date>.p<process-ID>.log.
- Search for the lines that contains [DEBUG] DP Client::Limiter
Here, you can find additional details about your requests and any limit-related messages.
Conclusion
Monitoring your remaining usage quota can help you avoid unexpected interruptions and better manage your application's interaction with the Data Platform.
In this article, we covered two methods for checking usage limits in the Data Library for Python:
- Querying the DAPI throttling endpoint when using a desktop session to view the current limits and remaining quota directly.
- Inspecting HTTP response headers and Workspace debug logs to obtain detailed usage and throttling information returned by the platform.
By incorporating these monitoring techniques into your development and troubleshooting workflows, you can proactively detect when your application is approaching its usage limits, implement appropriate retry or backoff logic, and reduce the likelihood of encountering HTTP 429 (Too Many Requests) errors.
The sample Jupyter Notebook file for this article can be found in the top-right section of this article.
- Register or Log in to applaud this article
- Let the author know how much this article helped you
If you require assistance, please
contact us here
Get In Touch

Related APIs
Related Articles
Source Code
Request Free Trial
Call your local sales team
Americas
All countries (toll free): +1 800 427 7570
Brazil: +55 11 47009629
Argentina: +54 11 53546700
Chile: +56 2 24838932
Mexico: +52 55 80005740
Colombia: +57 1 4419404
Europe, Middle East, Africa
Europe: +442045302020
Africa: +27 11 775 3188
Middle East & North Africa: 800035704182
Asia Pacific (Sub-Regional)
Australia & Pacific Islands: +612 8066 2494
China mainland: +86 10 6627 1095
Hong Kong & Macau: +852 3077 5499
India, Bangladesh, Nepal, Maldives & Sri Lanka:
+91 22 6180 7525
Indonesia: +622150960350
Japan: +813 6743 6515
Korea: +822 3478 4303
Malaysia & Brunei: +603 7 724 0502
New Zealand: +64 9913 6203
Philippines: 180 089 094 050 (Globe) or
180 014 410 639 (PLDT)
Singapore and all non-listed ASEAN Countries:
+65 6415 5484
Taiwan: +886 2 7734 4677
Thailand & Laos: +662 844 9576