Download tutorial source code |
Click here to download |
| Last update | Dec 2020 |
| Compilers | Visual Studio 2015 |
| Prerequisites | EMA NI Provider - Introduction |
Tutorial purpose
The goal of this tutorial is to teach you how to set up your development environment and also to describe the layout of the barebones EMA NIP application we will use in this series of tutorials. This barebones application lays out the foundation of our EMA Non-Interactive Provider application we will build in the next tutorials.
To this aim we will go through the following:
- Download the tutorials source code
- Setup the development environment
- Understanding the Visual Studio projects settings
- Understanding the barebones application structure
- Build and run the application
Download the tutorials source code
The tutorials in this series rely on source code projects that demonstrate the purpose of each tutorial. These projects are contained in a Visual Studio solution that can be downloaded here.
Before you move to the next section, please do the following:
- Download the tutorials series source code
- Extract the downloaded file in the folder of your choice
Once the file is extracted, the folder should contain a Visual Studio solution file and a number of subfolders. Each of these folders contains the project and source files for each tutorial in this series.
Set up the development environment
The downloaded Visual Studio projects are pre-configured with the proper Include directories, Library directories, and other parameters required for building EMA applications. These parameters refer to the RTSDK you may have installed (or you will install) in the folder of your choice. Because of this, the project parameters rely on an environment variable named ElektronSDKInstallPath. This variable indicates where your RTSDK is actually installed. The path should point to a folder name that contains the \Ema folder. For example, if you installed the RTSDK in this folder C:\Program Files (x86)\LSEG\RTSDK-2.0.0.L1..win.rrg\, then the variable must be set this way:
ElektronSDKInstallPath=C:\Program Files (x86)\LSEG\RTSDK-2.0.0.L1.win.rrg\Cpp-C
Before you move to the next section, make sure this variable is properly set in your system. If the RTSDK - C/C++ edition is not yet installed on your machine, please follow the steps of the Enterprise Message API Quick Start guide appropriate to your operating system.
Understanding the Visual Studio projects settings
The project settings used in this tutorial series are based on those described in the EMA C++ Compiler Settings tutorial. For details, please refer to this guide and its section dedicated to Visual Studio dynamically linked binaries.
The only difference with the Compiler Settings tutorial is the addition of “Pre-Build Event” commands that copy the appropriate EMA and ETA DLLs to the output directory of the project. This allows you to easily switch from a debug configuration to a release configuration.
Understanding the barebones application structure
The source code of this first tutorial is contained in the EMA - NIProvider - Tutorial 1 project. This project is made of two C++ files and the associated headers. We will update them as we progress along with this series of tutorials. All along, we will keep this simple structure, with the responsibilities described below.
main.cpp
This is the entry point of the application and where the main workflow is defined. In this first tutorial, it does almost nothing. It just creates a NIProvider object and waits for 5 seconds before exiting. It also catches and prints any exception that would be raised by EMA.
int main(int argc, char* argv[])
{
try
{
cout << "---------------------------------------------------------------------------" << endl;
cout << "| Non Interactive Provider EMA Tutorial |" << endl;
cout << "| |" << endl;
cout << "| Tutorial 1 - A barebones EMA NIP application shell |" << endl;
cout << "---------------------------------------------------------------------------" << endl;
NiProvider provider;
waitFor(5);
}
catch (const refinitiv::ema::access::OmmException& excp)
{
cout << excp << endl;
}
cout << " Exiting the application" << endl;
return 0;
}
In later steps, we will complete this workflow with other publication actions that leverage the Enterprise Message API. But we will take care of keeping it very simple and easy to read so that the main points of the workflow remain clearly visible.
main.cpp also defines the waitFor() convenience function that we extensively use throughout these tutorials to control the timing of the workflow.
NIProvider.cpp
NIProvider.cpp defines a class and the high-level methods used by the main workflow. It is in this class that the interactions with the Enterprise Message API mainly take place. You can consider this class as the interface between the application and the EMA library. You can refer to these methods when you want to better understand how to use EMA for performing specific actions like listening to connection events or updating an instrument.
In this first tutorial, the NIProvider class is just an empty shell that does nothing except write a message to the console when it’s created.
To be noted:
- NIProvider.h includes the EMA header file ema.h for later use.
- NIProvider.cpp declares using the refinitiv::ema::access so that we can use shorter names for the EMA types that we will use extensively in this file.
- The NiProvider class is defined in the refinitiv::tutorials::ema::nip namespace that we will use for all classes of this tutorial series.
Build and run the application
After reviewing the project files and understanding the structure of the application, it is time to build and run this tutorial.
Please proceed as follows:
1. Open the appropriate tutorial project file in Visual Studio (Tutorial1/Tutorial1.vcxproj in our case):
2. Select Debug_shared as the solution configuration.
3. Build the project: in the Solution Explorer, right-click on the project name and click on “Build”.
4. Verify that there is no build error in the Error List window.
5. Press Ctrl-F5 to start the application.
A console application should open and display the following:
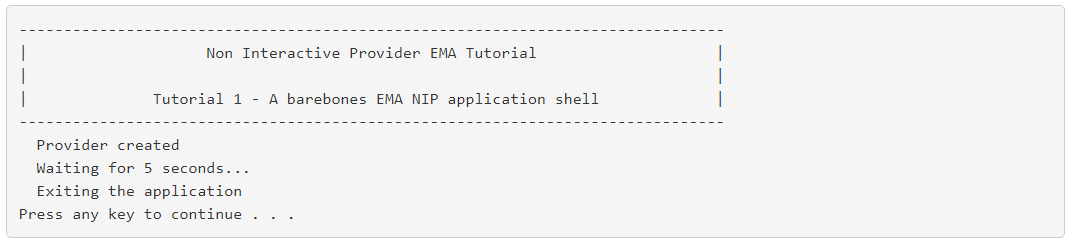
After 5 seconds the application should exit automatically.
6. Press a key to close the console.
Troubleshooting
Q: When I build the tutorial project, I get errors like:
error MSB3073: The command "copy "\Ema\Libs\WIN_64_VS140\Debug_MDd\Shared\*.*" .\Debug_WIN_64_VS140_Shared\
A: The ElektronSDKInstallPath environment variable is not set, or set to the wrong path. See Set up the development environment.