REST API Tutorials Introduction
| Last update |
Jan 2026 |
| Environment | Windows |
| Language | Any HTTP is supported |
| Compilers | None |
| Prerequisites | DSS login, internet access. Having done the Quick Start. |
| Source code | None |
Tutorial purpose
This is an introduction to the REST API (pure HTTP) tutorials, for interacting with the LSEG Tick History REST API webservices in HTML, and programming without the .Net SDK.
Two topics are covered:
- Using the REST API tutorials, and testing LSEG Tick History REST requests, with a pre-built REST client application.
When programming an application that connects to RESTful web services, whatever the programming language (Java, Python, Ruby, etc.), debugging can be lengthy, even when using available libraries to simplify programming.
Using a separate REST client application to send requests to the RESTful web server and check the responses can save precious time, by easily separating issues between coding problems and erroneous REST requests. For experimentation, to easily build and send requests, and look at the received responses, REST client applications are extremely handy.
Several are available on the internet for free download, ranging from stand alone applications to browser plug-ins. Popular ones include Postman, and Cocoa. This list is by no means an endorsement of any of these tools, feel free to use the one you prefer. For the purpose of this tutorial we will use Postman. - Understanding the link between the C# example application and the REST API (pure HTTP) tutorials.
The C# example application displays the HTTP requests and responses for the many use cases it illustrates. This knowledge can easily be re-used when programming HTTP requests, in any language.
For a more generic overview of the entire set of LSEG Tick History REST API tutorials, including programming approaches and more, see the Tutorials Introduction.
To ensure both seasoned and beginner developers can benefit from this tutorial set, some very basic instructions topics are covered here. The following tutorials assume such knowledge has been acquired, and concentrate on the LSEG Tick History API.
Table of contents
- Additional details on the prerequisites
- Using the REST API tutorials with a REST client
- HTTP requests in the C# example application
- Next steps
Additional details on the prerequisites
A DSS user account (user name and password) is required, because the API uses it to authenticate to the server. These username and password will be provided to LSEG Tick History customers and are valid both in the API and the GUI.
An internet connection is required to download ARC and run the examples, as they must connect to the server.
If you have not yet gone through the Quick Start, do it now before proceeding further, as that is where you discover the REST API C# example application, a powerful learning tool also useful when programming in pure HTTP, without using the .Net SDK. The Quick Start also describes its installation, and how to run it, even without a compiler.
Using the REST API tutorials with a REST client
Our tutorials use one particular REST client, Postman. This is by no means an endorsement of Postman, it is just an example to get you started. Feel free to use any other REST client you might prefer.
Postman used to be a Chrome plug-in, that version is now obsolete. We recommend you install and use the latest standalone version. Download and install Postman following the instructions on the web site.
A Postman collection and environment are available in the downloads, but you can also enter HTTP requests manually.
If you are using a different REST client, the process will follow a similar logic.
HTTP request description in the REST API tutorials
Each request is described using several fields:
- URL (includes the host and path)
- Method
- Headers
- An eventual Body
Entering an HTTP request in Postman
- Top left, select the method (GET / POST / DELETE).
- Copy the URL value directly out of the tutorial; paste it into the corresponding field in Postman, just next to the method.
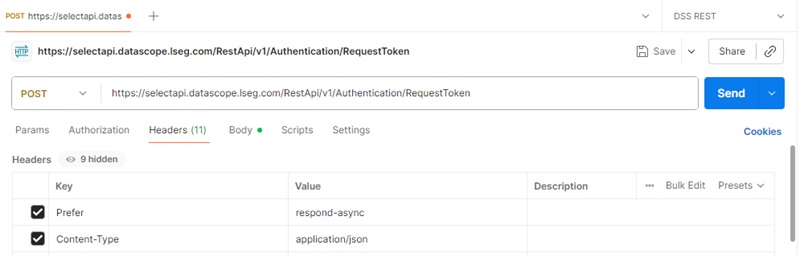
- Select the Headers tab, click on Bulk Edit, copy the headers directly out of the tutorial and paste them into the field, then click on Submit.
- Select the Body tab, select the raw radio button, copy the body contents from the tutorial and paste them into the field.
- Send the request using the SEND button.
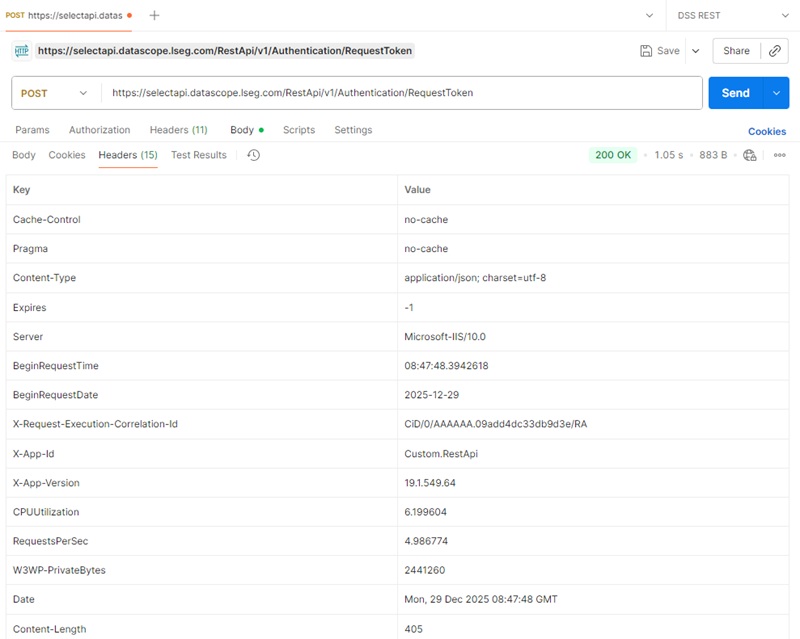
- The result is displayed in the lower part of the window.
Selecting the Headers tab displays the response headers.
Selecting the Body tab displays the response body. Inside the Body tab, selecting the Pretty tab parses contents based on their format (JSON) to make it easier to read. - The status and response time are displayed to the right, above the result.
Example
Example for the Authentication Request at the start of the REST API Tutorial 1: Connecting to the server:
Tutorial contents:
URL:
https://selectapi.datascope.lseg.com/RestApi/v1/Authentication/RequestToken
Method: POST
Headers:
Prefer: respond-async
Content-Type: application/json
Body:
{
"Credentials": {
"Username": "33314",
"Password": "XXXXXXX"
}
}
Entering the details in Postman:
After selecting the method, copying the URL, and setting the request headers:
After filling in the Body using raw mode:
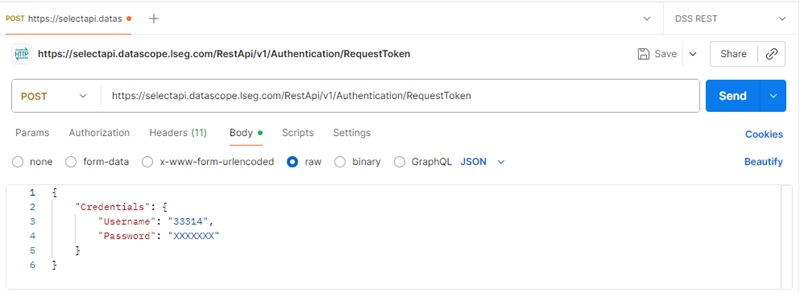
Important note: before running this particular request, replace the Username and Password values with those of your own DSS account !
After pressing the send button, and if the DSS account is valid, the response is displayed. Headers and status:
Body, pretty-parsed in Jason format:
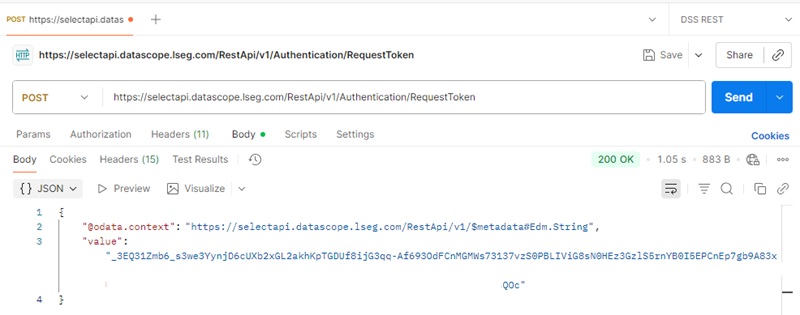
It corresponds to the contents of the tutorial.
Note how the JSON formatted output has been automatically recognised, parsed and coloured for easy reading.
HTTP requests in the C# example application
Even if you are not programming in C#, the C# example application is very useful !
This is because it shows all the HTTP requests and responses related to particular actions, so all use cases in the C# example application become easy to understand and re-use, whatever language you might be programming in.
Let us look again at the example for the Authentication Request at the start of the REST API Tutorial 1: Connecting to the server:
Tutorial contents:
URL:
https://selectapi.datascope.lseg.com/RestApi/v1/Authentication/RequestToken
Method: POST
Headers:
Prefer: respond-async
Content-Type: application/json
Body:
{
"Credentials": {
"Username": "33314",
"Password": "XXXXXXX"
}
}
The same HTTP messages in the C# example application:
If you have not yet gone through the Quick Start, do it now before proceeding further, to install and run that application.
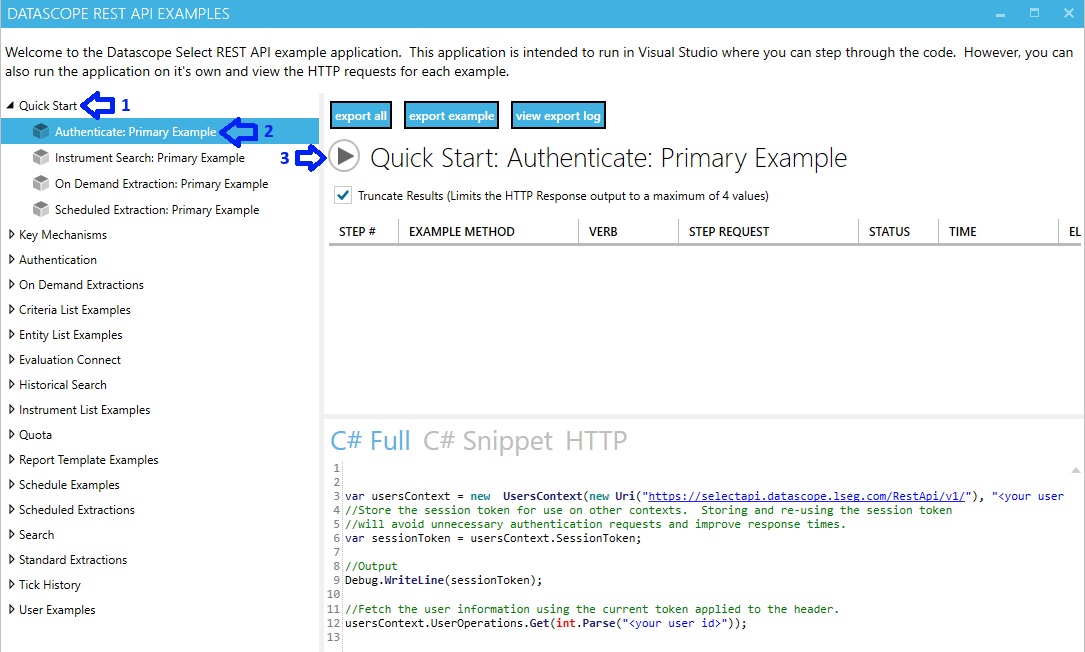
Run the application; enter a valid DSS username and password. Then:
- Open the Quick Start tab on the left
- Click on Authenticate Primary Example
- Click on the run button

4. Once the example has run, the requests are listed in the top right window. Select a request by clicking on it.
5. Click on the HTTP header to display all the details of the HTTP request and response in the lower right window:
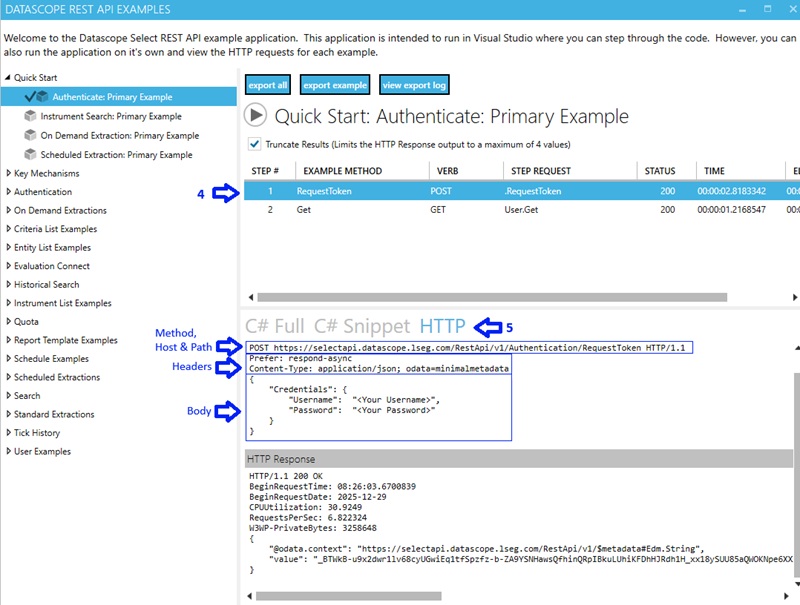
The HTTP request method, host, path, header and body are displayed (the real username and password are hidden).
The HTTP response details (status and body) are also displayed, so you can see what to expect:
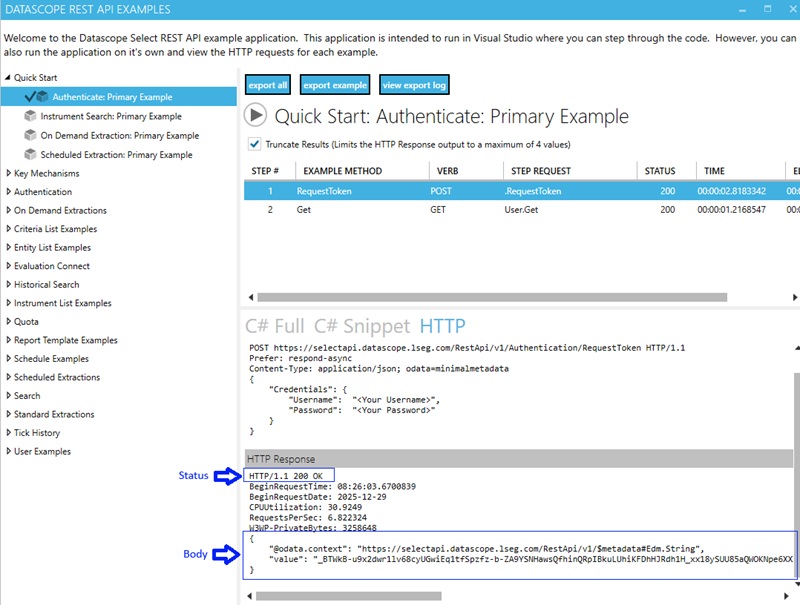
This easy method to display the details of the HTTP requests and responses can be applied to all use cases illustrated in the C# example application. This is why this application is so useful, even to programmers not using C#.
Caveats:
- One header line is missing from the display. When creating your own HTTP requests, add it systematically:
Content-Type: application/json
This is clearly illustrated in the REST API tutorials. - For all requests except the one to request an authorization token (illustrated above), the authorization token must also be part of the header, in this format:
Authorization: Token <Token value>
Example:
Authorization: Token
_2fyvzjmzdAmryZP4-IyxHphVKM3y2K4-Z0uzf4ylvAfOBpzkWUmk7GaeLc22bIZ6PPJ95QtgkVaJFfIXGaf9EnAL0vO8XJaVuveICxX8sVQMVZRrIoA3Jit9ls9fDbefJNYshu4QJ-QD7WX7LYBzVBuJS617Mm0AlL8mgdiA_xMZJfzMC0MR--8C-1pVj67D7cAVCTg9ICCIg4gET9Mj_rAKaiGF7lQ6jgXDb
This is also clearly illustrated in the REST API tutorials.
Next steps
Now proceed to the other REST API tutorials. Once you have studied and understood them, it will be easy for you to investigate other use cases not covered and explained in detail in the tutorials, but available in the C# example application.